Images / Photos as Illustrator Brushes Tutorial
graphicxtras > Adobe Illustrator tutorials > Illustrator brushes tutorials
* Youtube video tutorial on how to use images / photos as a great source for Illustrator brushes ** 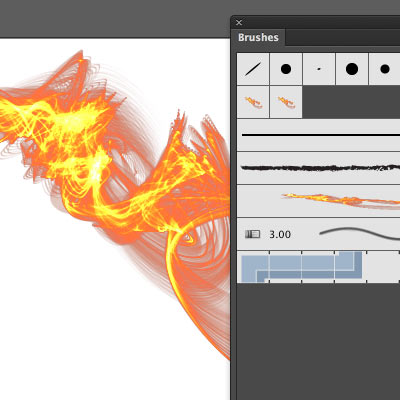
You can use images straight into the Illustrator brushes panel. You can also use Photoshop brushes imported via libraries etc and add those as art brushes or scatter brushes etc. You can also use custom shapes with styles as a great source for Adobe Illustrator brushes. You can add pattern layers (import via libraries) as a source for new brushes as well as gradients. You can also use type photos / images as a great source for new art brushes etc. This tutorial shows you how to use a variety of image / photo sources as Illustrator brushes
-
Window menu in Adobe Illustrator
-
Brushes
-
Select image in art board
-
Drag image to brushes panel
-
Select art brush or scatter etc
-
Set options
-
OK
You can now apply via paths and type and strokes etc
Photos / Images as a wonderful source for amazing designs as an Illustrator brush
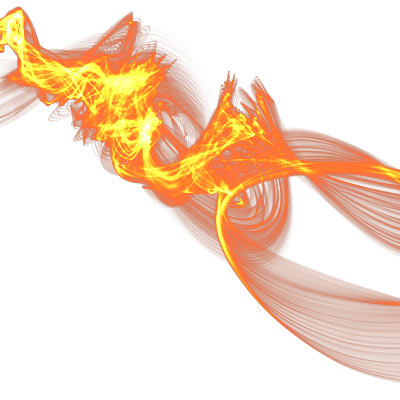
With the latest version (Creative Cloud), you can add photo / images to the Illustrator brushes - either as scatter or artistic or pattern. You can use Photos and images from all kinds of sources and not just standard images but also ones from custom shapes and brushes as well as places such as Adobe Stock. You can also use scans from books etc (especially public domain ones) to create a wonderful selection of amazing photo and image based Illustrator brushes
-
Save image with transparency in Flame Painter 3 Pro (or other app)
-
Save as PNG file
-
File menu in Adobe Illustrator
-
Place command
-
Click embed
-
Select image
-
Drag to the brushes panel
-
New brush - select scatter or artistic etc
You can also use Photoshop ABR brushes as a wonderful source for Adobe Illustrator brushes

You can use all kinds of artworks in the preset tool now so you can use heads, props, lines, blobs, ink drops, objects as well as more abstract artwork such as a Photoshop ABR preset in the stroke. To do this, go to Adobe ® Photoshop ® and then create a new document.
Depending on what you wish to achieve such as a scatter or artistic then create a square document or a thin line document for the stroke. If you want the stroke in PS and therefore into AI to be a straight line then hold down the shift key to create the stroke. In the example, I have used a basic line stroke but you can create artworks of all kinds of complexity with the ABR tools and then import them into AI.
The best way to create them is to add them to a new layer and then drag that layer to the CC library as that means the stroke in AI will contain the transparency which can then be added to the stroke's library.
Once you are in AI, select the item from the library and drag to the art board and then click the embed command and then select the object option and then you can drag the result to the brushes panel.
-
Layer menu
-
New layer
-
Select brush tool
-
Select color
-
Select brush
-
Apply brush multiple times on the layer (example is a straight line brush)
-
Drag layer to the library
-
Goto Illustrator
-
Drag image from library to art board
-
Embed
-
Drag to the brushes panel
-
Set as art brush
-
OK
You can then apply the image brush in numerous ways in Adobe Illustrator and with paths etc
Create interesting blobs and splatter and spots brush strokes in Adobe Illustrator via Photoshop brush strokes

You can also do the same with blots and spots and add them to the scatter section in the strokes panel. The key thing is to add the artwork to a Photoshop layer and then you can add the entire layer to the library and then use that via the library in AI.
With the scatter, you can also add rotation and scattering and other randomized settings to create all kinds of weird and wonderful artworks in AI and they are all still editable. This becomes a sort of nozzle like feature in AI and I would love to see a similar feature in Adobe ® Photoshop ® but I guess I will just have to make do with the feature in Painter.
The image is made up of a number of simple paint dabs in PS in a couple of colors and this was imported via the libraries into AI and used as a scatter stroke.
-
Layer menu
-
New layer
-
Select brush tool
-
Select color
-
Select brush such as a basic dot brush
-
Apply brush and change color and re-apply and create numerous color dots
-
Drag brush layer to the library
-
Goto Illustrator
-
Drag dot image from library to art board
-
Embed
-
Drag dots to the brushes panel
-
Set as scatter brush
-
Set random and variation such as rotation and size
-
OK
You can also use Photoshop custom shapes as a great source for images for Adobe Illustrator brushes
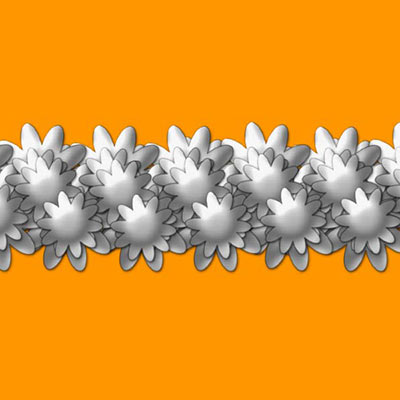
There are also many other resources in PS such as custom shapes and there are 1000s of those available via this site and they can all be used as a great source for strokes in AI.
As a start point, they are vectors and you can still copy them as a vector to AI but you can also copy the artwork as a converted raster layer as well with raster effects. You can also add effects as well as layer styles (metallic etc) to the shapes before importing into AI. You can do much the same as with the ABR, or you can just add them as a shape layer and then combine them all together and drag into the library and then copy into AI as before.
The stroke right is based on a flower vector shape (CSH) with a metallic style from Adobe ® Photoshop ® and then using the scattering and rotation (randomized) and scale etc
Patterns / tiles in Photoshop can also be used as a great source for amazing Illustrator brushes
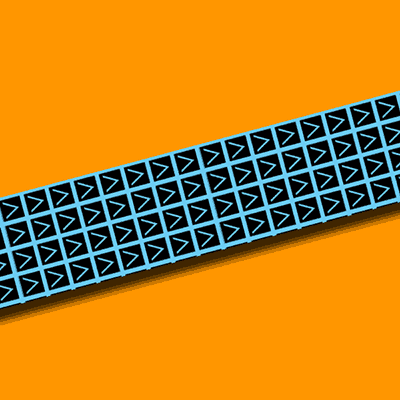
You can also add gradients as well as patterns from Photoshop (such as a fill content layer) can be dragged into the CC libraries and then into AI and saved as a scatter stroke as well as an art brush. You can also add into the mix different colors as well as different spacings and rotation and more
You can also do the same with gradients, simply add a gradient to a layer and then drag into the CC library and then over to AI and then add to the art brush. You can also use them in scatters as well as perhaps the radial gradients (with transparency) work best as scatters.
-
In Photoshop
-
Layer menu
-
New fill content
-
Pattern
-
Select pattern
-
Set scale
-
OK
-
Drag pattern layer to libraries
-
Goto Illustrator
-
Drag the artwork from libraries
-
Embed
-
Drag the artwork into the brushes panel
-
Select art brush
-
Set options
-
OK
You can now apply the Photoshop pattern / image as an Illustrator brush stroke. The Photoshop patterns can be anything so they maybe photos or images as well as type etc
Use gradients from Photoshop as a wonderful source for 1000s of unique Illustrator brushes

The image right uses a gradient (added to a layer) as a long line using the reflected gradient and transparency stops on both sides of the gradient and then the path was then added to a circle in Adobe Illustrator
Fonts / typefaces can also be used as a great source for all kinds of brush strokes in Adobe Illustrator
The font sets on this site are vectors but you can also convert them into raster artworks by using the raster conversion (type menu and rasterize type layer) in PS or just by adding the type Via the type tool) to a new type layer and flattening the result and then copying that layer into the CC library and then going to AI and copying the artwork from the CC library to the art board and embedding and using the convert option before adding the characters (in any font) as an image to the preset panel