Illustrator Splatter Paint Effect Tutorial
graphicxtras > Adobe Illustrator tutorials > Illustrator effects tutorials
** Youtube video tutorial on creating a splatter effect using symbols in Illustrator - all kinds of amazing splatter designs can be created **

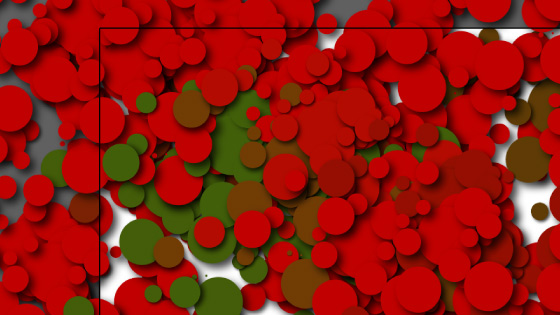
1. Set up of dot splatter
The advantage of the Illustrator symbols is that the splatter effect can be changed in seconds from a background of spots and dots to a splattered background of stars or cube or any other paths. You can apply a symbol that looks like paint or pencil sketches or made up of type and fill the screen in seconds.
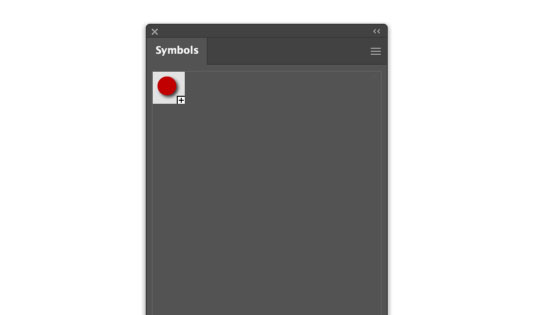
The symbols panel can be found in the window menu. You can add all kinds of color to the spot design as well as add live effects so go to the effect menu and stylize and drop shadow and click OK. Drag the design into the symbols panel. Select the default dynamic or static, export type doesn't matter and give it a name. Goto the toolbar and select the symbol sprayer.
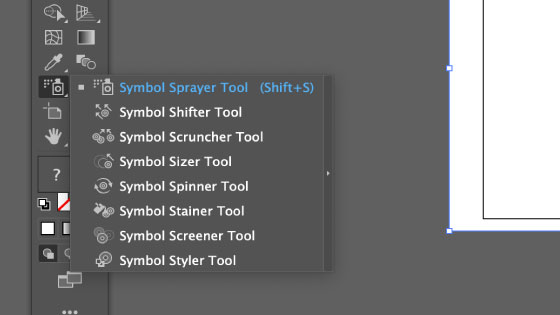
Apply the dot splatter spray by selecting the symbol in the panel and applying to the art board. You can add more and more to the group of symbol instances. You can also edit the source design and change it at any point by double clicking the preset. You can apply the sprayer in any part of the image or fill the entire image with your splatter design

2. Symbols from symbols to create splatter
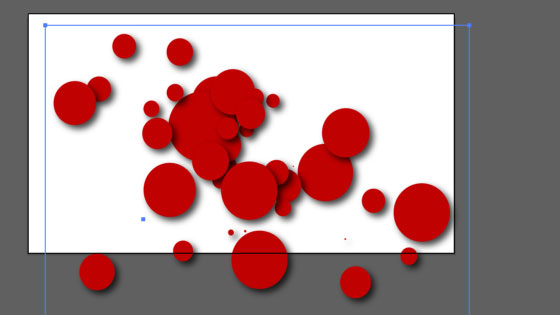
At present it doesn't look much of a splatter but you can apply the symbol size (on the same tool as the sprayer) to re-size the dots. Just hover over the dots that you want to re-size, hold down the alt or option key to decrease the size. You can also use the shifter tool to move the items around, perhaps bunch them closer so they look more like a splatter and not just spaced all over the art board. With the shifter, just drag them all closer.
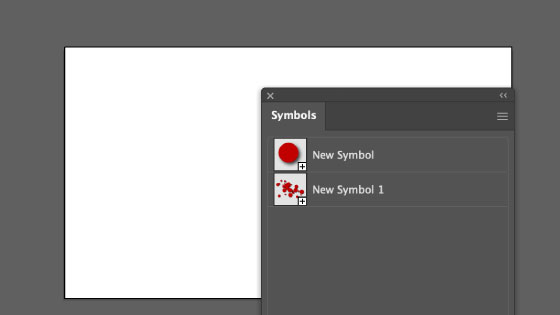
When you drag the symbols to the symbols panel to save the splatter, you can save it but sadly it is expanded which means it loses the live element. I would suggest saving a backup of the splatter design in a separate AI file or just on the art board if you want to change it.
3. Apply the new splatter design
Select the new symbol in the panel and then use with the sprayer and again you can apply it over and over as well as add in re-sizing using the sizer as well as rotation by using the spinner as well as color via the stainer tool (if you want to stain it with green then set the fill color in the toolbar to green).
4. Change the splatter source
If you kept the original design before adding it to the symbols panel then you can edit that design. If you haven't, you will have to go back to the original spot or dot splatter source and change that to a new artwork. You could go for a star splatter effect in Illustrator instead. Double click the design in the symbols panel and then change that. Any changes made to the symbol will change in all the instances.
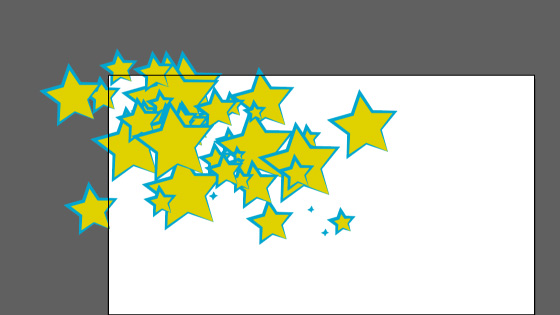
As before, you can then drag this design into the symbols panel. Select the new symbol set and then apply the design using the sprayer and re-size using the sizer etc to create your splatter design this time based on a star, though the splatter could be of anything and even different shapes