Illustrator grain / texture add to paths / Brushes Tutorial
graphicxtras > Adobe Illustrator tutorials > Illustrator how to tutorials
** Youtube video tutorial on how to add grains and texture to brushes (and paths) in Illustrator **
Grain and textures for brushes in Adobe Illustrator tutorial and learn how to add texture / grain to the Illustrator brush strokes - a number of ways such as using adding paths, add symbols, etc to create the texture / grain for a brush
-
Select a brush in the brush panel
-
drag to the art board
-
add additional paths such as spots and dots / circle paths to the artwork
-
drag the 'grains / texture' brush stroke and additional paths to the Illustrator panel
Using symbol sprayer to add grains / textures to the brushes
Another way to quickly add a lot of spots and textures is to use the symbol sprayer and add those sprays to the brush path and then re-define that as a new brush via the brush panel (such as save as an artistic brush). You can also use the symbol sizer tool and symbol scruncher tool to create smaller and more dense spots and textures (or any other symbols) added to the brush stroke
-
select a small black (or lighter depending on the color of the brush) circle (source for the grain / texture) or create a circle using the ellipse tool
-
add to the symbols panel
-
drag the brush from the brushes panel
-
select the circle symbol in the symbols panel
-
select the symbol sprayer tool in the toolbar
-
spray the symbols
-
use the sprayer tools to size and distribute the spots added to the brush stroke
-
select the brush and the spots / dots / grain and drag to the brushes panel
-
you now have you brush with grain / texture in Adobe Illustrator
Of course, the circle / ellipse can be any other shape and you can always apply multiple different symbols to the brush stroke to create all kinds of grain
Live effect glass (or texturizer) to add grain / texture to the brushes in Adobe Illustrator

Another way to add grain / texture to the brushes in Adobe Illustrator is to use the live effect 'glass' and the appearance panel.
-
Select a stroke and
-
go to the distort menu
-
glass menu option
-
apply a distortion (at this point you can also use a map from Photoshop).
The odd thing with the filter gallery plugin is that is does not allow for multiple filters to be added in a single dialog: a quick way around this, and a quick way to added many levels of distress effect to the stroke, is to use the duplicate effect command in the appearance panel and add more and more glass distortions to the art. The more you add, the more likely the re-draw of the stroke will be slower though.
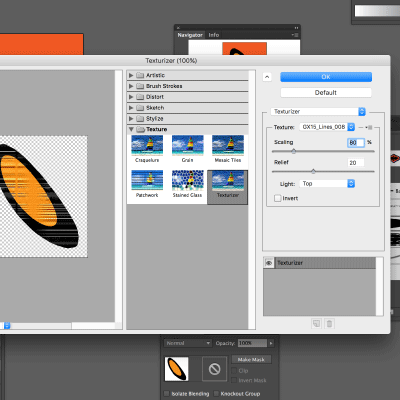
Add grain / texture to brushes using texturizer filter 'live' effect in Adobe Illustrator
Use the texturizer filter found in the texture menu
-
select brush set
-
go to the appearance panel
-
go to the stroke line
-
apply the effect / texture / texturizer filter
-
changing settings and add a texture via the texture dropdown and browse for a texture or use one of the default ones. Set scaling as required. You can use textures such as displacement maps for Adobe Photoshop etc (PSD files) or some of the pattern sets on the graphicxtras site with PNG files and seamless tiles.
To remove the effect, simply go to the appearance panel and use the right side menu and clear appearance
Use Illustrator swatches and photo to add grain / textures to Illustrator brushes
-
Take a photo of a texture such as a wall etc and transfer to your computer
-
open the generated texture / grain in Adobe Illustrator via the file / place command
-
click the embed button
-
image trace
-
image trace panel and set mode to black and white
-
expand
-
drag to the swatches panel
-
drag the brush from the brushes panel
-
select the brush path
-
object and ungroup and remove the bounding box
-
select remaining brush path
-
go to the appearance panel
-
right side menu and add fill
-
select the 'texture' / image transferred as the fill
-
set the blending mode for the swatch to something ike darken
-
drag the artwork back into the brushes panel