Illustrator Sphere / Globe Creation Tutorial
graphicxtras > Adobe Illustrator tutorials > Illustrator how to tutorials
How to create Illustrator spherical designs / globe / ball using styles tutorial, how to create spheres in Adobe Illustrator
** Youtube video tutorial on how to create amazing sphere / globe / ball designs in Illustator by using gradients / graphic styles **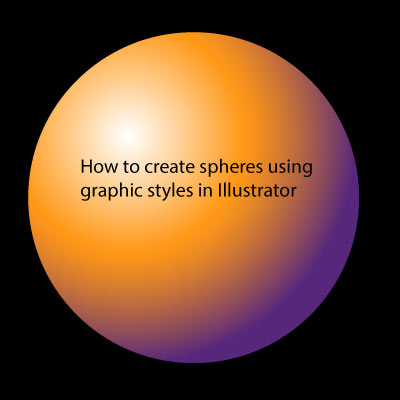
It is very easy to create a spherical path using the Illustrator graphic styles and with the appearance setup, you can always re-apply the effect over and over to a round path (it doesn't work so well with objects that are square or type etc) - you don't have to re-create the effect by hand each and every time.
Re-usability is one of the key features of the graphic styles in Adobe Illustrator
Steps for creating a sphere using gradients and styles

The design is set to a radial setting
-
Create or select a circle path
-
Double click the gradient tool - this displays the panel
-
Select a tile - this fills the current selected path with a gradient such as 'sky' or 'orchard'
-
Set type to radial type
-
Position the center point by selecting and moving the bar
-
Set the first stop (left) to white or light color - creating a highlight
-
Set the last or end stop to a darker color - creates the shadow for the sphere
-
Set the middle stops as required - gives the overall color to the sphere
-
Display the graphic style panel and then select the right side menu 'new graphic style'
-
Save this Illustrator graphic style (spherical style)
Highlights can be added by changing the blending modes of the gradient to screen
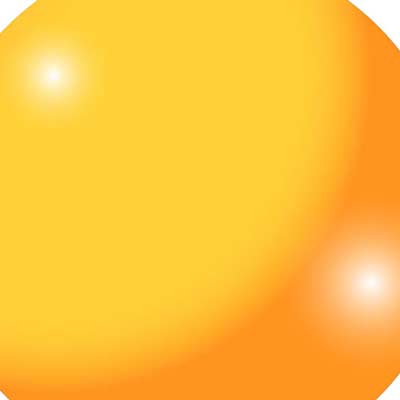
Two highlights can be added to the effect by changing the blending mode of the gradient to screen. Go to the appearance palette and then then select the fill and then duplicate via the right side menu. Go to the fill higher up and change the opacity / blending mode to screen.
More than two highlights can be added - though the more you add, the less of the actual color of the sphere you see
Multiple applications of the style to circles etc and the results of the style can be exported to other applications
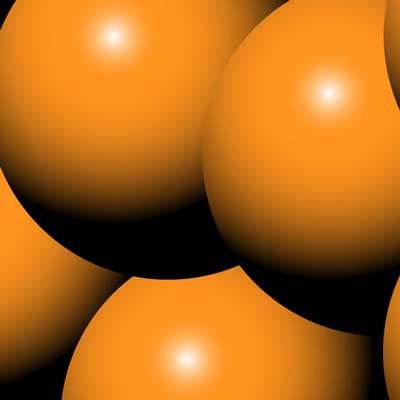
The sphere gradient style can be applied multiple times to circles etc.
The result can be exported to other apps such as Photoshop by copying the artwork to the pasteboard and then to Photoshop or perhaps using the CC libraries.
Live effect transformations can be used with the styles to create spherical spirals, circular artwork etc
You can also combine the result of the gradients and use transformations which are also live effects and can be altered to make spirals, circular artwork and much more.
-
select the spherical ball / graphic style path
-
effect menu
-
distort
-
transform menu
-
transform command.
-
Set the number of copies as well as set the scale and shift etc to achieve different results with the gradients (remember to set the preview to ON)
Blending modes
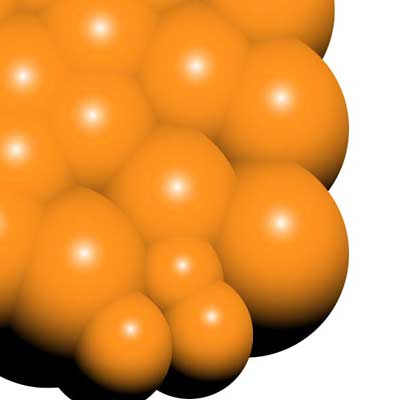
You can use blending modes of the objects to combine the artworks in all kinds of ways to create some truly abstract designs. Right, spheres but with a lighten blending mode to 'blend' all the gradients together.
-
Select the graphic style 'sphere' path
-
use alt / option to duplicate the spherical / highlighted Illustrator path
-
go to the apperance panel for that path
-
expand the fill entry
-
go to the opacity and expand
-
select the lighten option
-
move the sphere / path
-
alt / option with the current path to duplicate the 'lighten path'
-
again move the new path
-
and repeat multiple times
-
The paths will seem as if they are glued together
-
re-size the paths as required for the spherical / globe design
Illustrator Graphic Styles - saving the style
After all of that, you can just
-
Go to the Illustrator graphic styles panel
-
Define as a style
-
Select another path such as a circle just re-apply the whole complex (or basic) graphic style to that path. Really quick and easy and very effective and the results can also be exported to Photoshop etc (as with all the pics above)