Illustrator MirrorMe Plugin Tutorial
graphicxtras > Adobe Illustrator tutorials > Illustrator plugin tutorials
** Youtube video tutorial on how to use the mirrorme plugin from Astute Graphics in Illustrator to create the most amazing symmetry plugin designs **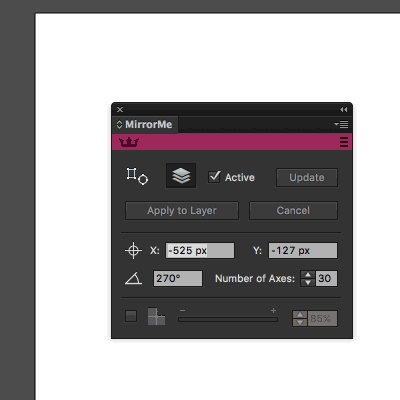
Review / tutorial of MirrorMe Plugin for Adobe Illustrator (Plugin from Astute Graphics). The MirrorMe plugin works in Adobe Illustrator PC and MAC. Mirrorme is a powerful symmetry plugin tool for Adobe Illustrator.
-
Select a path in Adobe Illustrator for the Mirrorme
-
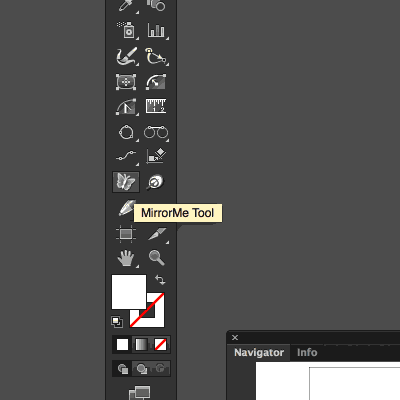
Go to the Mirrorme tool in Adobe Illustrator toolbar
-
Move the origin point of the tool to see the changes / symmetry effects applied to the path
-
Release
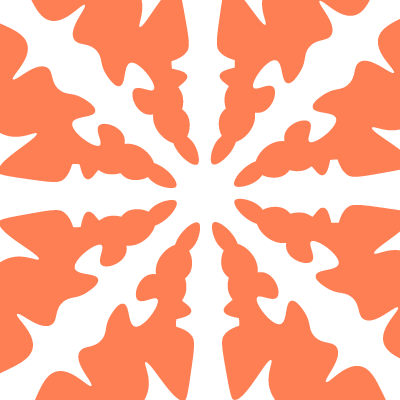
You can use the Mirrorme plugin with all all kinds of paths (type as well). The Mirrorme plugin can be used to create the most unique vector designs in seconds. Simply select a path and then create a symmetrical / kaleidoscope design. You can also use the Mirrorme plugin on a layer and all paths added will be modified by the current mirrorme kaleidoscope settings. It is super easy to use. Once you have your Mirrorme path you can then use the result to create even more symmetrical designs.
The mirrorme plugin is a product from Astute Graphics and you can find a free trial plugin on their site along with all their other plugins. The Mirrorme plugin is easy to install and use via the Astute installer (which also gives you access to tryout versions of all their other Illustrator plugins as well as MirrorMe)
Astute graphics' have a vast selection of videos and more showing you many ways to use the plugin - I've found them all very useful and easy to watch and understand. A big thumbs up for that (I wish I had more videos for my plugins)
How to install the mirrorme plugin set
-
Download the installer from Astute Graphics' website
-
Select the plugins you want to install such as mirrorme plugin
-
Will install to the listed locations for the various versions of Illustrator
-
Run the Astute Graphics installer
Once you have installed the set then on startup of Illustrator a dialog appears and gives you the option to run as a trial (a generous couple of weeks) or to activate the plugin (or purchase). Once you have obtained the serial, everything is authenticated via their website and you are off and running.
MirrorMe and Toolbox

The plugin appears in the Illustrator toolbox. Click that and start. OK, that isn't always the case. The plugin works on shapes etc so if there is nothing there and you select the apply to selection option, you will not get anything. You can set up the apply to layer and then add paths. It is that flexible. Double click the toolbox icon (a little butterfly) and a dialog appears with a selection of options.
Additional settings can be found conveniently via the window menu Mirrorme panel (which I found the more useful) as settings
-
Window menu of Adobe Illustrator
-
Mirrorme panel
-
Change settings
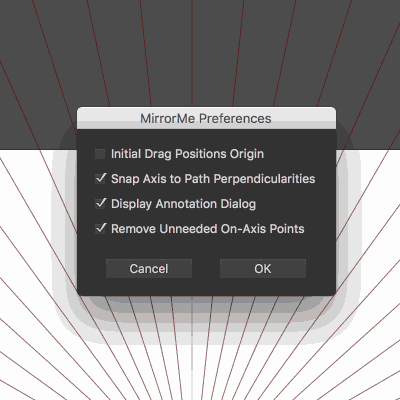
Mirrorme plugin options / preferences
The panel allows for the modification of the position of the center of the Mirrorme axes (though I wish this was a slider instead of a edit field), other options include the number of axes which has a minimum of 1 and a maximum of 72 (I was hoping for 200 or so but I suspect if that was the case, the area for drawing would be minute so 72 is a good maximum) and angle (to change the angle of the axes - again it would be great if this was a slider) and a very useful opacity setting which masks out the area where the paths etc are ignored by the Mirrorme (I set this to 70% but this can range from 0 to 100 % opaque).
All the settings are well laid out and useful. An additional selection of commands are available via the right side menu of the mirrorme plugin panel such as removal of the axes - which is a very useful feature as the axes are a little bit of a distraction once you leave the tool and work with other tools such as the move tool.
Active sector (area) for the Mirrorme plugin
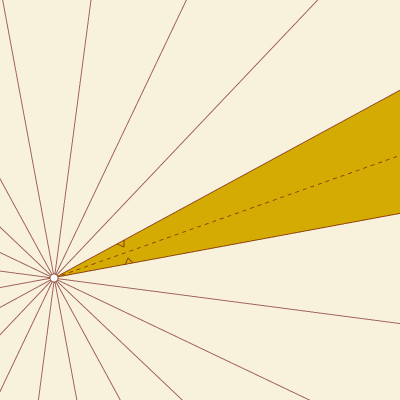
This is one thing I would love to see changed in the mirrorme plugin. Perhaps a color ?? instead of small triangles to define the active sector (which are quite hard to see) I would love to see the area for the active axes in a different color or perhaps slightly bigger markers (a preference perhaps?). Still, the masking means that it is obvious but sometimes the active area really can get quite lost and I think a variable color would make it even more obvious. Hold down the ALT key to select a new active sector. Shift key to constrain center / origin.
Mirrorme plugin and working from existing paths

The tool works from existing paths as well as adding paths to the active axis. I say active axis, this is the key axis for the tool. When you apply the plugin you see the axes and the masked out axes are only added to as a copy / mirror of the active axes.
This action is very quick (quite impressive) even for fairly complex paths. To test this, I created a selection of paths and then selected the plugin and passed the axes over the paths (if there are no paths beneath the active axis then you will see no paths in the masked areas) and the copies of the underlying paths were rapidly mirrored around the axes. This can be continued until you are happy with the end result and on release you are offered three selections: cancel, selection and layer. The cancel option means no change.
The layer option sets a persistent center to the Mirrorme axes and this can be used as a center for adding additional paths to the Mirrorme plugin active area (though the active option must be checked to set this in motion as I found that moving items and adding items with it off results in a less than plugin experience).
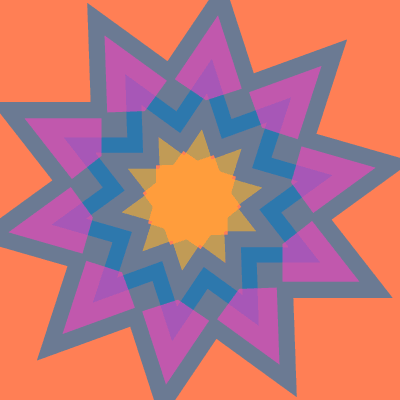
The layer option is very useful and can be used to build up a very complex vector graphic in seconds but the only problem with that is the active area, if you add paths to the active area then that is fine, add paths to the non active area and nothing happens. The first option is the apply to selection option and this results in an ever changing center of the Mirrorme axes and can result in some wonderful experimentation and shape generation. The selection option does also mean that repeated releases of the mouse and 'selection' results in more and more amazing shape decorative graphics generated and I can only say wow. You can also interactively rotate and shift so new artworks are instantly appearing and many amazing designs can be created in seconds. In many ways, I would love to see an animation feature added to this (other than just using a video capture). To the right is an apply to selection mirrorme design. The wonderful thing about the generated shapes are the lack of any breaks in the paths - all the paths are continuous and for that alone I would give a 5 out of 5. Another thing to note is that the selection option only uses the selected designs so if you have unselected paths on the art board, these are ignored. The layer option works with all the paths on the layer.
Mirrorme plugin and adding new paths
As mentioned above, using the layer option means you can define a center (which can be changed) for the mirror axes. Adding new paths whether they are standard paths or text etc can create the most amazing kaleidoscope effects in seconds. This is something that Illustrator has needed for years and years. This process can be continued over and over and it is quite addictive (you really need to know when to stop). If you add paths to the non active area, they will be just ignored. Only add paths to the active area in Mirrorme and they will then appear in all the other axes
How to manipulate the axes in real time
-
Click on the center and move the center of the plugin axes.
-
Hit the axes and rotate the axes. Very easy and yet another way of exploring even more shape decorative graphics.
If only most plugins were this easy to use and apply.
Display annotation dialog
The default is to display the annotation dialog after each action and personally it did slightly drive me nuts as this kept popping up. You can turn it off via the Mirrorme preferences and then use the buttons on the Mirrorme plugin panel to control the action. This has some advantages as you can just stick with a particular selection and keep creating more and more complex mirrored designs and the center and the angle of the axes can still be controlled as before (though to fix the selection you have to either double click the butterfly icon or press return. Really depends on how you like to create your mirrored paths, I found both approaches equally good and it is yet another nice well thought out addition.
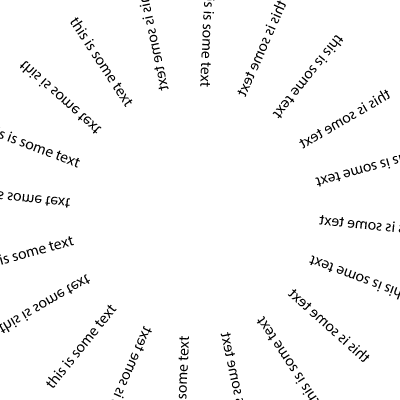
How to use text with the tool
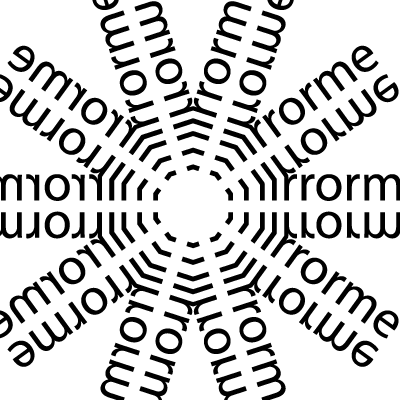
I have to say this is another impressive area that seems to work very well. Apply text to an active axes or use the Mirrorme plugin with selected text and wow. This has to be used with a little caution especially if you are using 72 axes and a lot of text but it is still quick and does an amazing job of creating mirrored text. As with normal paths, you can repeat these actions over and over and create multiple selections of text in seconds. This will be a really useful tool for any fans of creating weird and wonderful text designs. You can also, of course, expand the text and then the text will blend as with the normal paths. The touch type tool worked amazingly well with the plugin - excellent.
How to use the tool with symbols / images
The handling of images symbols was the only slight area of disappointment with the Mirrorme plugin. To be fair, it would be amazing if the plugin could pull off creating mirrored designs out of placed images, symbols etc. It does mirror them but you just end up with a set of layered designs. Still, all very useful and this can be repeated over and over to create ever complex graphics. Symbols can be also added in seconds to create copies on the other axes. As with symbols normally, you can always replace the generated symbols via the replace command. You can also, of course, live trace an image. As a vector graphic, the Mirrorme plugin can be applied to the design. You should note that unless the image has been cleaned up, the image has a lot of points - the result of applying results in 1000s of points which can be quite slow.
How to use the tool with layers
The layers option does mean that you can use the Mirrorme on different layers to create ever more complex artwork over multiple layers (without affecting the earlier layers which may or may not contain Mirrorme modified artwork).
How to use with opacity in AI
All the paths have an applied opacity. In most cases, probably 100% but you can always set the opacity to 10% or change the blending mode to difference etc. This works well across the Mirrorme axes and creates some truly weird and wonderful colorful and paint like designs.
How to use the result with transformations
The tool works fine with free transform tool and rotations etc though I did find it slightly confusing when the paths passed over into the non active sectors and the transform options were a little confusing especially with the free transform tool and distort etc.
Gradients
The Mirrorme plugin works with paths with gradients but only the shape is changed. You cannot use the tool to create totally unique gradients in Adobe AI - what a pity but it would be an amazing feature and probably would break gradients as we know them in Adobe AI if it did. Illustrator has only had linear and radial for zillions of years. No fault of Mirrorme.
Pen and pencil tools
The brushes and pencil tool and other brush strokes seem to work very well with the plugin. You can use the Mirrorme to really create a mirror image in seconds. Apply the brush strokes on one side and the exact mirror brushed strokes are applied to the other side. Very effective and saves a lot of work. Of course, you can try and duplicate this manually but this plugin makes it a whole lot easier to create mirrored art. The Mirrorme effect can be over multiple axes (as with the standard paths) not just a single axis. The tool didn't seem to work amazingly well with the width profiles over multiple axes and the art ended up more like the blob brush default (perhaps there was some setting ??). The blob brush worked very well with the plugin. I have to say the Mirrorme single axis and brushes worked very well and was really good fun. Hours and hours of fun could be had from all these features.
Mirrorme plugin and blends
This definitely creates some very interesting effects but you will need a very fast (and perhaps a lot of memory) machine to use the Mirrorme with blends. It does seem to work fine but it was fairy slow but it was create 100s of paths as I attempted to create a multi-axes blend. The design looked great but it adds a lot of paths to Illustrator. One to use with a little restraint and perhaps with only one or two axes. Of course, as with many features of Illustrator, you can expand the blend and then use those paths to great effect with Mirrorme.
How to use with effects / live effects / appearance / style
Again, the tool surprises. Select a path inside the active sector of the Mirrorme plugin and then go to the effects menu and apply a filter such as zigzag and the zigzag is repeated in all the axes. The effect is still live so you can move and change the zigzag etc and this is reflected in the axes. You can also expand the appearance and the paths are still mirrored and you then continue to work with the newly zigzag etc path to create ever more complex zigzags. Multiple effects can be applied. Also this can be extended further with the appearance panel and the addition of multiple strokes and multiple fills etc to the active sector paths. Very impressive. I am certain this can get a little out of hand and some effects probably cannot be mirrored well (raster images etc). This can be extended even further with the application of graphic styles to the active sector selected path (s) and these also can be mirrored. It also works well with 3D effects in Adobe AI in that it adds and modifies the underlying design and then the 3D effect is applied on top. Wow.
How to use with pattern swatches
Pattern swatches are not mirrored (like gradients) across the axes but then the graphic would no longer be a pattern. You can also use the tool in the pattern editor either during the creation of new patterns or the editing of existing ones but be careful as some of the default patterns have a lot of paths and a lot of paths and Mirrorme can create 100s of new paths. Still, the Mirrorme plugin is a powerful tool to create ever more wonderful pattern tiles.
Warp tools and Mirrorme plugin

The Mirrorme plugin axes work well with the warping features of Illustrator. Create a set of axes and then create a path or two and apply either the envelope or the warp tools and the you can use the tool to create amazingly warped and curved shapes. The result of twirls etc are not instantly reflected in all the axes (that would be nice but unlikely as many tools take some time to update the scren and generally change the artwork after the release of the mouse). Again, totally impressive. The only trouble with the Mirrorme plugin and warping is that you can sometimes confuse the active sector and I occasionally tried to warp the masked area with to no effect. Guess that is one of those things that come with practise.
How to use with clipping masks
It can be used with clipping masks. The clipping mask also is duplicated and can be used to great effect to create even more amazing shapes.
What would I like to see in the Mirrorme plugin
Lots of features .. but sometimes it is best to keep the best tool as simple to use as possible
Symbol creation
One very useful addition would be the ability to create a symbol at any point. I mean, I could create the symbol once I have finished with the plugin but in the flow of creating it would be nice if the tool could take a snapshot each and everytime I start moving the cursor and store that as a symbol (or perhaps press a key such as F15 to store it as a symbol).
Movie creation and Mirrorme plugin
With the snapshot symbols, the designs could then be exported to Photoshop or After Effects for videos (would the plugin store each frame .. hard to see how that one would work but it would be great). As a workaround for the lack of movie feature, it is always possible simply to record all the actions and save that as a movie but then you end up with all the background Illustrator panels.
Erase feature
Another feature that would be useful, simply the removal of the Mirrorme masked sector artwork. So for the case of the axes = 1, the artwork can be cropped very quickly with all artwork on the active sector remaining all the artwork in the masked, removed. This surely could also be extended to axes greater than one and this would make for a very quick and easy erasing feature.
Additional symmetry / tiles - a pattern feature into the tool
Perhaps the tool could be extended further to create a grid of axes or more like the pattern editor. Mirrorme (or PatternMe, perhaps) would make a really interesting pattern creating tool if it used the same hex grid / brick etc approach of the pattern editor. Now that would be an even more amazing tool - hopefully one for the future ? I would love to see it even move beyond the limited pattern features of Illustrator and go for even more complex pattern designs.
How to use with actions
The tool can be used with actions but none of the mirrorme movements can be captured (it seems). It would perhaps be an interesting feature to add actions especially for the layer (not so certain about the selection option and recording). Not an essential.
Conclusion
This is Astute Graphic's best plugin yet. I don't know how they do it but they regularly come up with plugins and ideas that should be in the application itself. This is one amazingly impressive software company and I can warmly recommend this plugin as well as all their plugins. Five stars out of five.