Illustrator Flare Tool Tutorial
graphicxtras > Adobe Illustrator tutorials > Illustrator tools tutorials
** Youtube video tutorial on how to use the powerful flare tool in Illustrator to create rings, halos, light flares and more **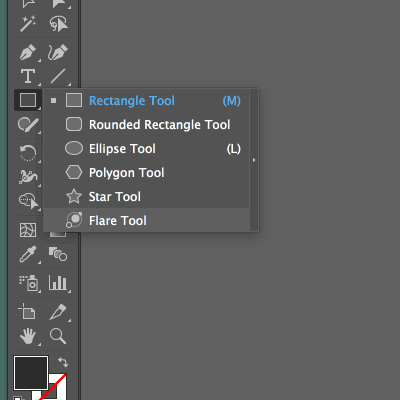
-
The Illustrator flare tool works well with a background so firstly create a black background / rectangle etc or something to work with though you can use it with a solid white background
-
Select the flare tool in Adobe Illustrator toolbar (beneath rectangle tool)
-
Apply the initial flare by clicking on the art board
-
Drag outwards to define the center
-
Click again to create the rings from the flare
How to use Flare tool for Adobe ® Illustrator with rings / halo / styles etc The flare tool can be found in the Illustrator toolbox beneath the rectangle tool (rounded rectangle etc). The flare tool creates amazing lens flare vector designs in Adobe Illustrator. The flare tool can be found in the Illustrator The result of the generated flares can be used throughout Illustrator. You can distort the flares, you can add colors to the flares, you can add effects to the flares.
The flares can be combined with other paths in Adobe Illustrator. You can also export the flares to other applications such as Photoshop and Affinity Photo.
The tutorial below gives you details about the flare tool options and how to use the flare tool. How to create rays. How to create flare halos. How to use it to create rings. The tutorial shows you how to transform the flare tool paths. b
Two part flare tool in Adobe Illustrator - flare and then the rings (or just the flare)

The flare tool is a slightly odd tool in that it is a two part tool. You can just apply the first flare and totally ignore the rings by changing tools after the first pass. Though, if you subsequently go back to the flare tool, the second pass will still be active and the rings will appear.
-
Go to the flare tool
-
apply the initial flare
-
select another tool in Adobe Illustrator toolbar
Flare tool is a live effect and editable even if you switch to other Illustrator tools - you can change the flare over and over
-
Select flare tool
-
Click on center of flare or center or rings
-
Move the center of flare or rings
It should be remembered that the flare tool is a live effect and most parts of the flare can be modified via the flare options dialog on selecting the flare tool. If you have created two or more flares, you can also select a flare and modify only that. Just click on the parts of the flare (with the flare tool) you want to change and move the origin point etc of the rings or center etc
A background for a flare - the flare works fine on its own but it is more amazing with a black background or a different colorful background
-
Small flares (to a confined space) make a wonderful sparkly background
-
Large flares can fill an entire background in seconds.
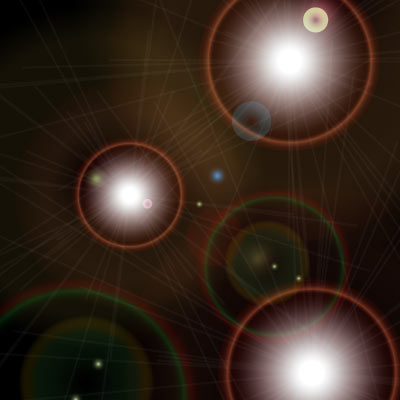
Personally, I find the default application of the flare against the default white background to be pretty dull, and perhaps one of the reasons why the tool seems to have few fans. If you apply the effect against a background or a solid color (black, comes to mind) then the artwork springs to life. Even more so when you apply 5 flares or more onto a color background and then the flare really starts to take on a true sparkle. As the flare can be applied large or small. The flares are definitely multi-use.
Modifiers: up and down and shift etc keys - you can interactively modify the flare tool in Adobe Illustrator as you use it
You can interactively modify the generated flare art by using some of modifier keys such as
-
UP / DOWN (number of rays)
-
CTRL (size of flare)
-
SHIFT (constrains the tool to the same ratio of flare / ray size etc)
-
ALT (rotate).
The modifiers are interesting and interactive but offer nothing that cannot be achieved via the dialog and the dialog does offer precision to the settings.
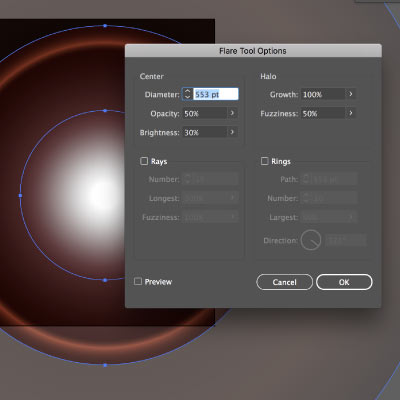
Flare tool options in Adobe Illustrator - double click the flare tool icon in the toolbar and change the settings for center and halo etc
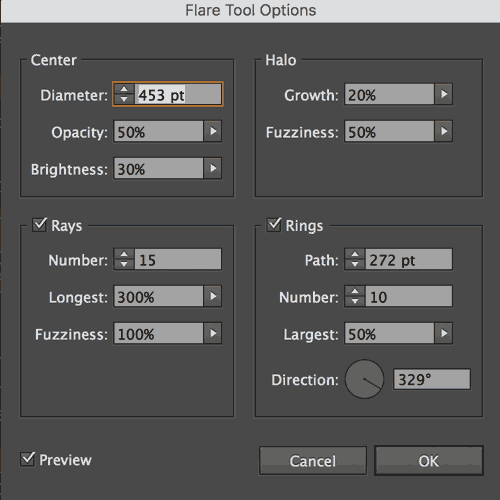
To see the options, double click the flare tool icon. There are a number of settings
-
center
-
halo
-
rays
-
rings
The flares can generally used independently so you can de-select the rays, rings etc and just use the halo etc. You can also set the numbers to low as well as high values for the rays etc to create a range of different artworks from the same basic tool.
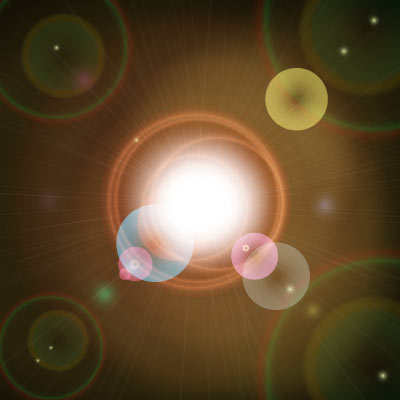
Blending modes in Adobe Illustrator - you can create unusual designs by changing the flare's opacity and blending mode
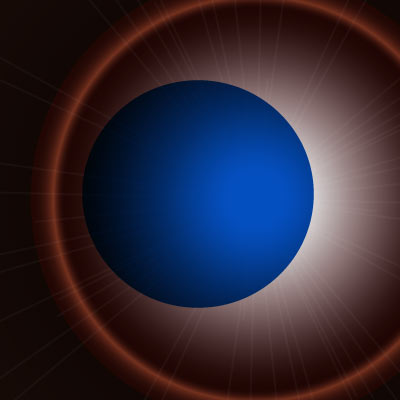
The flare tool generates a path and as a standard path it can be applied with a set blending mode such as normal or lighten. You can create multiple flares all with different blending modes as well as different opacity settings. To change the opacity and blending mode for the tool, just click on the opacity link on the top option bar. Many different color effect combinations can be created by using different blends which can also be in turn, blended with a background such as in the image on the right
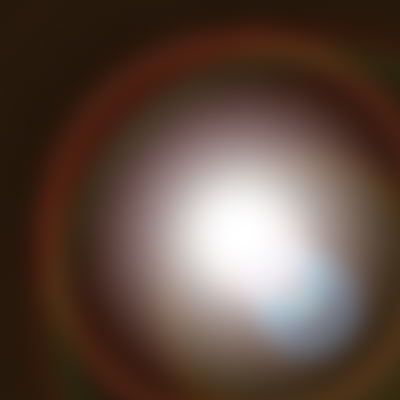
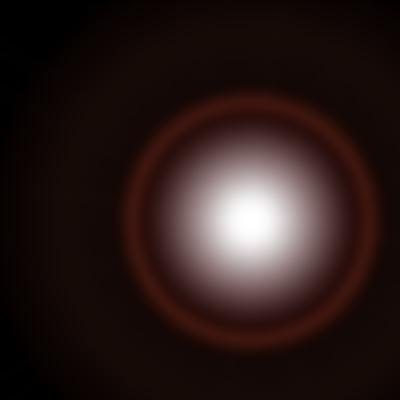
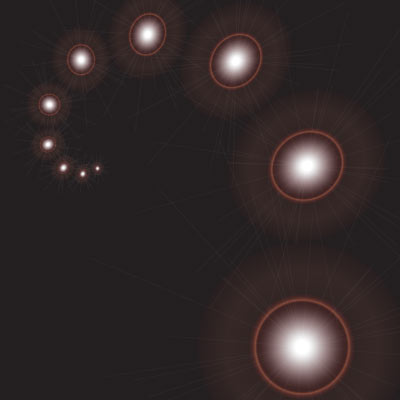
How to create different halo effects with the flare tool in Adobe Illustrator
You can create an interesting halo by
-
De-selecting the rays and rings
-
Set the opacity etc high as well as the growth etc to high values
-
Set the brightness to the high or perhaps to very low, 0%. The fuzziness settings is an odd one, I am certain it does something (probably more path related and perhaps comes into its own if used with other paths)
-
Duplicate the halo flare (alt / option) and reduce in size by scaling say to 75% of the original flare (you can do this via the center option as well)
-
Align both flares
-
Repeat duplicate and scale again by another 75% etc
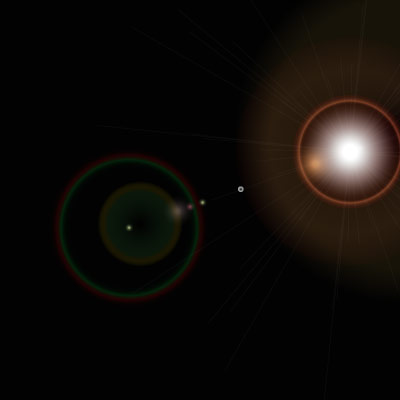
Great for creating a quick contour flare / halo tool effect as on the left. You can also shift the individual flares and perhaps fill an entire image with the flare / halos or perhaps align the halos in a line or perhaps create a circle of halos and more. Of course, you could just use two halos with opacity set to 100% and fuzziness to 100% and create two car headlights heading towards the screen as on the right
Creating rays with the flare tool in Adobe Illustrator

If you don't want any rays applied
-
double click the icon found in the toolbox
-
de-select the rays checkbox.
You can also set the number of rays to 0 even if the checkbox is on. The maximum number of rays is 50 - you can't enter 100 or more into the rays field (sadly). But personally, I like the rays so I generally keep the rays settings ON. The rays are very fine. The rays can be lengthened from 0 (again, no rays are seen) to 1000% of the size of the flare. There has to be said, little difference in the lines when the fuzziness is changed. All very subtle. Again, the rays come into their own when you re-apply a flare over and over. If you create multiple flares then you can generate more than the 50 ray lines. Four flares result in 200 lines filling the entire screen (if you use the maximum rays). I am certain there is some overlap so perhaps not all 200 lines can be seen but it creates a far more dramatic flare than a single. You can also use the alignment tools and rotate the path as you would with any standard path.
-
Select the flare tool
-
Go to the flare options
-
Set most of the settings in the non-ray sections to zero (other than diameter)
-
Rays on
-
50 rays and length 1000
-
Apply
-
Duplicate (alt / option key) and drag to a different positoon
-
Repeat duplicate and drag and shift
To apply this flare tool effect in a more repeatable way by using the appearance panel and live effects - the transform command can generate more copies of the live flare (rays and all) and rotate them as well as add additional transforms.
Isolation mode and the flare tool in Adobe Illustrator - you can edit the flare tool design in isolation mode
The flare tool can be edited via the isolation mode (as symbols etc). Double click on any of the generated flares and you will be offered different layers of the flare to edit such as core gradient which can be modified such as changing the highlight of the centre gradient - though not, it appears, any color. You can position the core of the flare using the gradient tool (in isolation mode) as well as shrink the core or increase the size of the flare - you can also make the core more intense and sharper as well as a lot fuzzier - none of these options are available via the dialog. In isolation mode, you can also distort many of the paths using the direct selection tool such as the rings (individually)
Masks and the flare tool using the clipping mask in Adobe Illustrator
They can be masked using a clipping mask.
-
Generate a flare
-
create a circle or other path
-
object menu clipping mask command to clip the range of the flare.
These paths are now filled with a dramatic flare.
The Illustrator flares can be exported for use into Photoshop and then combined with Photoshop effects
You don't have to keep the flare tool tied down, it can be set free.
-
Create the flare in Adobe Illustrator via the flare tool
-
Drag to the CC library
-
Go to Photoshop
-
Drag from the CC library into a Photoshop document
-
Apply effects to the new design
The result of the flare tool can be pasted into Photoshop (for some reason as a pixel option seems to work better than the smart object) and re-pasted or duplicates of the flare layer can be created. The flares are now just normal objects in Adobe ® Photoshop ®, you can apply layer effects such as metal and wood effects as well as live effects to the flares such as blurs and oil paint etc. The flare can be added as a dramatic effect to text objects or shape layers in Adobe ® Photoshop ® (though Photoshop has a lens flare filter - it doesn't come near to the range of options available to the Illustrator's flare). Of course, there are also many powerful filter effects in Adobe Illustrator such as gaussian blur which can be added to the flare. You can also export the results of the flare tool to other applications such as Affinity Photo and Flame Painter Pro
Appearance panel and modifying the appearance such as adding fills and strokes etc to the flare
Standard Illustrator Live effects can be applied to the effect and also fills and strokes can be added to the flare. The flare is a path, not a standard path as it is made up of multiple components but it does allow for additional fills and strokes (not always effective) to be added.
-
The 3D bevel effect can be applied to the flare though the result is a little poor (it is not a 3D flare by any means).
-
The blur etc filters can be applied to the flare and they result in a blurry / fuzzy flare.
A blur has been added to the Illustrator flare on the right. As the flare and the live effects are live, you can create duplicates of the design and the effects and fill an entire document with blurred (perhaps different blurring) flares.
Transformations can be applied to the flare so you can scale and rotate as well as apply free transform
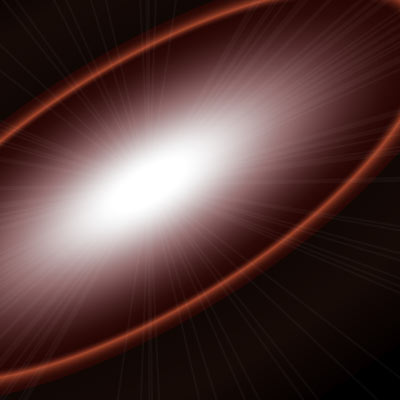
You can select a flare in Adobe AI and you can transform the design such as scale as well as rotate. You can also shear the flare as well as rotate and reflect it. You can see the result of adding a shear transformation to the flare tool on the right. The scale does not have to 100%, it can be 40% in the horizontal and 100% vertical creating a very differently shaped flare. Likewise, the object menu envelope command can be applied to the flare and various arch and arc and flag etc can be applied though the end results can vary. The free transform tool can also be applied and the results can be varied.
Better transformations for even more dramatic effects such as starbursts and flare spirals
The best tool for dramatic manipulation of the flare tool in Adobe Illustrator has to be the live effect (the key thing here, as always, is the live effect where you can modify the result at any point and create a completely different result in seconds).
-
The flare needs to be selected.
-
Go to the effect menu and distort and transform and transform.
-
The transform dialog will appear
-
you can then create multiple copies of the flare (though note, they are all the same underlying flare) by entering a value other than zero in the copies field at the bottom. You might like to leave the preview off but if you have a fast machine then you can just put the preview on and play with the rotate, scale, move etc options. See on the right for an example of using the transform on a flare
-
Change the move and scale (you can set to greater or less than 100% and you can also have different scales for the vertical and horizontal) as well as the rotation.
One thing to remember, if you are filling a circle - 360 degrees, 10 copies.. you really should enter 9 in the copies field as you already have one copy, the original.
Default / reset of the Illustrator flare tool
Hold down the alt / option key and the reset will appear and click that to put the settings back to the default.
Illustrator Flares can be saved as a symbol by dragging the result into the symbols panel and using with the sprayer etc
The flares in Adobe Illustrator can be saved as symbols. As symbols, they can be applied using the symbol sprayer tool. As a symbol, the flare can be re-used and they are identical. The symbols also take up less resources. As symbols, the flares can also be manipulated like any other symbol and fills / strokes and live effects can be applied to the instance. You can spray and splatter flares across the image. To save as a symbol
-
select the flare after creating using the flare tool
-
drag to the symbol panel
-
select static or dynamic symbol
-
Now select in the symbol panel
-
Go to the symbol sprayer tool
-
apply across the art board
Flare tool and re-color - you can use the recolor / color guide etc as well as the color balance in Adobe Illustrator
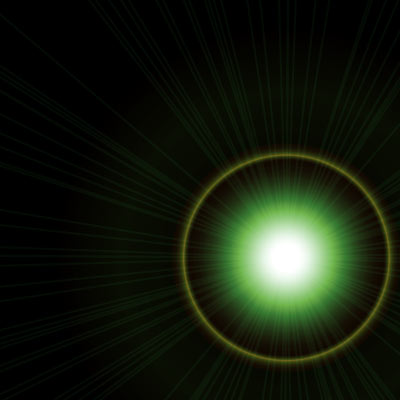
The flare tool dialog offers no means to change the color of the flare, so applying the flare results in the same color effect each and every time (whether large or small). You can change the color by
-
go to the edit menu
-
and the edit colors menu
-
and select the recolor artwork.
-
Use the various color settings in the tool to change the color.
The result being a green flare on the left image etc. You can also add a new color to the flare via the appearance panel by adding a new fill or more than one fill. You can use the edit menu edit color and color balance command to turn the flare into a red or blue flare.
Rings: path, number and largest in the flare tool
The rings option adds an extra touch of class to the flare. The rings do not need to be applied in a particular direction, they can be just layered on top of the center of the flare. just set the path to 0pt. The number can also be set to 0 which is the equivalent of de-checking the rings option. The maximum size of the rings can be set by the largest option - you can have small rings as well as super large rings all relative to the actual flare. On the right, you can see the result of adding multiple rings flares (four) and changing the angle of the applications of the rays. You can also change the settings of the rays via the settings panel and creating a powerful intense light show by just using a single flare, of course you can also create multiple paths and combine them with blending modes etc
Ungroup the flare in Adobe Illustrator and use the individual parts of the flare
Ultimately, the effect is made up of multiple paths (open and closed) and you can just ungroup the flare. Ungroup and the flare is no longer a live effect and can no longer be edited as a flare via the dialog. The flare can be broken into rings, rays etc. You can then modify each part such as adding additional designs to the flare or moving the origin of the rays and more. It is a decent and honorable end to the flare.
Illustrator Image trace on the flare - use to create abstract designs in Adobe Illustrator

You can, if you wish, rasterize the artwork via the object rasterize command and then you can apply a live image tracing to the design. You can then create a colorful trace or just a black and white trace. An alternative to this, pass the flare to Photoshop and apply various image adjustments and then re-copy the flare back into Illustrator and then apply the image trace.
You can see the result of an image trace applied in black and white
Apply the flare once or multiple times - you don't have to apply the effect only once

I am not so keen on a singular burst as I always feel the flare tool really comes alive if you are willing to throw all caution to the wind and apply multiple bursts to a design and multiple applications that are applied with different blends. Millions of truly wow graphics can be created using multiple applies such as sparkly to starbursts to subtle blurry fog scenes and more. By just changing the opacity of the flares (or the blending mode for others), you can turn bright headlights into a misty badly lit scene - which would look even more misty if there was something blended into the background of the Illustrator artwork. The opacity of the flares are all set to 20% simply by selecting all of them and then setting the opacity in the options bar