Photoshop Dual brushes Tutorial
graphicxtras > Adobe Photoshop tutorials > Photoshop brushes tutorials
How to use dual brushes in Photoshop, how to modify the existing brush using another brush to create a near infinite range of brushes.
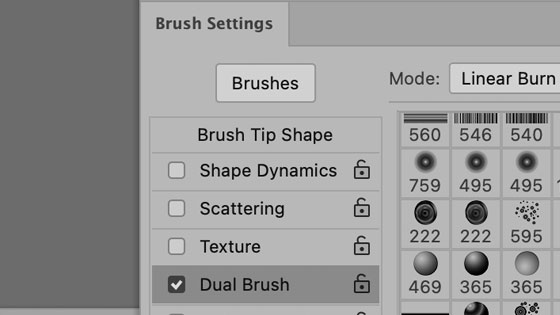
1. Where are dual brushes in Photoshop
You can find the dual brushes on the brush settings panel which can be found in the Photoshop window menu
2. Basic dual brush - modifying existing brushes
Brushes are not cast in stone, they can be modified in countless ways and one of the more powerful features is the dual brushes feature, perhaps not the greatest name but it is still a super useful feature of Photoshop Brushes and can modify any brush in all kinds of unique ways. You can use them to add and subtract from the existing brush preset in Photoshop
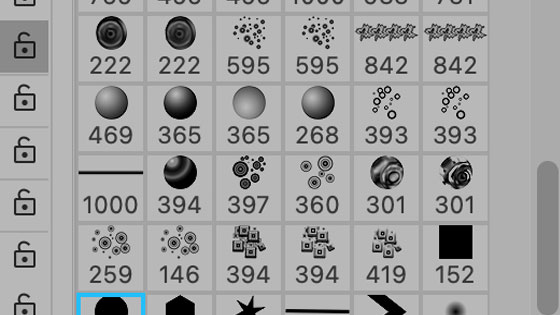
As the dual brush is a combo, any number of combos are possible, even from your basic set up of say 100 brushes, clearly you could have dual brushes of 100 x 100 brushes (you can use the same brush but modify the settings to radically change it as you can modify the spacing, size, mode, scattering etc so even the 10,000 possible brushes from a basic set of settings would be impressive, add into the mix a variety of spacing and scattering settings and all kinds of different brushes can be created.
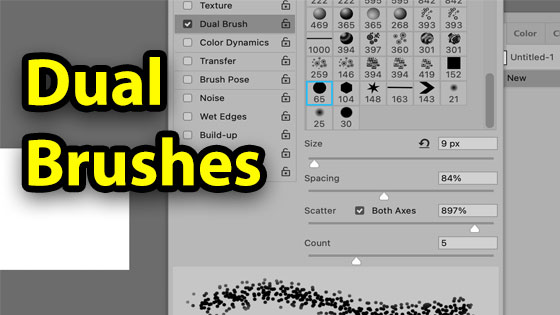
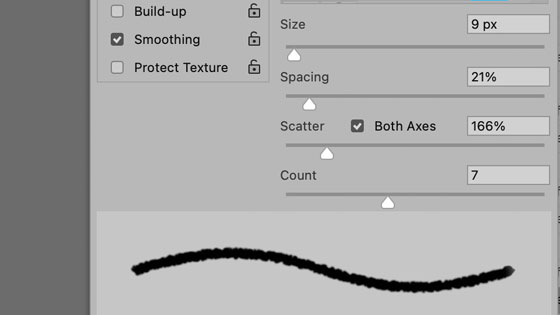
3. Brush settings panel and dual Brushes
So where is the dual settings feature in the brushes settings, well the brush settings can be found via the window menu and you can then go down the left side and see dual brushes. Go to that panel and you will see a selection of brushes. This is not laid out as in the standard brush panel, which is a pity. Still, you can simply select a brush in the dual brush panel and you now have a dual brush but it is quite possible little has changed as you may have the wrong blend mode or the wrong scattering etc (the scattered particles do not go extend beyond the current brush).
Luckily there is a preview but the preview is fairly small, it is a pity there is no brush creator pad to work on to quickly try out the brush stroke (beyond on the document itself)

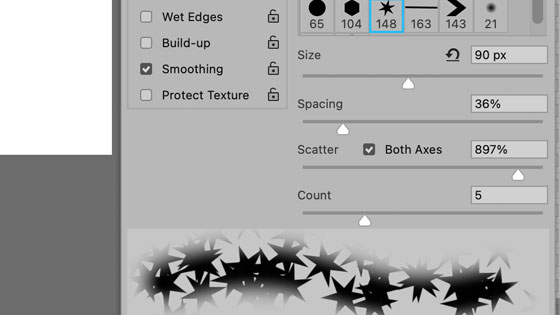
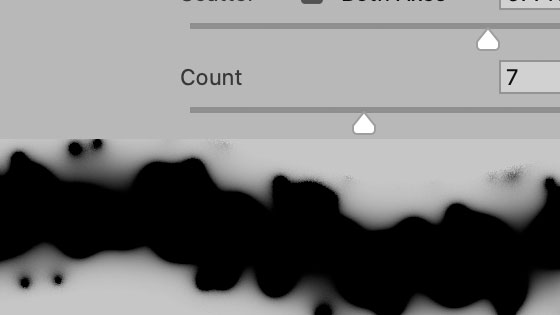
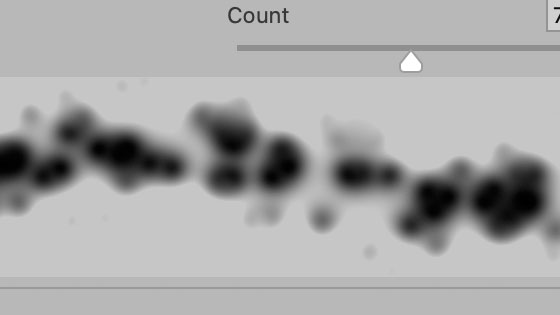
As you can see from above, the act of changing the design from a star to a line can radically change the output result though in each and every case, some additional modification of the spacing and scattering and size is required. The count just makes it far more dense, so the count works best with low to medium values
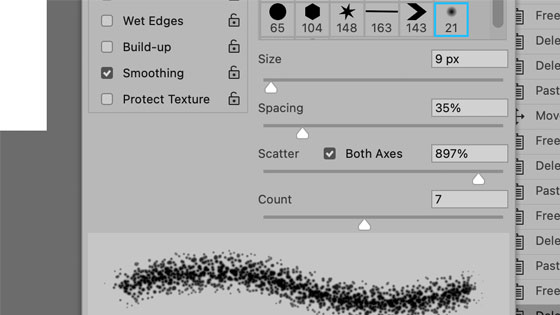
4. Dual brush size and scaling
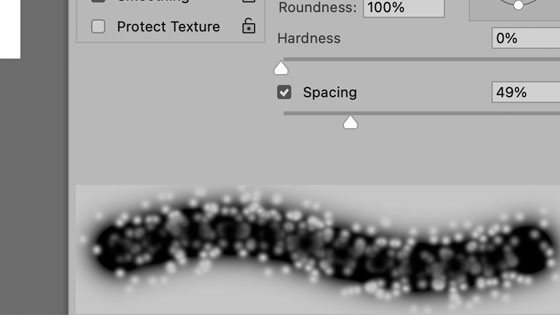
You can increase the size of the dual brush to create more sizable particles in the stream of particles, you can increase the size of the spacing so you can see bigger gaps between the particles or you can set it low and have a more concentrated dual brush.

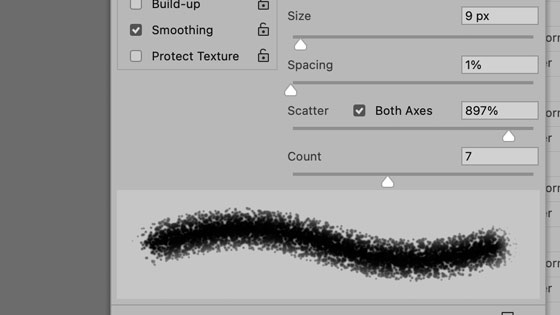
So lets go with the same brush and the all the other settings the same but change the spacing and see the result. The resource to be used is a basic dot. With low setting of spacing, you can hardly make out the dots except around the edge of the stroke.
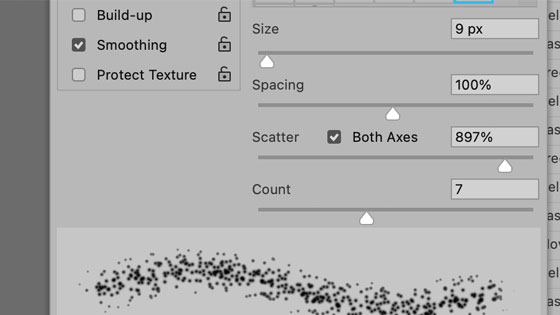
With 100% spacing the result is a little more sparse
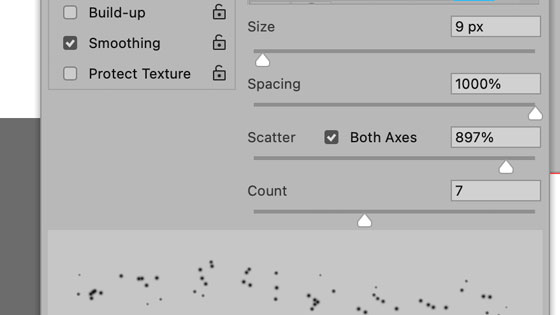
If you push it to higher spacing then the result again totally changes and you barely get any brush at all.
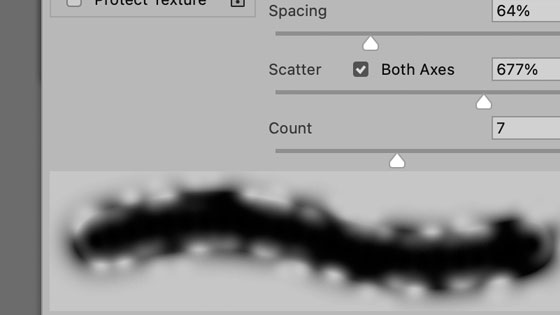
5. Dual brush scattering
You can scatter the dual brush particles beyond the brush by using scattering and especially useful is the both axes option.
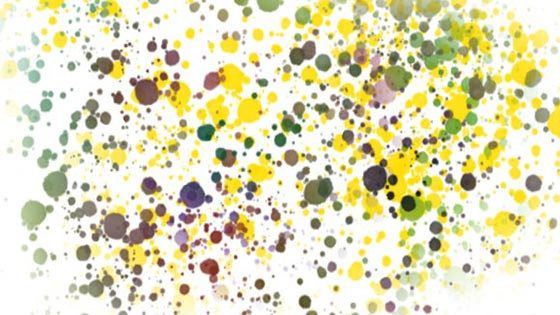
If you reduce the scattering down a very low setting, you basically get a very thin brush stroke dependent on the size etc. I generally ramp up the scattering to a decent level to see the dual brush. The scattering is great for spreading the design across the entire image so in that case set the scattering to the maximum and set it to both axes as well. To get the effect below, set the color dynamics on and set the foreground color to yellow or green and set the hue etc to as high as possible and apply across the document. The source dual brush for this was a very basic dot / rough brush stroke.
The dual brush combinations can be great fun to explore and in many ways it is a pity that Adobe have never added a randomizer feature to their brush panel as it would be great to explore many different combos to create the perfect dual brush in Photoshop.
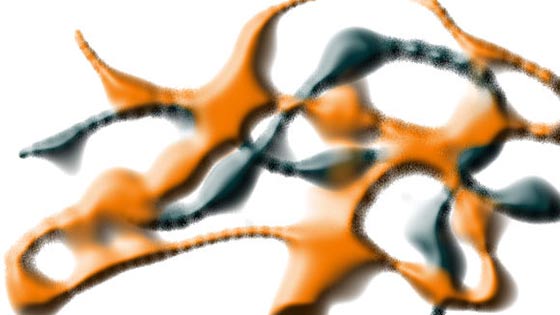
6. Blending modes for the Dual brushes
You definitely should not avoid the mode at the top of the panel. Try out all the modes with your dual brush as linear height is very different from darken. It does seem odd that Adobe didn't add erase / subtract as well as difference etc to the list. There is an erase like feature if you use the brush strokes on layers and then you will see linear height works and a negative space on the brush stroke. The image below is a dodge blending mode
The same source brush stroke and settings but this time with linear burn
With the linear height the result can be very different
7. Original size / Spacing as factor in the dual brush
It should be noted that the dual brushes depend on the original brush size, if you change that you will see more or less of the particles and if you change the spacing the combo of two brushes, the end result can vary greatly such as having pulse of brush stroke instead of a continuous stream of brush stroke.
8. Dual brushes and layers in Photoshop
The dual brushes are even more effective in Photoshop if you use them on a layer and then go to the layer styles panel and add layer styles such as bevels or shadows. Also, when the dual brushes are applied on a layer you can also change the blending mode of the layer and create interesting color combinations of the new dual brushes.
9. Other tools and the dual brushes
It should be noted that the dual brush is effective with the standard paint brush tool not the other tools. It is a pity that the dual brush does not work with all of them.