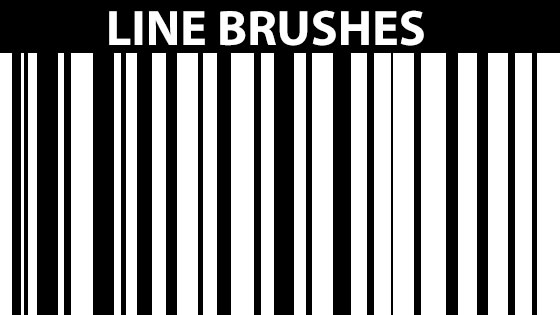
Photoshop line brush Creation tutorial
graphicxtras > Adobe Photoshop tutorials > Photoshop brushes tutorials
Learn how to create an intense line brush in Photoshop tutorial, create amazing line designs/ patterns that can be used in countless ways in Photoshop
1. Create the basic line design using rectangles
File / New Photoshop document for the line brush. Say 2000 x 2000 (so you can create a very large line brush - you can always scale the line brush document). Select the rectangle tool / lines in Photoshop
set the color to black via the toolbox and set as shape layer via the top options. Draw the rectangle from the top of the document to the bottom and create a thin rectangle - add this to the far left and then add another a few pixels away (leaving some white gap) perhaps with the same size of rectangle or slightly different.

Repeat this over and over for about 1/4 of the document though you can do this all the way across the document - it is just quicker to just use 100 or so lines and repeat them.
2. You can create all numbers of variants of the line brushes
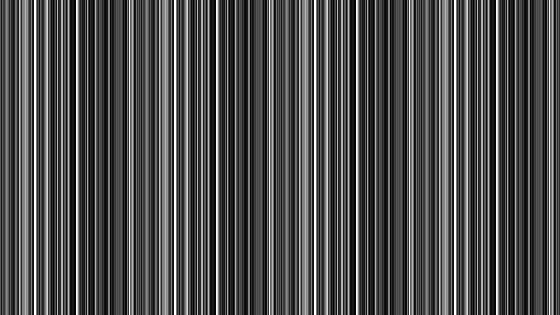
Brushes work on a gray scale model so you don't need to have just black lines, you can use gray scale lines as well. The lines can be thin or thick across but you can also vary the color. Unfortunately the color of the custom shapes / rectangle has no random variability such as a brush with color dynamics. Easiest way to add the lines and change the colors is to have the swatches panel open and select the gray scale colors so you can quickly click the colors and then apply the shape that way.

3. Line layers and duplication of those groups of lines in Photoshop to create line brushes
Select rectangle layers via the layers panel and layer menu and combine shapes and then unite shapes. With that set selected, Alt / option key and duplicate the combined shapes. Move duplicated layer away from existing lines
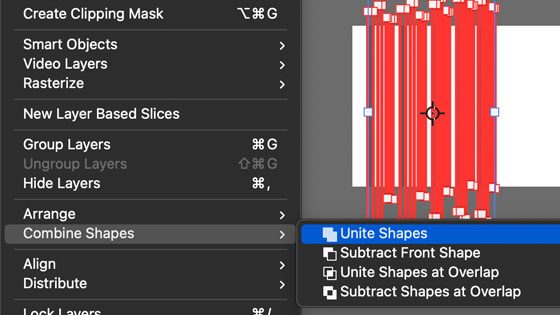
You can create multiple lines with different widths. You can then combine them all into a single shape layer by going to the layer menu and combine shapes command and unite though if you use the unite, the color for all those lines will become the same (you may prefer instead to use the layer menu and smart objects and convert to a smart object and that keeps all the different colors). Once united, you can then duplicate that set multiple times as well as change the color of the united lines and fill the entire document or just create multiple copies of the line artwork for the line brush in Photoshop.

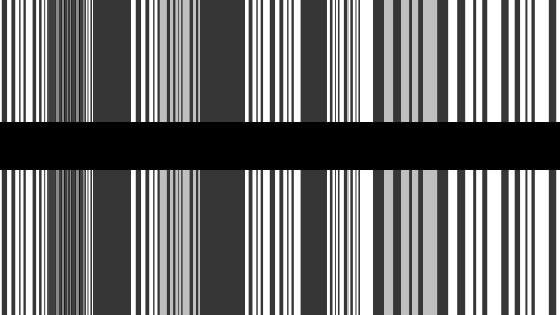
4. Transform line layers - you can also increase or decrease the size of the lines in the line brush
Select a layer (made up of lines) and then check the show transform controls is ON (top corner of Photoshop) and use the bounding box / transform controls to now stretch the lines to the right or left (making the lines bigger or smaller than before)

This can be repeated with all the layers or just one. Another option is to drag the layers on top of the others as well as transforming the line layers. You can also simply re-select all the layers and then go to the layer menu and smart objects and convert to smart object and move that smart object and duplicate etc
5. Add variations to your new line brush
Select the rectangle tool. Apply lines in different locations and width. You can add all kinds of additional lines to the artwork to add some variation and randomness to the line brush. You can also change the opacity and the blending mode of the rectangles added to the line brush to create even more unusual combinations of lines.

Or more combinations and using blending modes (such as difference) to create an even more intense line.
5. Add horizontal lines as well
If you want a line brush, well you don't want to turn it into a grid design but you can a few horizontal lines as well. Again, just use the rectangle and draw it across the design.
6. Horizontal line brushes
You can also create a line brush that is horizontal. Simply create the rectangles horizontally or just rotate your vertical design. As with the vertical, the same can be done with the horizontal lines.

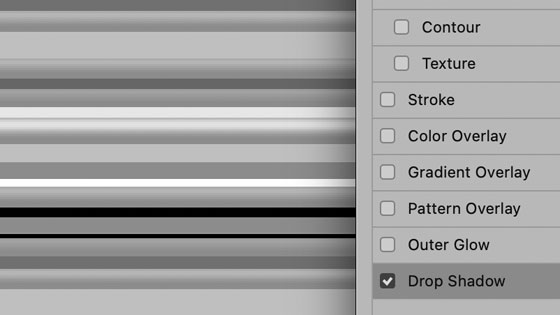
7. Add shadows etc to the design
The artwork for the lines (if shapes) can be modified further by using layer menu and layer styles and perhaps add a shadow or perhaps add a gradient overlay to the lines.
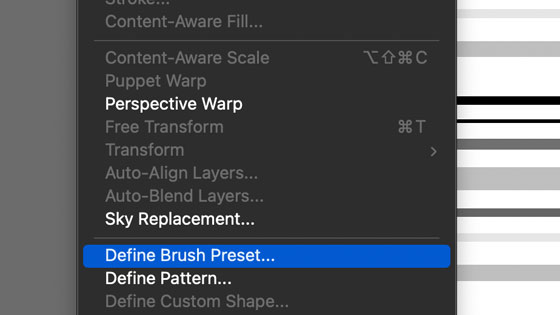
8. How to define the intense line brush in Photoshop via the edit menu
Flatten the layers and edit menu and define brush command. You can then go to the brushes settings found in the window menu and add a number of additional settings to the brush stroke such as color dynamics etc and then define that as a new preset.
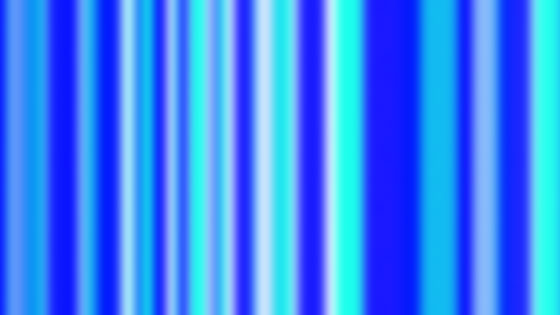
8. Using Intense line brush in Photoshop
For example, select the brush tool and set color to black and apply line brush. Set color to red and apply brush and set the color to blue. Go to the brush panel and brush tip and squeeze the brush size vertically and apply brush

There are 1000s of other ways of using the line brush (as well as many 1000s of possible variations of the tool). You can also use the design with other tools such as the blur tool and clone tool
9. Line brushes as patterns
You don't have to just use them as a brush stroke, they can be used also as a seamless design as well via the edit menu and define pattern and then use with fill layers etc and they can also be combined in multiple ways to create even more line designs