Photoshop 3D Lansdscape Creation tutorial
graphicxtras > Adobe Photoshop tutorials > Photoshop effects tutorials
How to create some really weird and unusual 3D folding landscape / background / surface designs in Photoshop using a variety of filters such as Bas Relief (BR) and re-applies of the filters as well as combining with Photoshop GRD presets. Create the weirdest looking landscapes just by the simple application of filters in Photoshop. The result is then combined with the 3D features of Photoshop, Create dunes, fabrics, textures, curtains etc
** Youtube video tutorial on how to create amazing 3D landscape designs using bas relief and gradients and 3D features in Photoshop **
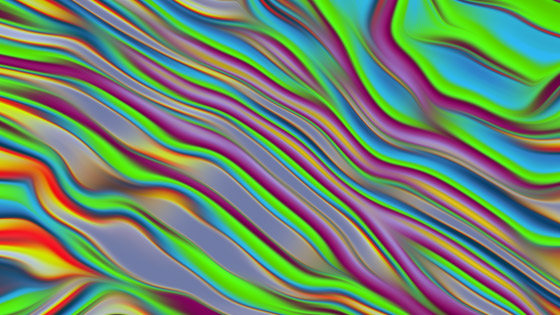
1. Setup of colors using gradients
Use a gradient with multiple stops via gradient tool in Photoshop and apply that using difference blending mode as well as linear type for the gradient. Apply the gradient a few times to create a very intense initial source design (you could, of course, use any kind of tool to create this such as a brush stroke and filters)
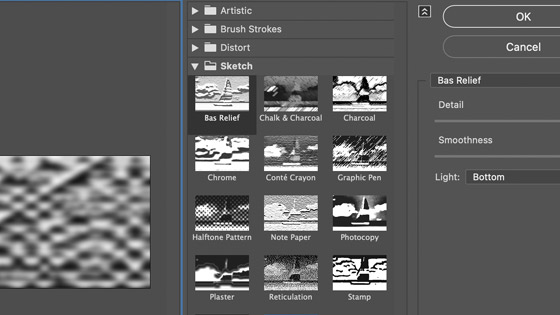
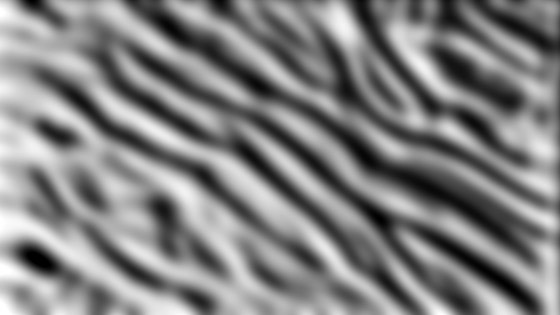
2. Bas Relief filter setup
Set the color for the bas relief filter to black and white via foreground / background, filter menu and filter gallery and BR filter, Smoothness to the max, re-apply the BR filter over and over
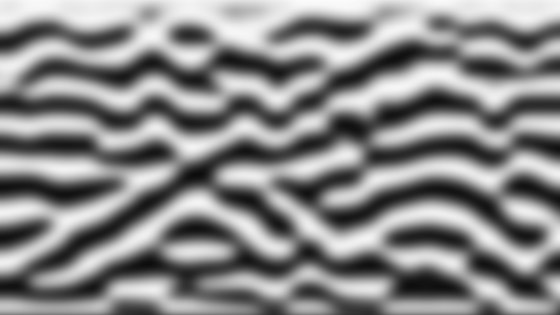
After a few re-applies of the filter
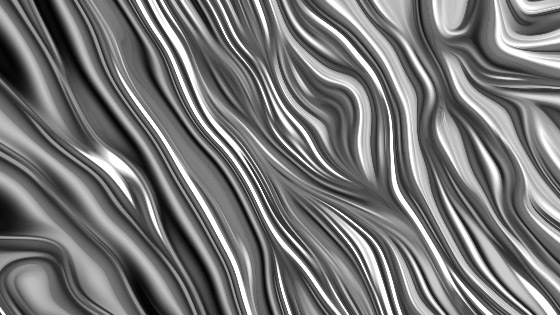
The gradients in Photoshop can be changed via the gradient panel. Adding many different stops and then using the linear gradient with the BF filter and repeat apply the bas relief will result in truly unusual distorted artworks. The Photoshop BR filter can be used to change the direction of the light of the gradient effects and create all kinds of weird and wonderful folding rippled landscapes
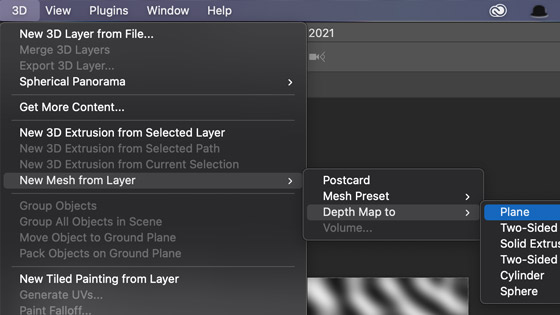
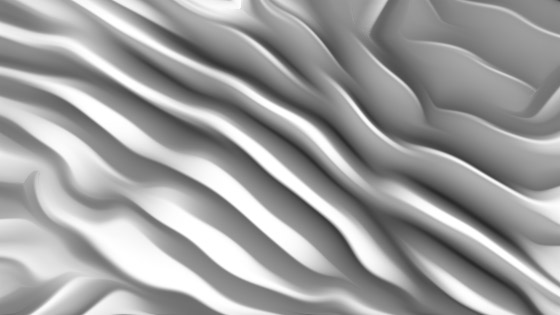
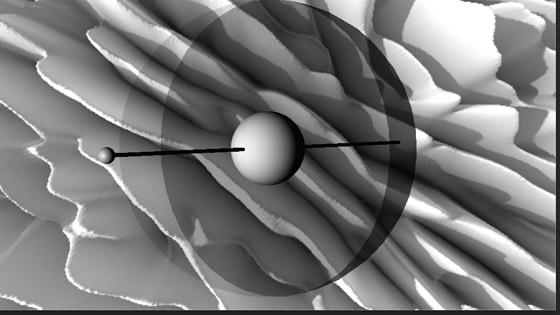
3. Enter 3D mode
You can also use the result of the BR filter and gradients as a 3D model in Photoshop. Goto the 3D menu and new mesh from layer and go for depth map to plane option
Use the 3D controls at the top of the application to move and scale the created mesh
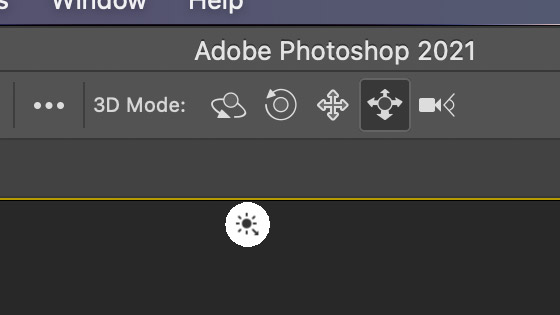
You can manipulate the mesh to bring it closer to the screen. I always find the default position is well away from the camera for the rippled landscape.
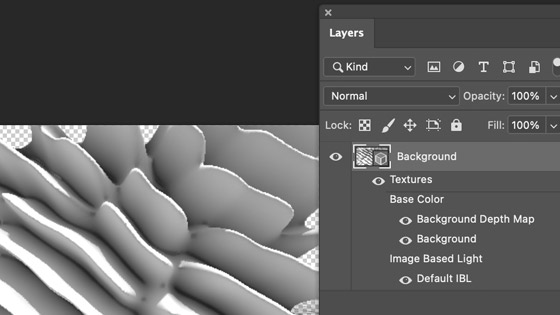
If you go to the layers panel, you will now see your folding / melted / rippled landscape design layer. You can use the 3D and properties panel to manipulate it further if you wish but at this point I generally always flatten the layer via the layer menu and flatten image
4. Add filters to the rippled / folding landscape design
You can now add some filters as well as adjustments if you want to add some color to the image. Such as using the stylize filter oil paint a couple of times
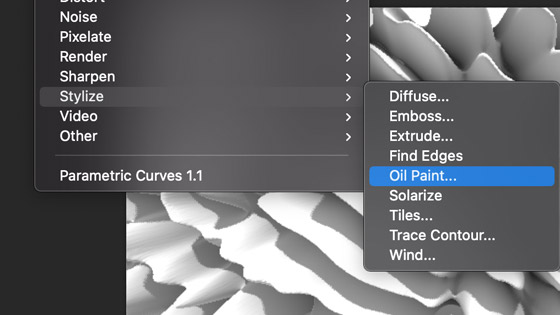
Set the stylization setting to high and cleanliness to high and leave the lighting OFF
You can, if you wish use liquify (filter) as well as twirl etc to distort your rippled 3D landscape
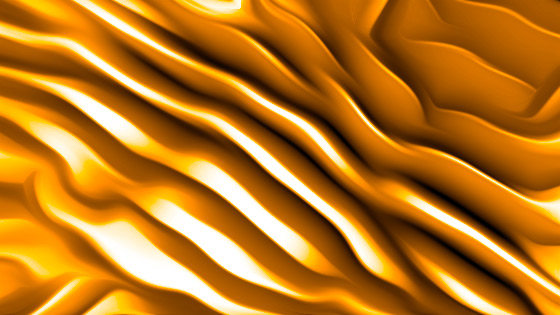
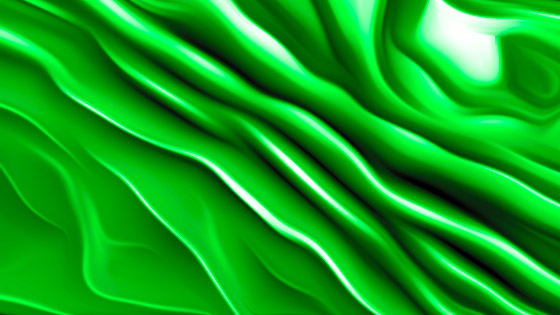
5. Add some color to your rippled folding landscape
Go to the image menu and adjustments (or use the layer menu and adjustment layers) and select photo filter and if you want a sandy / desert dune look go for the warming filter 85 and then set the density high and click OK.
To intensify the color, go to the image menu and adjustments and vibrance and set vibrance to 30 and saturation at 90 and click OK
To make an interesting black and white design use the image menu and adjustments and gradient map and use the default black and white preset
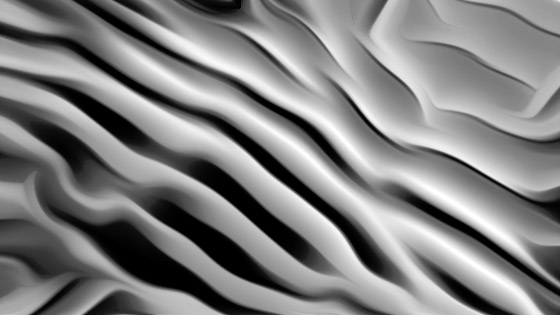
Or perhaps use the black and white adjustment to create all kinds of interesting rippled folding wavy background landscapes
Or use the gradient map adjustment with a preset with a lot of stops and perhaps combine with the stylize oil paint
6. Re-apply BR filter on the folding / rippled landscape
I always find, re-applying the same approach above a couple of times on the result of the first landscape can generate even more unexpected results. I would always suggest that you save the results of your work to the cloud or as a snapshot via the history panel or to your library.
And even more landscapes can be revealed. Again, go back to the 3D menu and use the depth maps. You can always select the 3D lighting widget and move the lights around in 3D layer plane or add additional lights etc, again, yet more possible things to explore
You can also go to the 3D menu and export the 3D layer and use the folding / rippled landscape in a normal 3D application (use OBJ etc as the format)
Flatten the layer / image and again apply some filters such as oil on to the design and then add adjustments such as photo filter or perhaps add presets etc to the design
Or add the black and white filter into the mix and photo filter etc

You can use the re-applies to continue to manipulate the 3D landscape
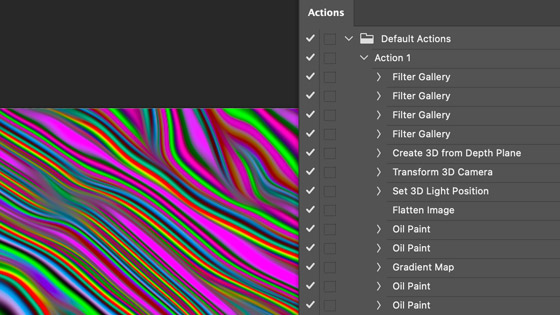
7. Actions and the creation of 3D landscape / rippled design
All of the above can be stored as an action. I would suggest not storing the initial source creation but for the rest, all the steps, they can be quickly stored as an action and the result of that can be then re-applied super quick to all kinds of source designs and a quick generation of all kinds of results. Go to the actions panel and click the + at the bottom of the screen and start recording all the filters and adjustments you want and stop the recording. Now you can play it back with all kinds of different sources for all kinds of landscapes
You can always combine the action with other filters such as perhaps twirls and perhaps smudge different parts of the image or liquify etc as well as add in different color maps or just a black and white one