Photoshop Abstract Swirly Flowing Design Tutorial
graphicxtras > Adobe Photoshop tutorials > Photoshop effects tutorials
** Youtube video tutorial on how to create abstract glowing swirly flowing vibrant designs in Photoshop by using pointillize and maximum filter etc **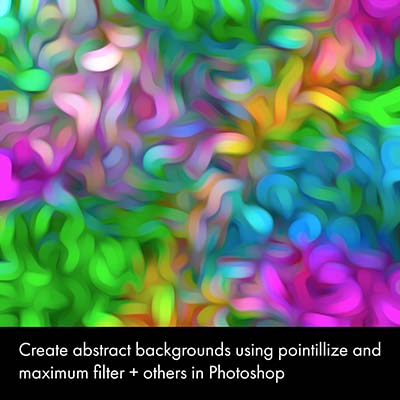
How to create an abstract swirly line / edge background in Photoshop using Maximum and Pointillize as well as oil paint filter plus initial gradients.
How to create an abstract swirl line edge background as well as layers and overlays in Photoshop using gradients and maximum and pointillize filters. The end result depends on the gradient created.
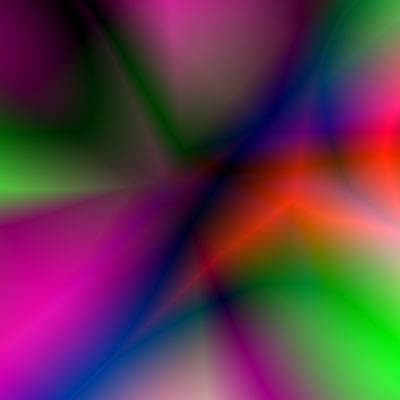
The first step is to create a gradient by using repeat applications of gradients using different blending modes. You can now use pointillize filter to modify the gradient in Photoshop.
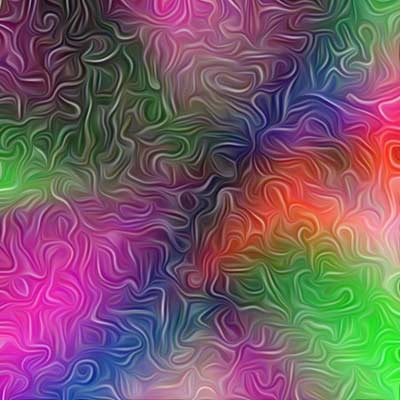
The result of the pointillize filter can be modified by effects such as oil paint filter (to create an abstract swirly design). You can then use the maximum filter to intensify the white of the swirls. The maximum filter in Photoshop can be then repeated to create even more abstract swirl line edge designs. The tutorial shows the steps for creating an abstract swirly line background / design using Photoshop filters such as pointillize filter and maximum combined with gradients.
The key thing for this video is to create a gradient or a quadrant gradient effect but basically a very super colorful image. You could, of course, import a gradient mesh from Illustrator or perhaps a colorful design from another application. You could use brushes with different colors and smudge and blur the image. I have always found gradients a very useful way of creating interesting designs (especially if you use the 32bit color mode).
Record gradients in Photoshop
Another option is to create an action and store the application of the gradients. You can then quickly create super colorful abstract backgrounds for the swirly design and repeat the designs in seconds using the actions panel in Photoshop. You can then rotate the image and then repeat the colorful gradient action and create all kinds of unique super colorful gradient designs for use as a source image for this work.
Setup for the colors in the document using gradients in Photoshop
-
Create a document with a reasonable sized (1265 x 1265 say)
-
go to the gradient tool
-
Go to the gradient panel, select the blue red yellow default gradient (if it is not there then please reset the gradients panel back to the default set). It should be noted here that the actual end result of the line / swirly / smudged / edge etc abstract background generated will depend on the structure generated at this stage so if you only use a few applies of the gradient to create the background or use a very subtle colorful background then the result will differ from the more colorful background design created on the left by the gradient tool. You may wish to use a different gradient or an image or brush stroke and blu and smudge that and use that as the source instead
-
set the type to linear
-
set the blending mode to difference.
-
Use the gradient tool and repeat multiple applications of the gradient to create a super colorful background with multiple colors in it (you could use any similar gradient filled design such as a blurred image etc).
Pointillize filter in Photoshop
-
Now use the pointillize filter found in the pixelate category of the filters in Photoshop.
-
Set the value to a fairly small size such as 12 etc and apply the filter.
The pointillize create a lovely spread of colorful shapes across the image based on the previous underlying colorful artwork and so will probably vary from experiment to experiment with the gradient tool. Ok, now you have a lovely colorful spotted background.
You could stop here and just perhaps use an adjustment to turn the design into a black and white background or texture
Oil paint filter
-
Now apply the oil paint filter a few times with maximum settings but adding no depth to the image (unless you want some) and you will then have a nice smeary swirly colorful background in Photoshop
Maximum filter
I love the other filter category, why couldn't they add the maximum to the blur or some other category but instead it ends up in the others. It is a useful filter though.
-
Set the maximum to a fairly large value say 17 and roundness.
-
Apply the maximum
-
Edit menu
-
Fade
-
Fade using blending mode of difference
You should end up with is a super colorful edge / lines that follows the original contours of the pointillize.
Vibrance / Camera raw filter
It is probably not the most colorful design yet
-
use auto tone or perhaps vibrance to improve (or perhaps not) things. Or perhaps Camera raw filter or one of the Nik plugins
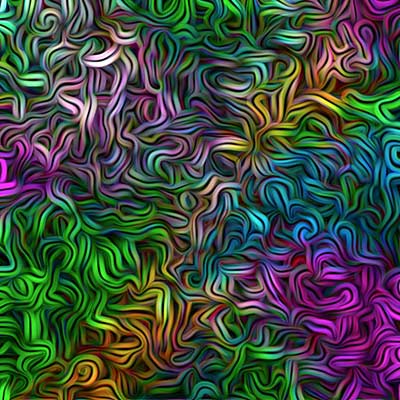
Repeat maximum filter to blur the swirly background design in Photoshop
You don't have to stop there. The maximum filter can be used multiple times and combined with multiple applications of the oil paint effect to smear the image. It is probably a good idea to take a snapshot at certain points as sometimes you may find the design is not working. Or perhaps just use the history panel to restore an earlier history state of the swirly background
-
Re-apply the oil paint filter to smear and create an even more unusual swirly line / edge in Photoshop or
-
re-apply the maximum filter with the same setting or more or less and create a new edge to the edge and this can be repeated to create even more unusual abstract swirly line / edge effect.
-
Oil paint
-
Maximum filter
-
And so on...
Use the oil paint filter to create an even more amazing smeared design in seconds
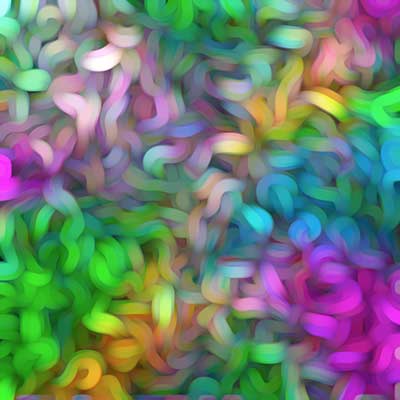
You can finish the entire design off with an extra application of the oil paint to create a very unusual smeared design or perhaps pass the result into the lighting effects filter and use the spot light and add some texture to the design (personally, I would use Painter at this point) to give it some depth