Photoshop Circular Contour Random Colors Creation Tutorial
graphicxtras > Adobe Photoshop tutorials > Photoshop effects tutorials
** Youtube video tutorial on how to create a circular contour random color design shape in Photoshop **
How to create a circular / circle contour random color fill in Photoshop tutorial.
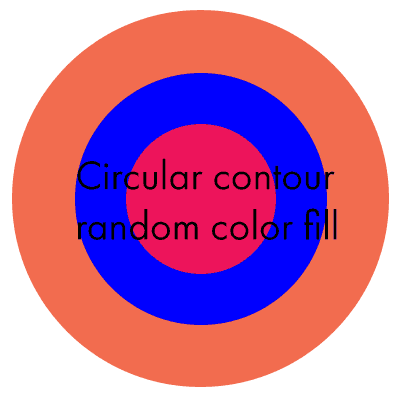
How to create super colorful random color filled circle / circular designs in Photoshop .
-
select the Photoshop ellipse tool for use to create the circular contour random color filled design
-
set the color
-
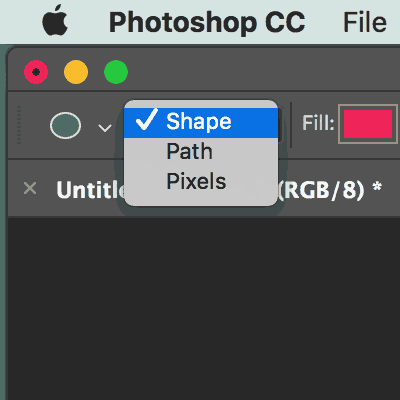
set shape layer option
-
create circle by holding down shift
-
duplicate layer
-
edit menu
-
transform
-
scale 95% etc
-
set ellipse tool
-
change color via properties panel
-
repeat
Create an initial circle and then use transformations to quickly scale the circular design. The circular contour shape layers can be quickly created with Photoshop actions to create multiple circles. The circle shapes can then be selected and filled with random color fills in Photoshop. You can then remove circles from the circle contour design. This tutorial shows you how to create the circle and the Photoshop action for the circular random color fill. How to change the color to random colors for the shape via the properties panel. The tutorial also shows how you can take the circular contour random filled design and use other effects such as oil paint to create stunning combinations of circular contour random designs in Photoshop
Circular contours in Photoshop Setup
The first thing to do is to set up a circle shape that fills most of the document. The quickest way to create the contour is to use the actions panel but you can always do the duplication and scaling manually. Display the actions panel via the windows menu
Circle creation in Photoshop using the shape layer option
-
Create first circle by selecting the ellipse tool in the Photoshop toolbar
-
setting to shape layer option
-
Create circle by holding down the shift and fill the entire document with the circle
Circular contours and Photoshop actions - make it super easy and quick to generate circles using actions
Now you have the initial layer,
-
Go to the actions panel in Photoshop
-
Click the create the new action at the bottom
-
Give it a name
-
Go to the layer menu
-
Duplicate layer
-
edit
-
transform
-
scale
-
Set to 95% or 90% etc depending how many circles you want in the contour
-
End the recording
Circle and contours and actions - repeat click the action in Photoshop
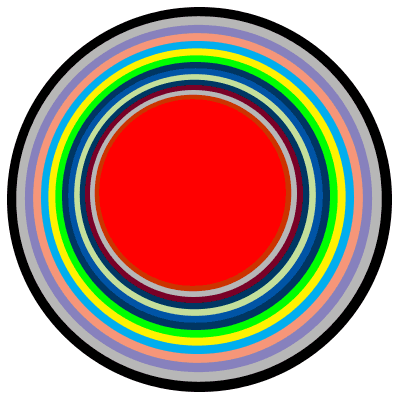
Now you have the action, click the action repeatedly to create as many circles as you want 90% 85% etc of the size of the previous.
Circular contours and random color fill - you don't have to keep them all the same color via the properties panel in Photoshop
Now you have the circle layers in the layer panel
-
Click on the layer you want to change the color
-
Select the ellipse tool
-
Go to the properties panel
-
Click the fill button and change the color in the shape details section of properties
-
Go to the next shape and so on and change the color to a new color
You may wish to select all the circular shapes and then use the align feature to align them to a single center
Effects etc added to the circular contour artwork such as oil paint effect
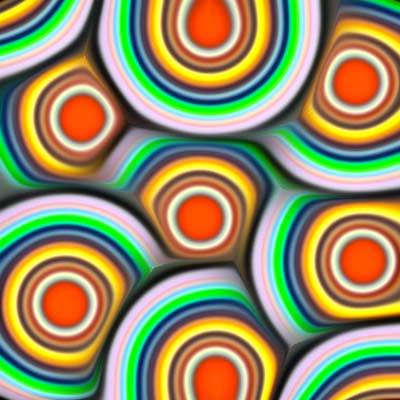
You can always select the Photoshop artwork layers and then go to the layers menu and smart objects and convert the artwork to a smart object. You don't have to select all the layers, only a few of the layers can be selected and turned into a smart object and then effects added to those only (or perhaps create two or more smart objects and add different effects to different sets of layers in Photoshop). As a smart object, you can then add in adjustments and smart filters to change the color as well as add effects such as Analog Efex Pro 2 etc as well as the super powerful color tools such as camera raw filter (you can then also add gradients and highlights to the artwork using that filter). You can also just flatten the layers or perhaps re-position the individual layers to create a zoom design or perhaps duplicate the smart object and create a sea of colorful contours
-
Go to layers panel in Photoshop
-
select layers of the circles
-
go to the layers menu
-
smart objects
-
convert to smart object
-
layer menu
-
duplicate layer
-
filter / image menu and adjustments to re-color etc
-
duplicate again
-
repeat the duplication for as many copies you want
-
shift artwork and re-size
-
Flatten
-
Apply effects such as oil paint