Photoshop Water Ripple Effect Tutorial
graphicxtras > Adobe Photoshop tutorials > Photoshop effects tutorials
How to make a water ripple effect in Photoshop using alpha channels in the channels panel and manipulating that with layer styles such as bevels. The source ripple being a gradient added to the alpha channel. How to use the water color effect as an action and re-apply the effect to any image
** Youtube video tutorial on how to create a water ripple effect in Photoshop and create unusual distortions in your images **1. Setup alpha channel for the water ripple effect
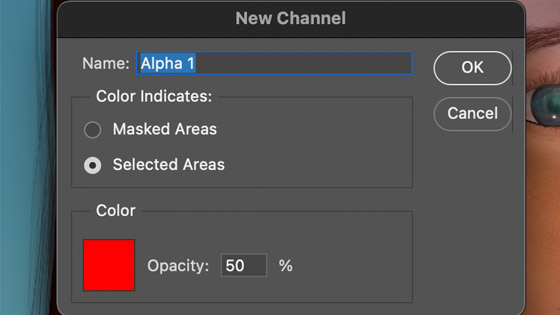
First thing to do is to open an image and then go to the window menu and select the channels. Go to the channels panel and right side menu and new channel and create an alpha channel
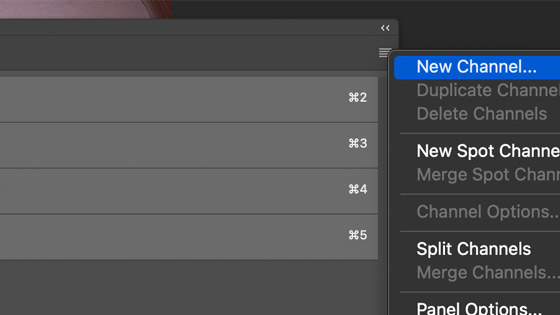
Select the selected area option and give it a name and click OK and now you have the alpha channel, you need to fill it with something such as a gradient
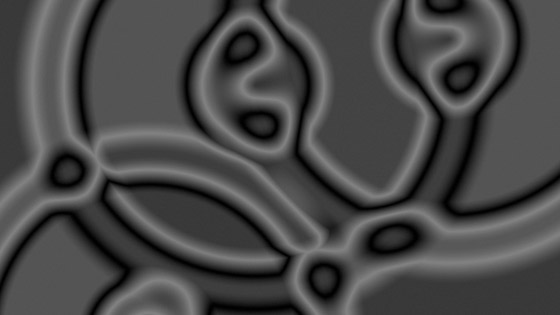
2. Alpha channel fill such as gradient
You can fill the alpha channel with anything. Select the channel. If it does not allow you to access it then I would suggest click on the RGB and then go back to the alpha channel.
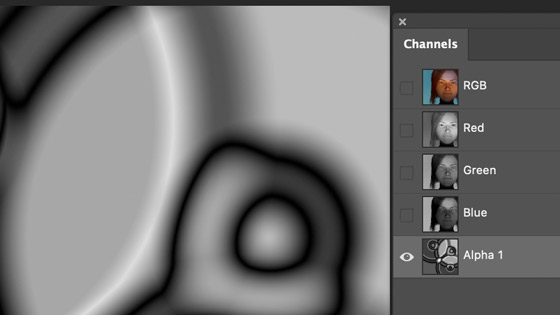
Select the gradient tool etc and difference blending mode and apply a gradient to the alpha channel, all kinds of gray scale designs can be created. You can also if you wish create as many alpha channels as you want and you can then select them via the select menu
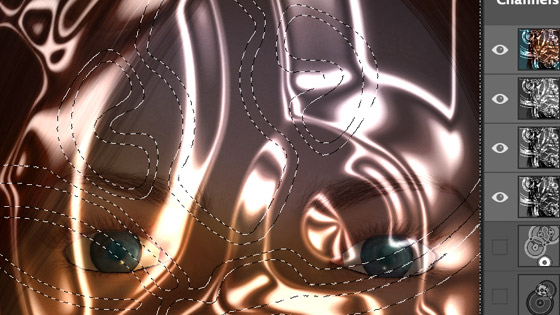
3. Selecting the alpha channel and the associated part of the image
You can then go back to the RGB and go to the select menu and load selection command and display panel and select the alpha 1 as the channel.
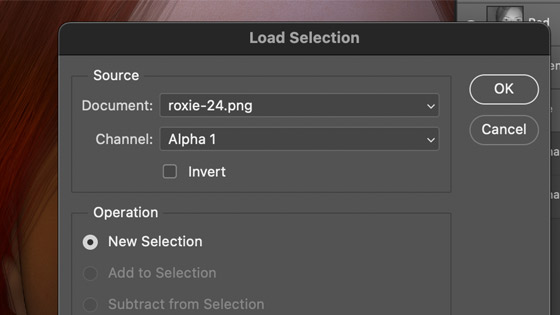
You will now have a selection. Go to the edit menu and copy and edit menu and paste and now you have the design (just the selection) as a new layer. At this point it looks like little has changed.
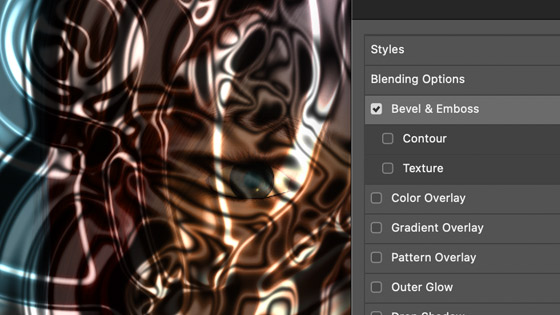
4. Pasted Layer and layer styles for the water ripple
Go to the layer menu and layer style and bevel command and you will see the layer styles panel. Set the style to emboss and manipulate the depth (maybe 800%) and size etc as well as change the angle and also the highlight mode to linear dodge (add) blending mode and also set the gloss contour to the double peak preset
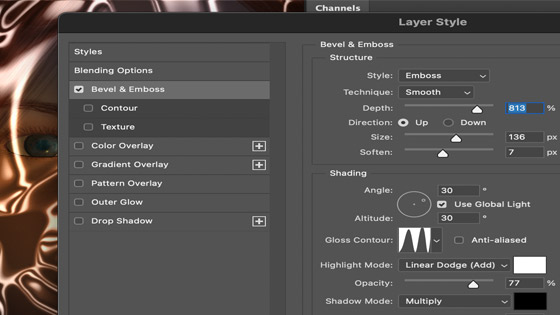
Press return and apply the effect. Go to the layer menu and flatten image
5. Repeat alpha channel for water ripple
Go to the channels panel again and the alpha channel and perhaps clear it using the edit menu and fill and then add a new gradient set to it
Click the RGB entry and then go to the select menu and load selection and re-load the alpha channel
and you will now see the new selection, repeat the copy and paste
6. Copy and paste the layer again and add bevel
Go to the edit menu and copy and then edit menu and paste the new layer and then go to the layer menu and layer style and bevel. Change the angle, size, etc as required.
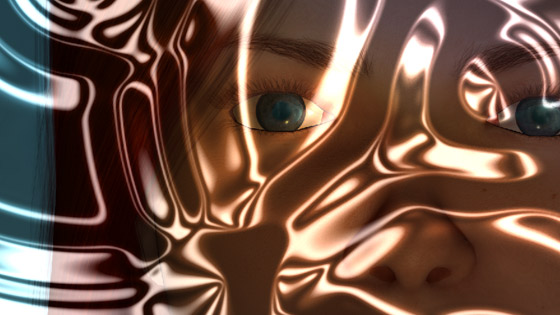
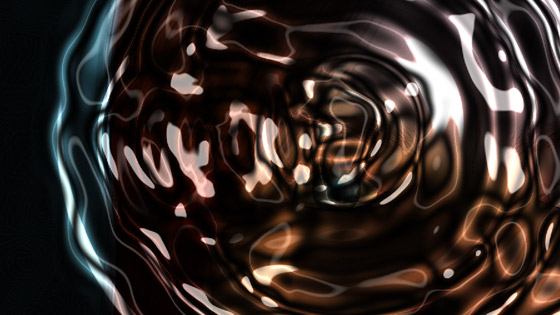
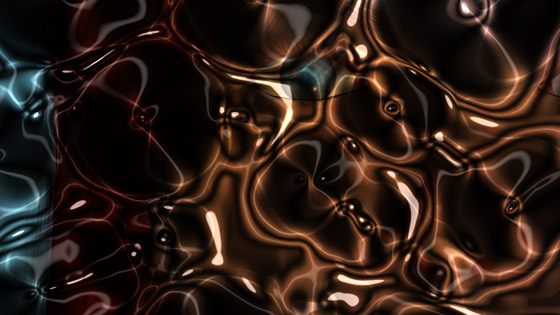
You can repeat this over and over if you wish to create an ever complex water ripple effect
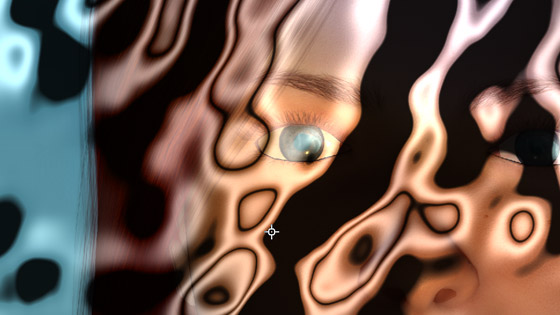
7. Combine with effects such as twirl and wave
You can always go to the alpha channel entry and use the filter commands 'twirl' as well as 'wave' (found in the distort menu) to vary the end result of the alpha channel and therefore the selection and the end result of the style added

Go to the select menu and then load selection with that alpha channel. You can also invert the selection via the select menu and you can also tweak the alpha channel by using adjustments such as brightness and levels.
8. Actions for the water ripple effect
You can also go to the actions panel and set up a recording by clicking the + at the bottom of the panel and record all the steps perhaps leaving out the initial gradient as that means you can vary the source of the action effect otherwise the result will be the same every time the action runs (unless that is what you want) for the water ripple effect
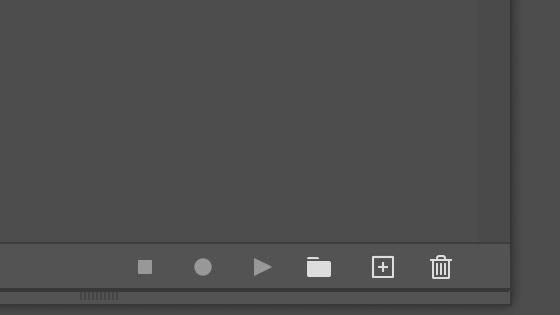
Record all the steps such as the load selection, layer style, copy and paste and flatten etc
Stop the action via the bottom of the actions panel. You can now re-run the action by selecting and pressing play. You can also change the source gradient so the result will vary. Or perhaps use some shapes such as basic circle
and the action quickly applied
Apply it more than once using the action
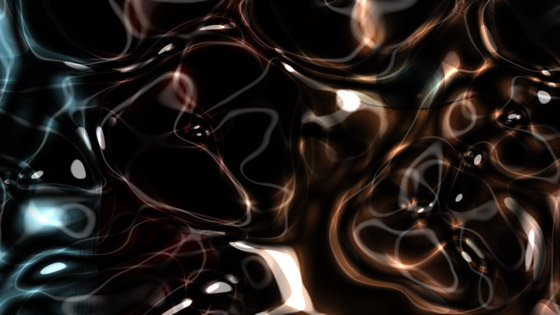
All kinds of weird and wonderful surfaces and water ripple etc designs can be created using a very basic set of shapes and effects,