Photoshop Bas relief filter tutorial
graphicxtras > Adobe Photoshop tutorials > Photoshop filters tutorials
Tutorial on the Photoshop bas relief filter and how to create amazing gradients. Bas relief filter is a powerful tool to be applied to any image but use it with an empty image and it can be used to create very basic gradients in seconds and much more. 1000s and 1000s of amazing designs can be created using the bas relief filter in Photoshop, how to re-use with layers and actions, how to create stripes etc
** Youtube video tutorial on how to use the bas relief filter in Photoshop, the filter is found in the Photoshop filter gallery and can be used to create super colorful imagery **
1. Basic bas relief gradient creation
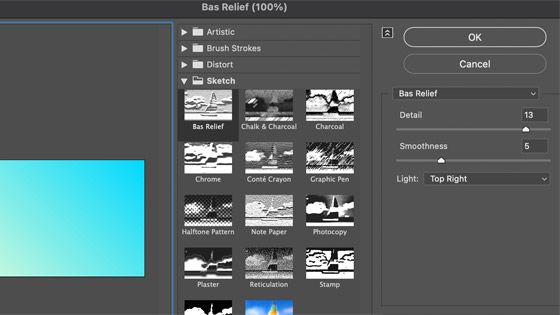
New document and set the foreground to black and background to white for the initial bas relief effect and gradient, go to the filter menu and then filter gallery and go to the category 'sketch' and then select the bas relief filter
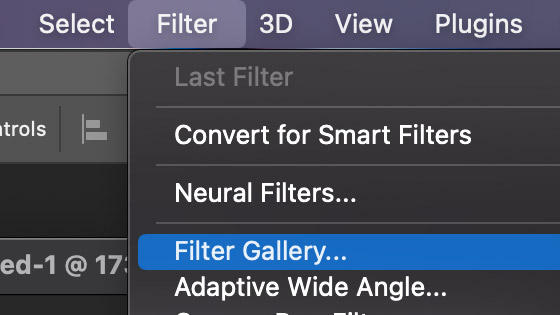
Set the detail 1 and smoothness 15, light (any direction), click OK and there you have a gradient. Not much different from a normal gradient but still a gradient.

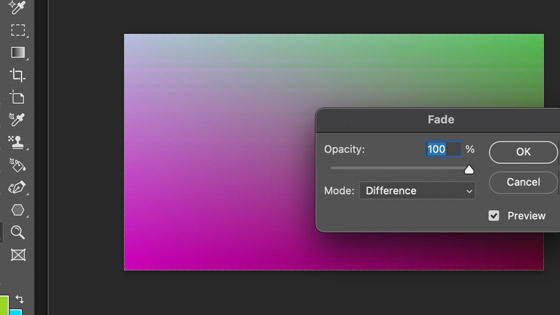
2. Create another bas relief gradient
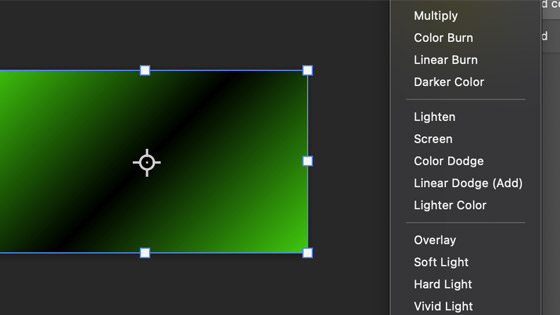
To create another gradient, change the foreground and background color if you wish, go back into the filter gallery and bas relief and change the light direction and click OK and then edit menu and fade and set mode to overlay or difference etc (you will notice some banding but a blur will blur that away) and edit menu and fade
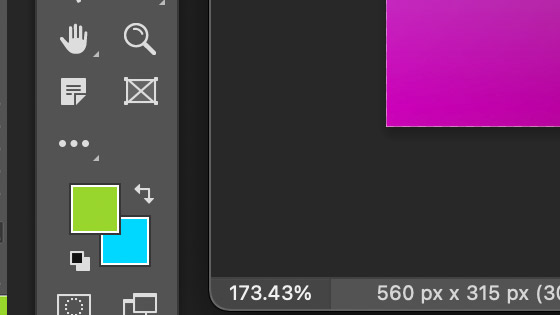
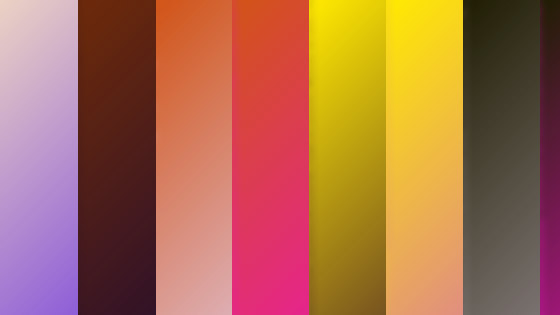
The bas relief filter uses the foreground and background colors in the Photoshop toolbar to generate the gradient. The gradients can be any set of two colors.
You can apply the bas relief filter to create many different combinations of gradients using that method.
3. Using Bas Relief and gradients on layers and blending
Another approach is to use layers and then apply the bas relief to a layer and create a gradient. You can repeat this multiple times. The gradient layer can then be blended with multiple different colorful gradient bas relief layers in Photoshop.
You can use any of the blending modes
4. Selections and Bas Relief and gradients
You can do the same with selections and the bas relief gradient applied to that. You can also use selections to create quadrant gradients and half image gradients with the bas relief or stripe designs with selections using the rectangular marquee tool.
If you overlap the selections and then apply the bas relief to create the gradients then you will see a relief appear in the end result in Photoshop.
To create a colorful gradient stripes design, create a thin selection strip using the rectangular marquee and then set the foreground and background and then apply the bas relief to create the gradient. Move the selection using the marquee and place adjacent to the first strip and then change the foreground and background and then apply the bas relief gradient again and repeat this with different combos of foreground / backgrounds
5. Quality issues
The quality will get worse and worse as you apply the bas relief more and more. You can now repeat the same application of the bas relief with a new gradient and changing of the foreground and background and change the direction of light if you wish
6. You can also use smart objects and the bas relief as a smart filter and Gradients
Use marquee tool and select a circle and copy and paste, set the foreground and background color, layer menu and convert to smart object, apply the bas relief via the filter gallery as before with a certain light direction
You can combine multiple smart object layers with bas relief gradients.
7. Bas relief / gradient smart filter for a custom shape
You can add the bas relief gradient effect to custom shapes. Goto the custom shapes tool and then select a shape layer (top left) and then select a shape. Draw the custom shape on the current layer / art board and then go to the layer menu and smart objects and convert to smart object and then go to the filter menu and filter gallery and sketch and bas relief and create the gradient using the current foreground and background colors.

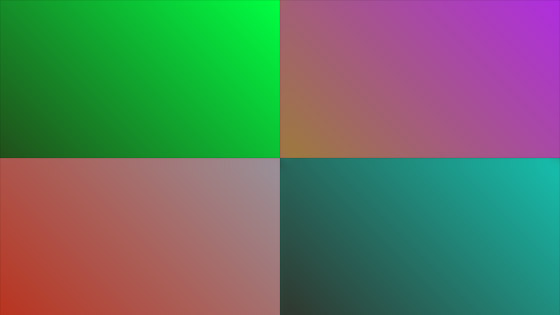
8. Quadrant Bas Relief Gradients
Create a selection for the entire image (select menu and select all) and then go to the select menu and transform selection and width and height and 50% for each. Drag the selection to the top left. Set the foreground and background color and then apply the bas relief to create a gradient in that selection. Go to the rectangular marquee and drag to the top right and change the colors of the foreground and background and apply the bas relief gradient again. Repeat this with the bottom left and the bottom right
9. Actions and bas relief gradient
You can save the bas relief / gradient effect to the actions panel. Go to the actions in the window menu and then click the record (+) at the bottom of the panel and give it a name etc and then run through the bas relief etc