Photoshop Displace Filter Tutorial
graphicxtras > Adobe Photoshop tutorials > Photoshop filters tutorials
How to use the Displace filter and displacement maps in Photoshop tutorial, how to use the displace filter with channels, fades, smart filters, combined and more
** Youtube video tutorial on how to use the powerful displace filter with displacement maps to create all kinds of weird and wonderful distortions and texture effects in Photoshop **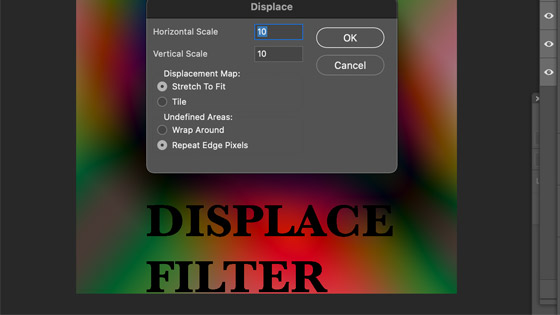
1. Where is the displace filter
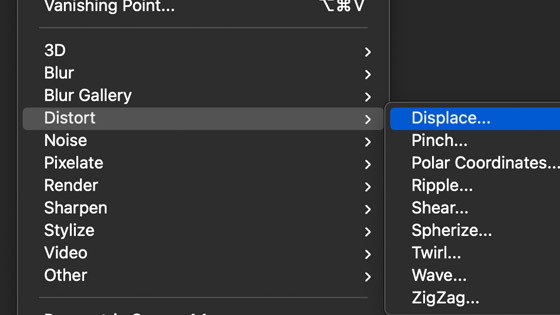
You can find the displace filter in the distort category in the filters menu.
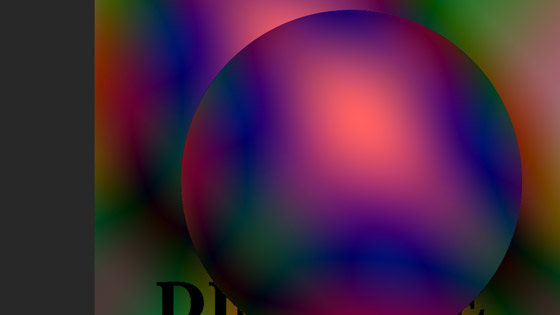
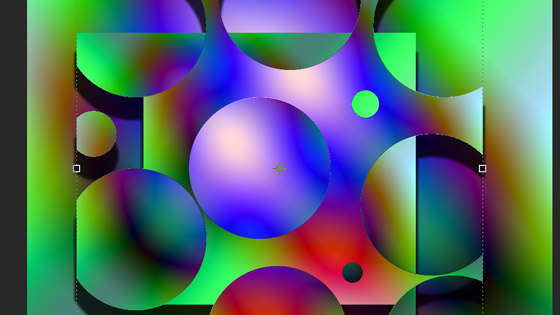
2. What does the displace filter do
It moves pixels depending on the underlying source displacement map, and you can choose a displacement PSD files to create a strong or subtle shift of those pixels in any image.
3. Displace filter panels - There are two steps
You can use PSD files as displacement maps. Access the displacement map PSD files via the filter menu and distort and displace. You can set the value to be positive or negative in the scale to change the direction of the effect
To use displacement maps, goto the Filter menu and distort category and displace filter and enter the horizontal scale, 10% or 20% etc or so for an extreme setting of 100% etc to really blast the image either up or down or diagonally. You can also set the 'Stretch to fit' (matching the source map to the image) or use tile where the map is tiled, though the result may not be what you want depending on how seamless the design is. You can also wrap around or use the repeat, personally, I always use the wrap around where the pixels from are moved from side to side
The filter is slightly odd in that there is another panel after the first requesting a PSD file and you have to select one or cancel.
4. PSD is the file format
The displacement maps are standard PSD files. They can be made from anything, images, type etc but you can also use displacement maps via patterns or textures.

You can convert images from PNG or JPG format to PSD via Photoshop or use another application to run the conversion, there are many on-line converters of file formats available.
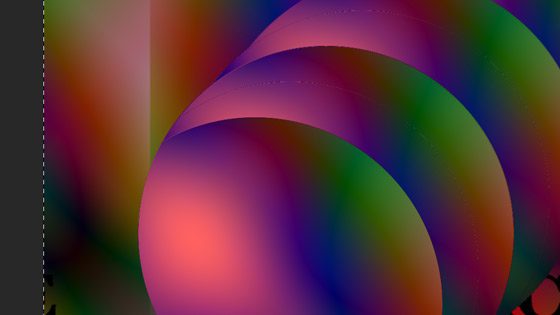
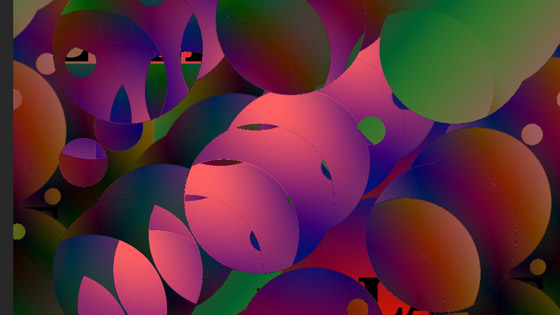
5. Use the displace filter multiple times for even more amazing effects
The displace filter is one of those tools that probably works best when applied multiple times. One application of the displacement maps and displace filter can look a little limited, apply it again and the magic really happens and even better, apply the magic with the displace filter combined with other filters such as noise or oil paint and you will see the tool in many new ways. You can also combine the displacement maps with other resources as well (they are not cast in stone) such as adding addition artworks to the design (perhaps intermixed with effects) such as brush strokes
6. Use displace filter with layers
As with many filters, I find that the filters work best with a layer so before you use the filter, simply duplicate the current layer via the layer menu. Apply the displace filter to that layer and then use the layer menu and the blending modes to blend with the original image such as select blending mode of darken or multiply etc
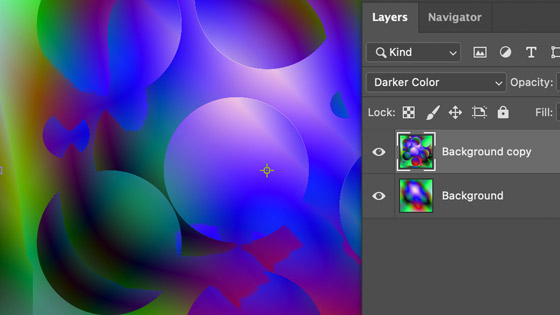
Open an image and go to the layer menu and duplicate layer (perhaps more than once if you want multiple layers to blend) and then go to the filter menu and distort category and select the displace filter and set the scale, repeat etc as well as the PSD file to use to modify the pixels. You can then use the blending modes in the layers panel to mix the designs
Another option would be to use the same design but with the top layer reduced in size and the displace filter applied to that and you will then get an interesting transparency effect and you can then add layer effects / styles such as bevels and shadows
7. Displace filter and smart objects
A key thing for me is that the displace filter can be used with Photoshop smart objects and that means instead of just applying the effect and that is that, you can use it but at the same time you can decide that you don't want it or try different settings and so on. It is a pity that you can't select the displace entry and duplicate and duplicate (so adding 10 or so filter entries), you have to manually create them
Select a layer and layer menu and smart objects and convert (to smart object) and then apply a displace filter and then apply another displace filter and so on. Add adjustments to smart objects to re-color the design as well as use additional smart filters
You can also combine multiple smart filters with the smart object and also combine those effects with adjustments and layer effects to create a truly awesome effect. You can also bundle the whole thing up in a new smart object and save the result to the CC libraries.
You can also combine the displacement maps for use with the Photoshop displace filter with patterns but central to the whole thing is the PSD file (unless Adobe change their mind with the filter and allow for multiple other sources such as ones from CC libraries and PNG files as well).
8. Displace filter on color channels - you don't have to use the displacements just in RGB but in the red channel etc

The displace filter can be used with color channels, separate color channels.
Go to the Channels panel which is found via the window menu and select red channel and then goto the displace filter as normal and use a number of settings say 10% for the scale. Go to the green channel and then use perhaps 20% and then to the blue channel and then use 30%. The end result will be an unusual jarring colorful image
9. Modifying displacement maps - they can be modified, they are not textures cast in stone
You can also open the displacement maps PSD files and apply other effects to them such as blurs etc. If you want to avoid the seams then use masks / selections etc to control the effect on the edge. Or perhaps use brushes on the displacement map and only modify the center of the work. Another option is to use the edit menu and define pattern. You can then re-size the document, perhaps make it 10 times bigger and then fill that new document with patterns and they will still be seamless. You can then save that new file as a PSD file and use that with the displace filter.
Open PSD file and edit menu and define pattern and layer menu in Photoshop and then new fill layer and pattern and select a pattern from your pattern presets and then set the scale to 25% and flatten and use twirl or another filter and then save as PSD format. It should be noted that some filters will damage the edge of an image and the resulting displace file will not be seamless
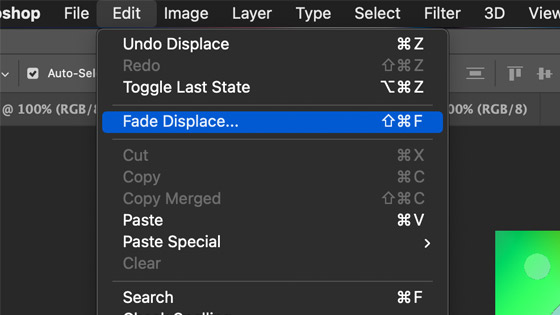
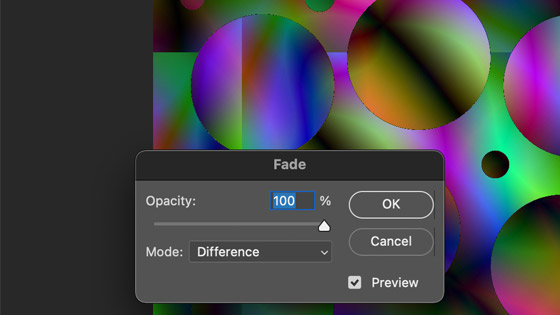
10. Fade the displace filter
You can apply the effect and distort the image but you can always fade the result. Go to the edit menu and fade command and then use a lower opacity as well as a different blending mode and click OK