Photoshop vertical gradients tutorial
graphicxtras > Adobe Photoshop tutorials > Photoshop gradients tutorials
** Youtube video tutorial on how to create vertical gradient designs in Photoshop **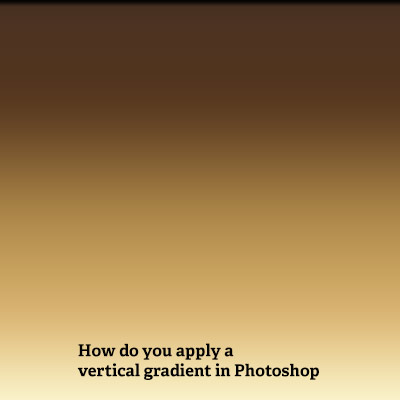
How to do you add / apply a vertical gradient in Photoshop ?
Go to the gradient tool and the gradient panel. Select a gradient. Select a gradient style of "linear".
Click top of the image and drag and draw a gradient and hold the shift key down. Release mouse at the bottom of the image. You can fill layers with vertical gradients by setting the style to linear and gradient angle to 90 degrees.
You can also apply vertical gradients to images by using the gradient tool in Photoshop by applying the gradient up and down or down and up (hold shift key down). You can also fill selections with vertical gradients by using the gradient tool and holding the shift key. You can also apply vertical gradients to type via the styles panel and gradient overlay. This tutorial shows a number of ways to apply a vertical gradient to different artworks in Photoshop
-
Gradient tool
-
Goto to the gradient panel / dropdown and select a gradient
-
Set gradient style to linear
-
Click top of the image
-
Drag down and hold shift key down
-
Release mouse at bottom
You can, of course, have a different origin point (perhaps 200 pixels from top) and release at any point before the bottom. The gradient can be a solid all color gradient with no transparency. It could be made of many opacity stops. You can start from the bottom up as well. The key thing is the shift key and up or down to apply a vertical gradient in Photoshop
Apply Vertical gradients on a layer in Photoshop
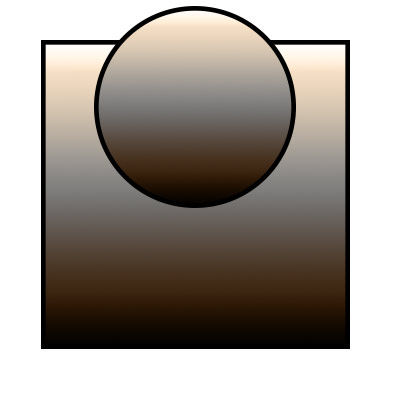
You can use any Photoshop shape tool such as custom shapes or rectangle shapes etc, as long as you create a layer (it can be an image as well etc)
-
Go to the rectangle tool
-
Create a rectangle
-
Set to shape layer option
-
Set fill color to gradient
-
Select a gradient from dropdown panel
-
Set style to linear
-
Set angle to 90 degrees
-
Click the reverse or not for the gradient
Apply a vertical gradient to an image
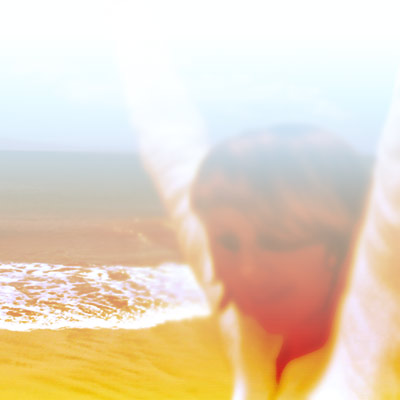
There are 1000s of different gradients. There are trillions of images. Clearly vertical gradients can be applied to any image in countless ways. The example below is but one
-
Go to the gradient tool
-
Go to the gradiend dropdown
-
Select a gradient set from right side menu (select Photographic toning)
-
Set the gradient style to vertical
-
Set the blending mode to screen
-
Apply gradient from top to bottom + hold shift key
-
Release mouse
You can use the vertical gradient to create all kinds of color effects with any image such as the image on the right. The applied vertical gradient was black to blue to white and applied upwards using screen blending mode in Photoshop
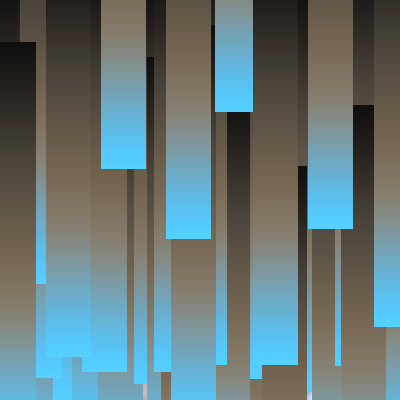
Apply a vertical gradient to a selection
-
Select the rectangular marquee tool
-
Create a long and thin selection from top to bottom
-
Go to the gradient tool
-
Select a gradient
-
Select linear style
-
Apply gradient from top to bottom and hold shift key to constrain vertical gradient
-
Move tool
-
Hold down alt / option and duplicate and move selection
-
Repeat numerous times and fill design with gradient
-
Select menu and deselect
Apply a vertical gradient to type

-
Select type tool
-
Select font / size etc
-
Select move tool
-
Layer menu
-
Layer style
-
Gradient overlay
-
Select gradient
-
Gradient style linear
-
Set angle to 90
-
Move the gradient up and down on the type itself
You can use any gradient with type by using layer styles. You can shift the gradient origin as required in Photoshop