Adobe Fuse / Photoshop Figures Tutorial
graphicxtras > Adobe Photoshop tutorials > Photoshop how to tutorials
** Youtube video tutorial on how to use models / figures generated in Adobe Fuse in Photoshop **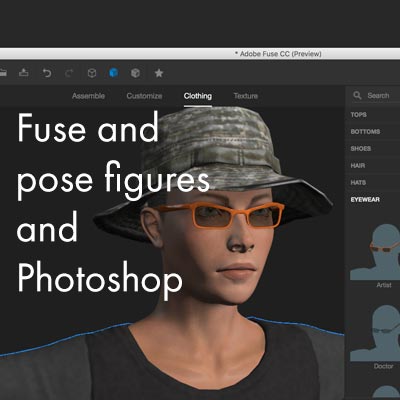
Learn how to use the new Adobe Fuse to create amazing Posed figures for use in Photoshop.
Adobe Fuse is a new preview technology in CC and is a great new feature that means you don't have to create human / people designs via Poser and Daz. You can create human figures, faces, fantasy figures, action figures, exciting dynamic bodies in seconds using Adobe Fuse.
You can create super easy to use animations in seconds using Adobe Fuse and the results of the human figure animations can be imported into Photoshop and used with the 3D features. You can use Adobe Fuse to change the clothes as well as add expressions and also add glasses and hats and other accessories to many different human (as well as fantasy) figures. Adobe Fuse results can then be stored in the CC libraries. This tutorial shows many of the powerful features of Adobe fuse such as how to export the results of the posed figures to Photoshop, how to animate, how to add clothes etc. Adobe fuse is a preview technology but it is a really useful addition to the creative cloud and the content can be then added to Photoshop as layers, as designs, as backgrounds, as unique elements of your work. All you have to do is decide which man or woman or creature to use and create.
Basic / Start of using Adobe ® Fuse 3D application (part of the creative cloud)
3D animation has always been in CC in some form and another such as in Photoshop but the new bit is the joining of Fuse via the CC library into Photoshop and accessing the pose-able models with animations. To start with it, it does require the use of Fuse and CC libraries and then getting the result into PS. It is not something solely in Photoshop.
This tutorial is not a massive study of all the possible ways of using the Fuse into PS but it is a basic approach as set at the moment (as it is a preview, perhaps the whole process will be even more streamlined shortly). The image below is one of the models with the default setup with no rendering
Technology Previews and CC 3D animations in Photoshop
Set the preference for the enable CC 3D animations to on in the technology preview and restart PS (probably best)
Fuse application as part of the CC subscription
Start Fuse up. If you don't have Fuse then you will have to download it via the CC subscription. Once you have the tool, start it up. If you have used Daz Studio or Poser Pro etc then you will have seen similar 3D models such as men and women as well as a few monsters in the mix. Not sure why they don't have dogs, cats, old people, youngsters etc.
Basic Setup in Adobe Fuse for your 3D model such as torso and leg and arm and head
Anyway, will see the basic setup of a head as well as torso and leg and arm and the key thing is to click on one of the items in each category though I guess you could add a character with four heads (not sure that feature will be in there any time soon).
This is all in the assemble section and you can create a variety of different artworks just with this setup though I assume there will be more available (perhaps to buy) such as in Poser with the thousands of additional models. You can move and rotate the figure in the assemble room. Once you have the model more or less in the arm / head etc that you want you can then move on to the customize and other sections.
In customize section, you can find a whole range of different settings which you can tweak such as the size of the arm, teeth, head, skull etc. You can also randomize all but the results can be pretty weird at times.
Not sure why they don't have a randomize in the assemble section as well.
Once you have more or less setup the body then you can add some clothes (if you want).
Personally, in SM Poser, I find this the hardest bit and I would love to see an easy feature in Poser like fuse, simple click and add a shirt to a model - in most cases I am not too fussed about the shirt or trousers (or pants) but they are handy to add otherwise you just have to use head shots all the time to avoid any nudity issues.
Clothes and Adobe Fuse - clothes can be added quickly to your model and in many 100s of combinations
The clothes are fairly limited but OK, would love to see more period items etc but I guess at some point more will be added (again via Mixmo etc) Some tweaking is required with the clothes as sometimes the hair is too big for the hats etc.
You can make all kinds of weird combinations of clothes as in life such as adding gas masks and beanie hats and more. Select the object if you don't want to have a hat and then go to the edit menu and delete (I wish there was a preset section with no hat). You can also add some textures and there are a number of options such as edge wear, texture resolutions, color, creases, roughness etc and all worthy of more exploration but the basic use does mean you can change the color of the skirt and shirt etc as well as add creases etc. It is best to zoom in and select the individual items of clothing as sometimes the results can be hard to see with the model in the distance.
The set of defaults are pretty good and you can turn your shirt into metal and different patterns and much more and each have their owl selections of settings so a lot more to explore. Sadly there is no randomization feature here as you could just play havoc with your model's clothes using this feature.
Skin / Hair and Fuse - you can also add beauty marks and skin variations to your fuse / Photoshop models
There are also a number of settings for the skin (100s of options such as beauty marks and skin variation lightness etc) as well as teeth color and also a load of options for the hair and even an option for the metalness of the skin.
If you love messing around with options then this will be heaven for you though I wish I could just add metal / fabrics to the skin as well as well as the hair etc. Now you have your complete model.
CC Libraries and saving fuse files for use in Photoshop
You can now save it to CC libraries and just select a library for your new character. You can also save it to Mixmo as well. On saving it to the library you will see a statement saying that the OBJ has been exported and also the result has been sent to the Adobe Server. I would love to see a little more control here and perhaps a little bit of a blurb about the actual process involved and also a way to send only the head perhaps, as perhaps that is all I want in my image.
Photoshop side of things - now you have your Fuse model, you can use it in Photoshop
Create a new document and go to the CC library and go to the correct library (I generally stick to the very boring 'Fuse 1' and 'Fuse 2' but as I add items I guess I will stretch it to things such as 'head 1' or 'Kate 1' etc. and select the item and drag to the document.
Personally, I find the default setup for the 3D very odd but then I am not a super 3D user and I would just love to see the default setting to be not what seems to be a silhouette where you then have to struggle to get some lighting to see the face again. Display the 3D panel and then go to the infinite light line. Go back to the properties panel and select one of the presets (if you are great with 3D then I guess you will know how to add lights etc and manipulate them).
Choose the default lights.
Click the 'hair_skeleton' in the 3D panel and you will see the properties connect with Fuse and add a load of animations.
I am certain they are all useful such as standard t-pose and I am certain others can be added at a later point. You can also setup the properties via the right side menu to have poses only (and not animations or both). If you select poses only, the properties will show poses in body section and not animations.
Faces and Adobe Fuse - you can change the settings for the emotions of the face in 100s of ways
There is a face section in the panel as well and you can choose a range of expressions such as 'laughing softly'. It is quite possible that the settings will be different for different users (no idea) depending on your setup with Mixmo (you will have to check Adobe's site for that). You can set the strength of the smile and other properties as well as rotate the head or have the head nod up and down. You can continue to change the camera, change the lights, add backgrounds, add animations (as described).
Snapshots and saving the model details in a second to your history panel
The animations also mean you can have a snapshot at a particular point so if you have a model walking towards the camera you can move the timeline playhead and capture a particular mood at a particular time and the animation feature throws even more ways to tweak things as there are many different options in the video timeline to change the style, position, 3D lights, 3D camera position, 3D materials etc.
There are a lot of articles about those kinds of things in a lot more detail than I could ever go into.
The next thing to do is just flatten the image/ layer or perhaps you may wish to render the artwork to a finer degree or perhaps turn it into a sketch render or perhaps save the model as an OBJ file or 3D Earth or DAE format or perhaps save it as a layer and combine with the same 3D model or different model and perhaps effects to the mix (which sort of makes the render a little redundant and perhaps also mix in with backgrounds and mists and light and more from other 3D apps).
Mixing and fusing adjustments and other effects with the model - turn your Fuse model into an oil painting in seconds
Personally, I am enjoy using the 3D feature with adjustments such as black and white as well as combining with oil paint and camera raw as below but then that is me, I know others prefer the more hyper-realistic features of 3D (each to their own)
Adobe Fuse / Illustrator - you can use it in Adobe Illustrator as well
Weirdly, if you go to the CC libraries in Adobe Illustrator, the fuse model is no available. Not sure why it can't be just imported in as an image file but I guess it is not as simple as all that as the model includes a a lot of animations and poses etc and is not just a standard image. I really hope that the app does get some access to be able to choose to bring in a snapshot of the model with the animations / poses available purely for a snapshot purpose.
Still, the obvious work around is just to work the model in Photoshop and then flatten it and add the result to the CC library and then import that via the CC library into Illustrator and then use it as a brush stroke or symbol or perhaps use with image trace (you will have remove the clipping mask before you can trace) and use tools such as the poster edge and edit color adjust color balance to create illustrations.
Final thoughts and Adobe Fuse
Will it ever replace Poser for me ?? perhaps not but it is a really nice starting point and an easy way of bringing 3D figures and animations and poses into Photoshop. It should be noted that the Adobe Fuse does say that it is a limited time preview on Creative cloud.