Photoshop Dilative Symmetry Patterns Tutorial
graphicxtras > Adobe Photoshop tutorials > Photoshop patterns tutorials
** Youtube video tutorial on how to use the fill pattern script 'symmetry' and the powerful dilative symmetry option to create truly awesome whirlpool spinning designs in seconds **1. Where is the dilative symmetry feature
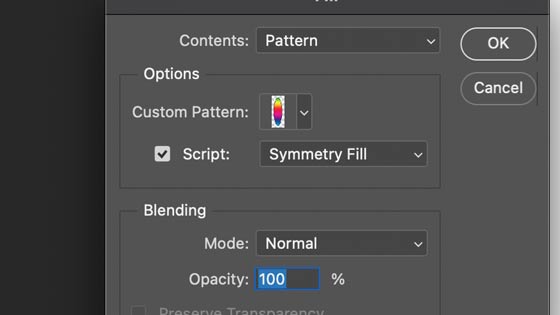
The feature is available via the edit menu in the fill command and pattern content and script 'symmetry'
2. Start point for dilative symmetry pattern in Photoshop
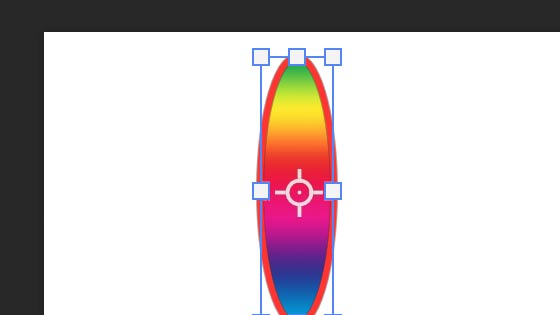
The start point for the dilative symmetry pattern is a source pattern and this can be anything such as an image, text, shapes, chunks of an image and much more.
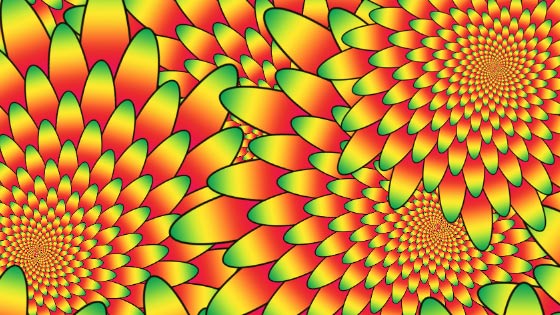
A good start point is a shape, a vector shape as it can be any size. You may wish to have a pattern of 1000 x 1000 or perhaps a pattern of 100 x 100, well, the vector shape is the ideal resource. You can fill the vector shape with gradients as well as patterns and also solid colors. Select say the custom shape tool or ellipse tool and set the option to a 'shape layer' and then apply it. Avoid going over the edges unless you want a sharp line in your design.
3. Define the pattern
You can define it as a pattern now but personally think it works better if the background is removed so you have transparency, another reason for going for the vector shape layer approach.
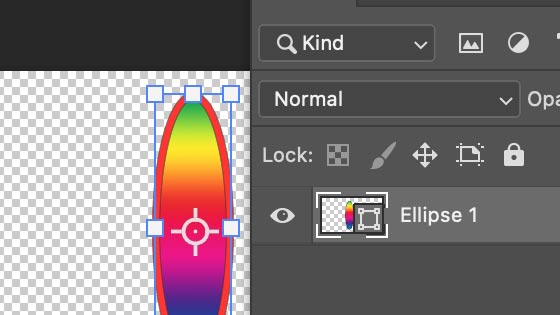
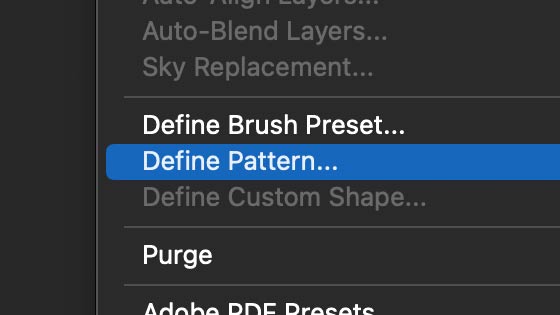
Select the entire image or close to the actual design, I prefer the latter so use the rectangular marquee tool to select the object. You can also add a layer style if you want to add some depth to the image, such as a drop shadow via the layer menu and layer styles and drop shadow. Now, after all that, define as a pattern via the edit menu define pattern command
4. Add a dilative symmetry pattern design
You have the pattern stored away in your preset library. Go and create another document, perhaps three or four times the size of the pattern document and create a new layer via the new layer command. Go to the edit menu and fill.
Choose pattern as the contents and select the pattern you just created from the presets and then set the script check box to ON and then set to symmetry fill and click OK. Another panel will then appear (it is a pity that they went for a two panel approach)
5. Symmetry type in Photoshop
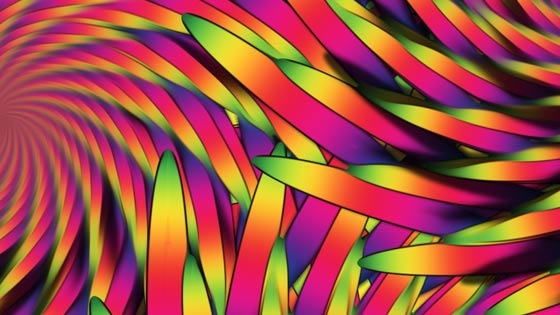
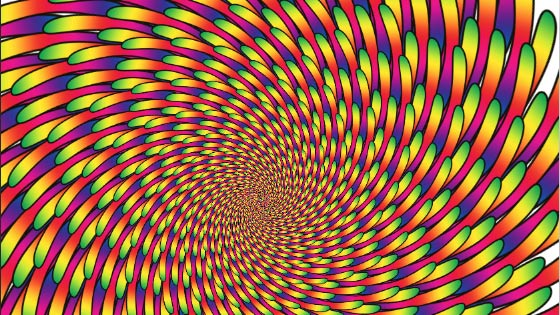
The next panel does not have the pattern preset so if you have chosen the wrong one, you will have to just cancel and then re-try. Set the scale, set the width / height as well as randomization for the colors etc. Set the symmetry type to '7 Dilative rotation symmetry'
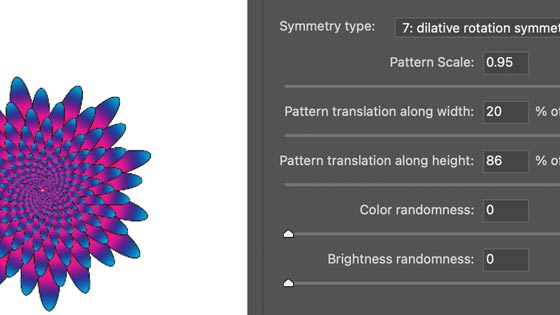
You can vary the scale. The preview is not much of a help as the preview may show the design is too big or too small and you may go over the edge of the document (not that is an issue if you only want to use it as a single layer). Annoyingly the scale only goes to 1.25, I am really surprised they have never increased that maximum value. You can also add effects to the image such as stylize oil paint
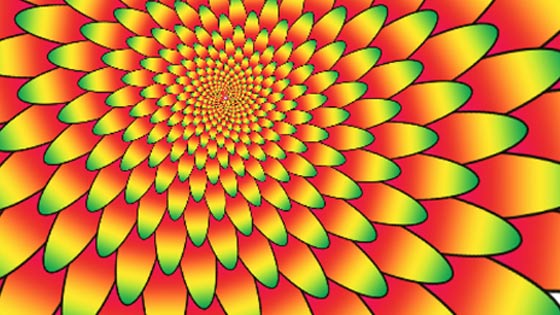
You can change the result very quickly by modifying the pattern translation along width and height and there are a number of different combinations that can result in a radically different image (it is a pity that there is no randomizer feature here)
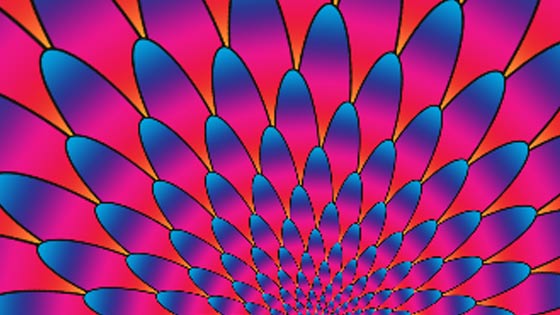
The design can be applied to a layer and as a layer the artwork can be duplicated and fill the entire screen with the symmetry artwork as well as re-sized and rotated.
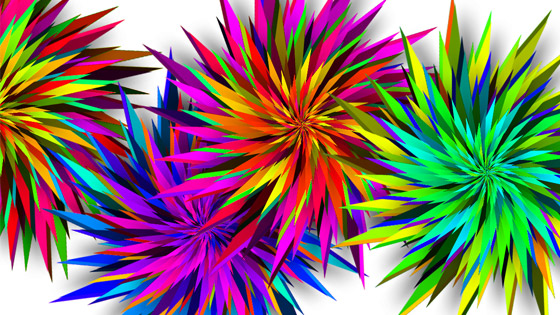
6. Change the source design for the symmetry pattern
You can create millions of different designs even from a slight variant of a basic circle such as making the circle thinner and distorting it slightly using the direct selection tool and then perhaps having multiples of that shape and then define that as a pattern via the edit menu. Again, delete the background otherwise you will have the white background included in your pattern.

The problem with this tool is always trying to match the size of the source pattern to the end result. If you have a very tiny design then the end result may not be very big. Too big a source design and you will end up with the dilative symmetry core and not the outer part of the design
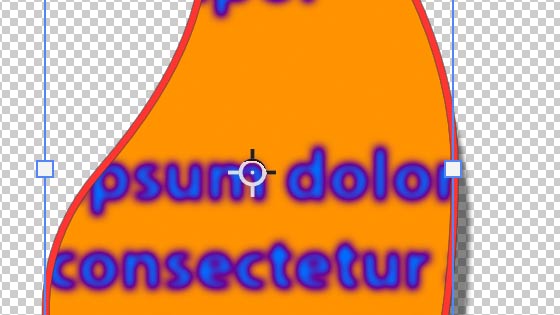
7. Type and dilative symmetry
You don't need to use a colorful gradient fill, it could as easily be a shape filled with type used as a source. The shape can be modified by using the direct selection tool and layer styles such as color overlays can be added. The type can be as is or blurred, etc
Vary the width and height and pattern scale in the dilative symmetry to create many different type filled designs.

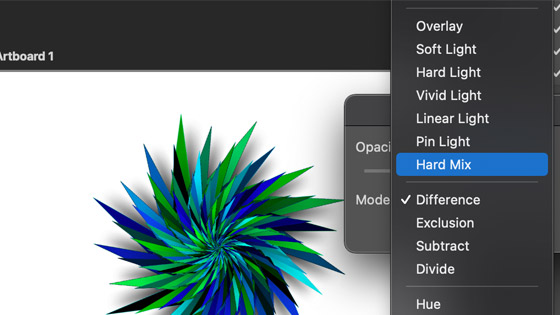
8. Blending modes and opacity and dilative symmetry
You can also use opacity and blending modes when you create and apply your fill with the dilative symmetry. You can use difference etc to great effect as well as opacity to create a more painted design. You can also combine with filters such as oil paint

9. Multiple applies of the fill
You can also combine multiple applies of the fill command with the different blending modes and then combine the end result with an adjustment such as a vibrance,

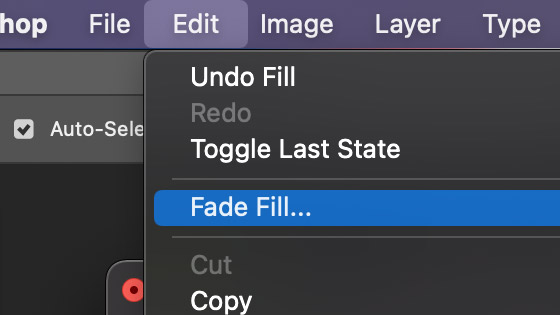
10. Fade the dilative symmetry
You can apply the fill and then go to the edit menu and fade the fill. You can change the opacity and you can also change blending mode for the fade
11. Dilative symmetry automate / actions
You can also record the steps for the dilative symmetry in an action. Goto the window menu and actions and then start the recording (the little +) and then capture the steps for creating a design. You can then repeat this action at a later time or just use the action to quickly re-apply the effect
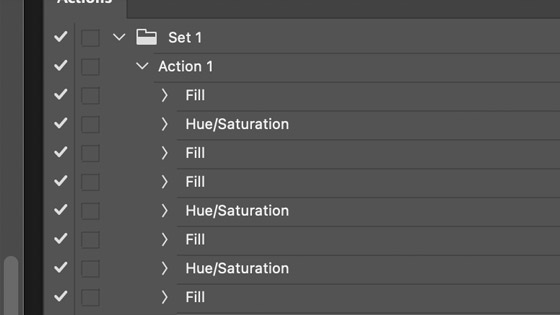
You can then re-apply the action over and over, perhaps use on different layers,combine with other effects such as blurs and much more
You can also apply the effect to a set of folders if you wish via the file menu and automate and batch and process the symmetry effect on a bunch of different files.