Photoshop Place Along Path Patterns Tutorial
graphicxtras > Adobe Photoshop tutorials > Photoshop patterns tutorials
** Youtube video tutorial on how to create amazing pattern designs via the fill command and place along path pattern (script) in Photoshop **
How to use paths (custom shapes as well as any other layers) in Photoshop with the fill command 'Place along path' to create amazing pattern designs, layers, abstract art and more.
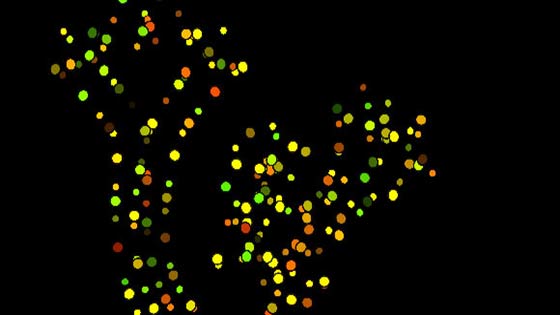
Start with the pattern, you need a pattern and it is probably going to be best to create on with transparency as the pattern script just applies them as dabs and if there is no transparency, the result will be just square blocks. Go to a new document and create with transparency. Create your pattern with brush strokes or shapes etc. Use the rectangular marquee tool and select that image and then use the edit menu and define pattern command.
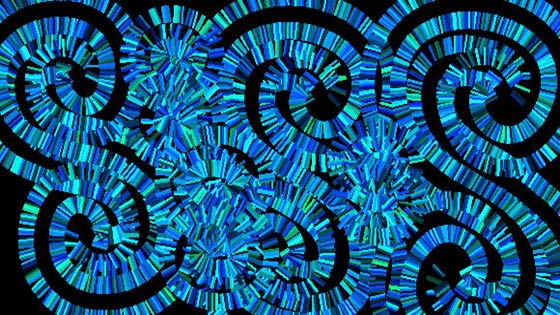
Once you have done that, go to the custom shapes tool found in the tools bar. Go to the top left and set the shape / path / pixel options to 'path'. Select a custom shape to use for the place along path.
Apply the shape to the current document / layer. You can also transform the path as well as use the various path tools such as curvature to manipulate the design.
You can also apply the path multiple times and if you look in the paths panel (found in the window menu) then you will see them all combined (as long as the combine paths option is on in the path options section along the top bar) so you can create quite complex paths from a very basic custom shape and then that design can be used with the place along path fill via the edit menu and fill command.
To actually generate the fill, go to the edit menu and fill command and select custom pattern to your pattern and then set the script to ON and set the script to place along path. Click the OK button and that will take you to another panel (this is a weird feature, it really should all be one single panel) and you can then set the scale, I generally go for small, as well as spacing which can be set positive and negative as well angle of path (depends on the patterns) as well as the distance from path as well as scale progression (shrinks or increases in size) as well as the random color features. The preview rarely matches the end result. Click OK
You can also use the custom shapes as paths with place along paths with selections. Use one of the selection tools or menu commands to create your selection such as a rectangular selection and then use the edit menu and fill and apply and only that area will be filled with the path's fill.
You can also use the place along path fill feature with custom shapes in channels, go to the channels panel and select the red channel and apply the fill, go to the green channel and then apply the place along path but change the settings and so on.
You can also use the pattern preview with the place along path and custom shapes. Set the pattern preview to on via the view menu. Apply the edit menu fill command and you will see the design. I would have to say it does not work perfectly but it can be used to a certain degree.