Photoshop pyramid pattern tutorial
graphicxtras > Adobe Photoshop tutorials > Photoshop patterns tutorials
** Youtube video tutorial on how to create a pyramid pattern in Photoshop **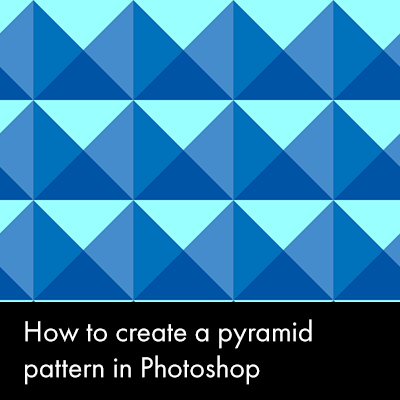
How to create a pyramid pattern in Photoshop tutorial.
As with many things with Photoshop, there are probably millions of ways of doing this - this is just one way.
-
Create a document 600 x 600 etc
-
Set up some smart guides via the view menu and new guide layout.
-
Set to 2 and 2 guides.
-
View menu
-
Snap to on
-
Set the snap to only guides
-
Next step, using pen tool to create the vector designs
Creating a pyramid - Anchor points for the pyramid patterns for Adobe Photoshop
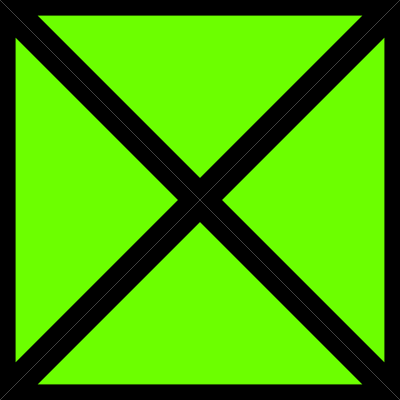
You need to create four triangles with four different triangles. They don't have to be equal triangles but it works best when the corner points at least match for seamless reasons.
-
1. The center can be in the center (mine generally are) but you can also set the guides to have them slightly shifted from the center. Of course, other combinations of guides can be set up as well to create other combinations of anchor points. Select the pen tool in the Photoshop toolbar
-
2. Set the pen tool to shape option
-
3. Click the top left corner with the pen tool and then go to the bottom left corner and then click and then go to the center and then back to the start point to close.
-
4. Go to the top right corner and then go to the top left and click and then go to the center and click and then to the start point for the second triangle.
-
5. Do the same with the next triangle i.e. bottom left to center and then to bottom right and back to the start and so on.
-
6. Create four shapes - all triangles.
On finishing, you should have a complete filled square in a solid color.
Layer panel and change pyramid Photoshop pattern colors

-
You can now go to the layer's panel and you should see four triangle layers in the same color.
-
Select the rectangle tool and then click each of the layers - 1, 2, 3 and 4.
-
Set the color via the top fill color option - go for blue, another blue, a darker blue and then a lighter blue (that is one option) or have random colors such as red, green, blue etc or perhaps use the window menu extensions and Adobe color themes to set up harmonious colors and so on.
-
Flatten the result (you can always undo and come back and change the colors)
Define the pyramid pattern and apply

-
Go to edit menu and Photoshop define command for the pattern and give it a name. The tile is then stored in the preset's panel.
-
You can then use it via the edit menu fill as well as layer and new fill layer as well as use it via layer styles / textures / pattern and much more.
The artwork on the right was generated using the layer menu new fill layer content and pattern and the scaling set to 50%
Rectangular pyramid variant

You can select part of the artwork and re-color that and then define that. You can also combine them with adjustment layers such as hue and saturation to re-color the artwork or part of the art.
Select parts of the design and fill with images.
You can also use different sizes of structure as well such as rectangle themed one such as on the left. You don't need to create the guides to be just square, they can be rectangular as well (sadly there are no guides for circular designs as well though you can find that kind of feature in a number of other excellent tools such as paintstorm studio. The one on the left was also re-colored into a pink design using adjustments (though you can also just use different four color triangle shapes using different fill settings or perhaps different stroke settings if you want a hollow pyramid design
Abstract pyramid pattern

Or use different origin points using the direct selection tool to shift the origin to create more abstract artwork such as (as on the right image)
-
Select all the layers in the layers panel for the pyramid
-
Go to the direct selection tool in the Photoshop toolbar
-
Avoid the points around the edge and select only the central anchor point
-
Click on that central point and drag to the left or right or top or bottom
-
Flatten layers
-
Edit menu define pattern
-
Use layer menu and new fill layer command and pattern
Duplication and scaling variant pyramid

If you want to create an interesting two or three pyramid pattern with some additional depth then
-
You can also just duplicate the current layer (made of the pyramid pattern)
-
Rotate by 90 degrees and scale (75% etc) the duplicated layer
-
Flatten
-
Re-color perhaps using adjustments
-
Edit menu and define pattern
Or perhaps combine more than one additional colorful layer so all kinds of super colorful artworks can be created using the same approach as on the right. All kinds of different colorful pyramid patterns can be created in Photoshop and you can also add effects to the 'inner' duplicated layers such as blurring them or oil effect etc