Photoshop 3D Extrusions Custom Shapes Tutorial
graphicxtras > Adobe Photoshop tutorials > Photoshop shapes tutorials
How to use custom shapes with the amazing 3D features in Photoshop (albeit that Photoshop is not a 3D application ... check out Dimension for that). Custom shapes can be used in all kinds of ways to create 3D designs and they can be exported to proper 3D apps as well in formats such as OBJ. You can also create lovely sketch rendered 3D designs from the shapes.
** Youtube video tutorial on how to use the custom shapes with the powerful 3D extrusions in Photoshop **1. Basic 3D custom shapes extrusion
3D extrusions from custom shapes in Photoshop tutorial. You can create all kinds of 3D models using custom shapes as a layer.
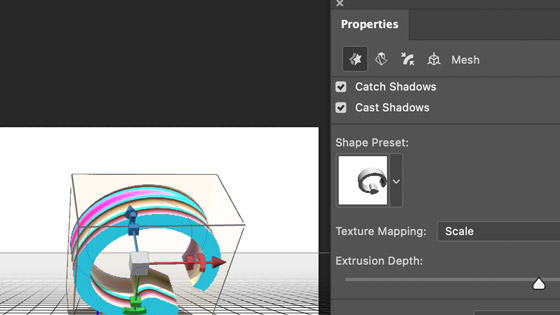
Select the custom shape tool, set the shape option in the top left to a shape layer and then goto the 3D menu in Photoshop and select new 3D extrusion from selected layer. Modify the 3D extrusion
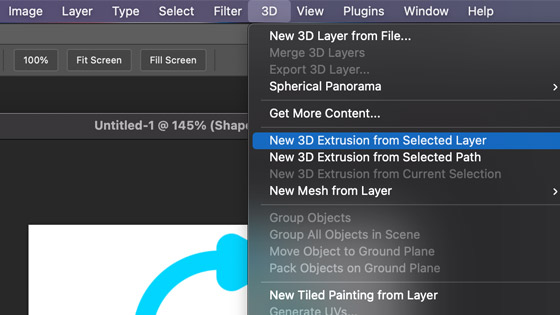
Select either of the options, layer or path

That is the start point. The 3D custom shape extrusion can be modified in many different ways in Photoshop.
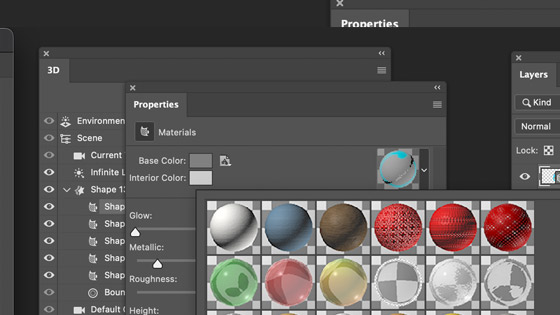
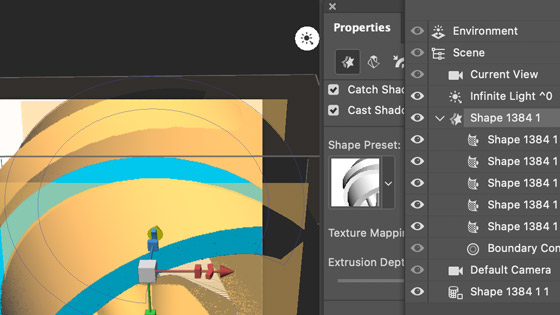
2. Properties / 3D / Layers panels for 3D custom shape extrusion
The key panels are the properties and the 3D panel and also the various 3D controls to modify the rotation, scale etc. Goto the 3D panel. Select the shape (it may have a crazy name in the 3D panel - there appears to be no rename feature)
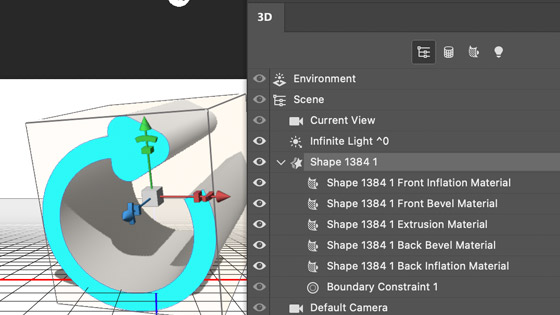
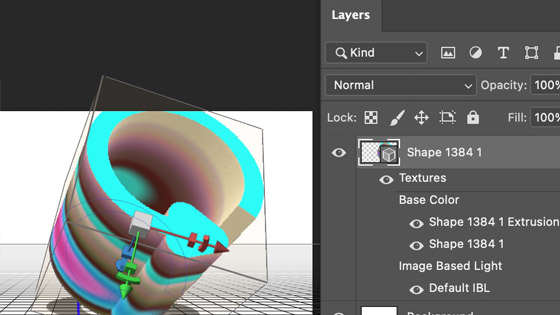
You will notice that it breaks down to a number of different materials such as front inflation, front bevel etc (it is a pity there appears to be no just overall material preset for the lot so you have to select each item in turn and change them, however select the main shape name and go to the textures entry in the layer, you can change the overall texture there via the default texture) such as by adding a gradient to the textures base color.
Goto the properties panel with the shape layer selected and change the extrusion depth. I am never sure why they have never added a preference for this as the value is always massive and far greater than I ever want such as perhaps 50px instead of the current default. I always have to re-size the extrusion depth for the custom shape.
3. Add preset to the 3D custom shape
There are a number of presets, they become available depending on which item you select in the 3D panel or the layers and the presets are then available via the properties. The presets are useful but you can also just set the values yourself and some cases, just as easy. The range of materials available is also fairly limited which is a pity especially when you compare it to the range in the Adobe Dimension application.
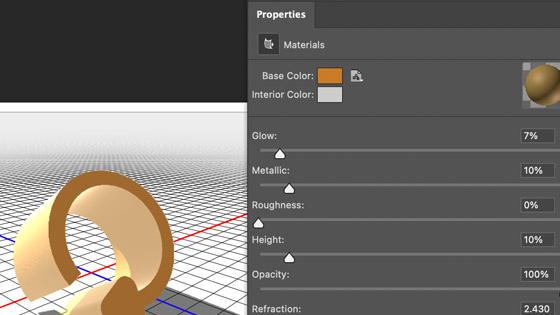
Select the shape in the layers panel and then select the front inflation material (all great names !) and then go to the properties and you will see a presets browser on the right side of the panel.
Select one of those. Of course, it is possible that the 3D shape is not displaying the material (it is behind or below the current view and in that case you may need to go to the 3D move tool features and rotate the 3D shape). You can also modify other aspects of the 3Dmaterial such as metallic, glow, roughness etc
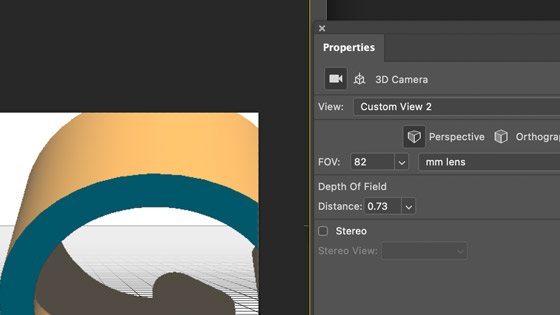
4. Current view and 3D Custom shape
This is independent of the shape, you can also change the current view and how you see the shape and there are presets for that as well as FOV (field of view) and depth of field etc
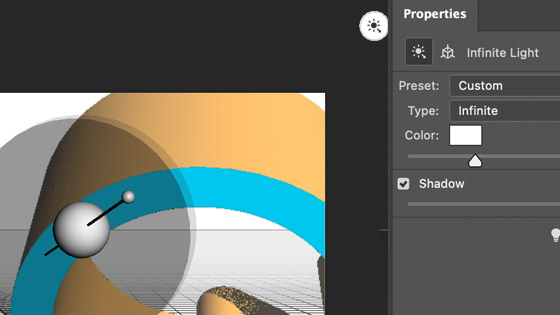
5. Lighting
Again, independent of the custom shape but without you won't be able to see the shape. Go to the 3D panel and select the light and you can add more than one light and there are three types of light. You can, of course, over do the lights making it so dark you can't see anything or so bright you can't see anything as well, lighting is probably the key thing in any 3D work. Doesn't come with many lighting presets though which is a pity.
6. Instances of 3D extrusion custom shapes in Photoshop
One of my favorite and slightly annoying features is the instances feature which you can find by going to the 3D panel and selecting the shape and right click and instance of object. An instance means it is a linked copy to the original and you can make changes to the original which then are changed in the instance. The instance feature only creates one object at a time so if you want 50 instances of your object you have to right click and instance and then repeat that over and over, why not add an instance dialog ? and allow 50 instances. You can move, rotate, scale them independently of the original, extrusion etc is not independent so you can change them all at the same time.
7. Deform the custom shapes
You can deform the custom shapes via the shape selected in the 3D panel and properties and the deform panel. It comes with a useful set of presets as well but you can also alter the extrusion (why is it there as well ?) as well as the twist and taper and bend and shear etc and many weird and wonderful shape can be created. It is not as useful as being able to manipulate the extrusion directly though as a true 3D shape but some unusual designs can be made.
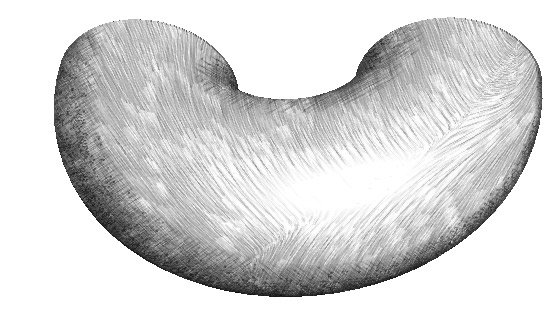
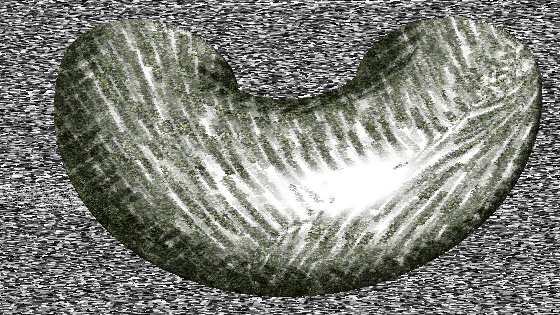
8. Sketch renders of the 3D extrusion custom shapes
One of my favorite features is the sketch renders, click on the scene in the 3D panel and then to properties and select one of the presets. You can also got for the surface and lines and points and create many variants of renderings from this. Goto the surface entry and right side 'style' and select the bottom entry, sketch. You can change the texture, you can even use the current brush though to be honest most of the time the result is never that great. The sketch does take a little set up to get the best sketch result and it will never a proper 3D sketch render or ease of setting up.
Of course, once you have created this you can always return to just normal layers and layer menu and rasterize 3D, which you can do at any time
You can use the generate from brush to add your sketch render, it is not quick and generally result always seems to be a solid color.
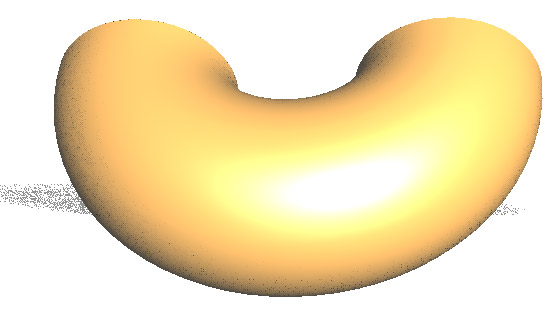
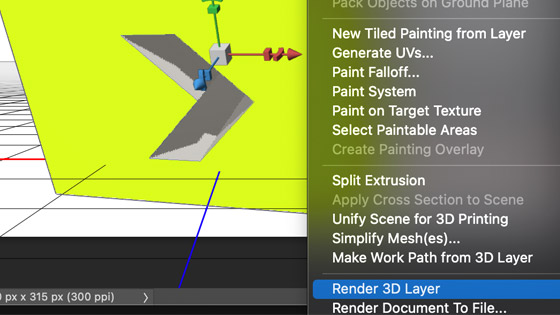
9. Render result of 3D extrusion custom shape
You can also create a lovely render of the 3D design, this can be slow depending on your render setup. With the 3D shape selected, go to the 3D menu and render 3D layer
The design can then be used just as a normal layer and combined with other layers etc
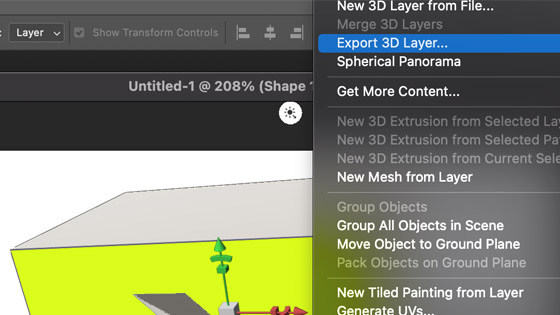
10. You can also export the 3D design to OBJ etc
The 3D custom shape design can be exported for use in another 3D application. With the shape selected, go to the 3D menu and export 3D layer and select OBJ format etc