Photoshop Impressionist Tool / Painting Tutorial
graphicxtras > Adobe Photoshop tutorials > Photoshop tools tutorials
** Youtube video tutorial on how to use the impressionist feature / pattern stamp in Photoshop **How to use the impressionist (Pattern Stamp) tool in Photoshop to create millions of amazing impressionist-like images from any photo / image. The end result matches the underlying image but it has been changed in a subtle or extreme way depending on the brush etc

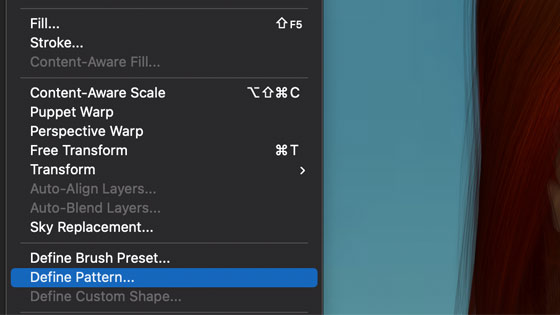
The key thing is to open an image and then go to the edit menu and define pattern and define the entire image as a pattern source.
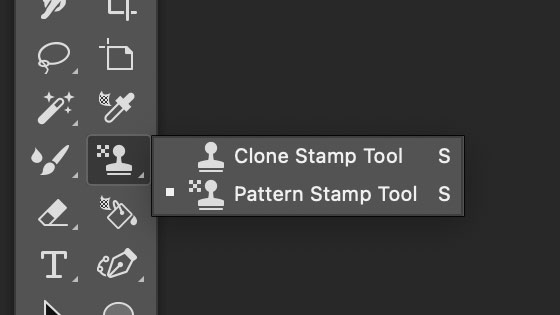
Go to the pattern stamp brush tool in the Photoshop tools box.
Go to the options bar and check the impressionist box as well as the aligned box. Both need to be checked though if the aligned isn't it will still work it is just not as good (I think)
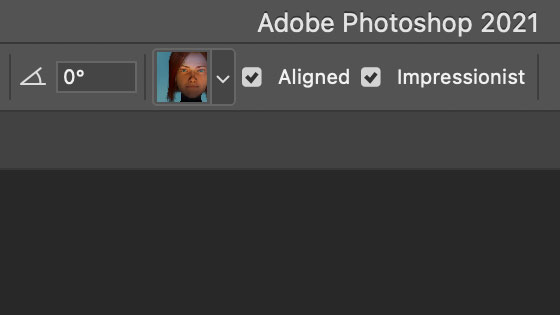
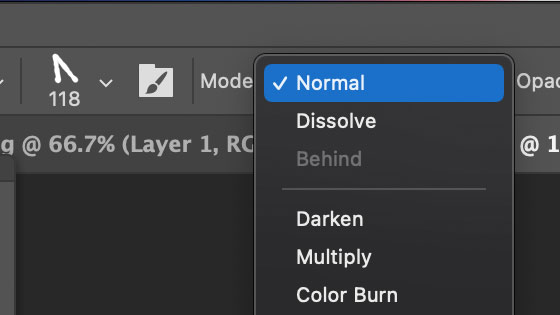
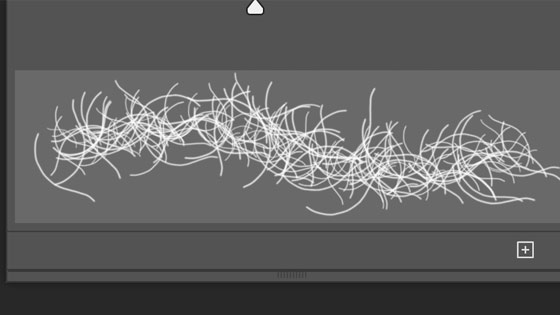
Set the blending to normal (or lighten, darken etc) and select a brush from the various brushes in the brushes panel and set the size, this can vary. Please don't ask me what the angle option does, I haven't found any details on the Adobe site nor have I ever got any meaningful result by changing it.
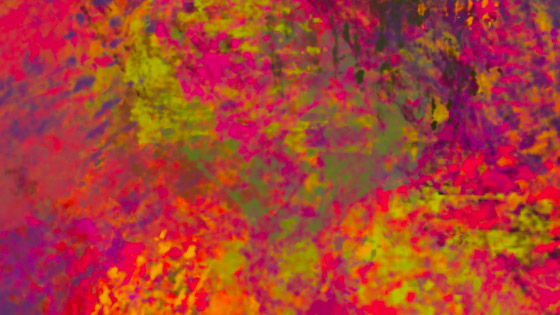
Apply the pattern stamp / impressionist tool to your image and you will see the image be modified by the current brush stroke though overall (unless you set the color dynamics) the end result of your brush strokes will look very much like the original but with a slightly more painted look.
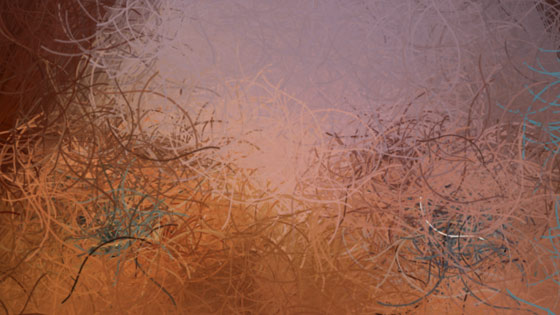
As you can vary the brushes in millions of ways so you can get a different image result from using a spiral source design as to a spot design or perhaps a scratchy rough design or perhaps a sharp custom shape image or a brush stroke modified by a visual effect or perhaps a gradient design limited by a selection.
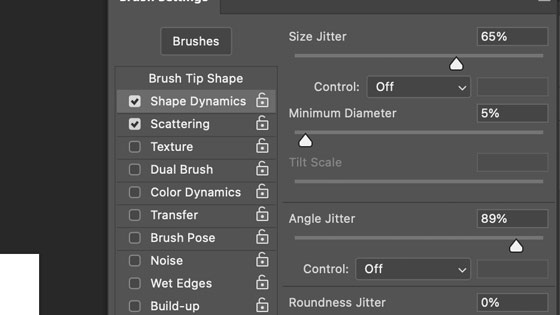
The impressionist Photoshop tool can also be varied by the brush settings so use the dynamics section to perhaps randomize the angle or perhaps apply angle jitter to the brush (set it high to randomize the angle of the applied brush) or perhaps modify the roundness of the brush as well as vary the brush tip.
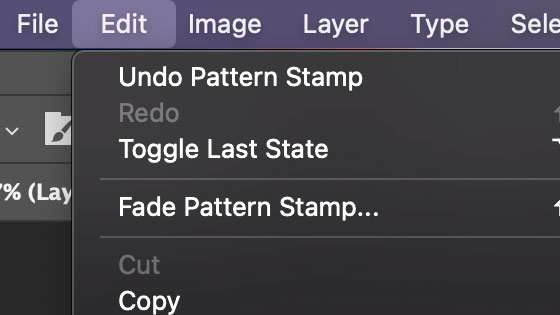
The impressionist brush strokes can be applied to the image using normal blending mode but you can also use the difference or darken etc or if you add the strokes as normal you can always change them or fade them by going to the edit menu and fade command and change the blending mode for the impressionist tool there.
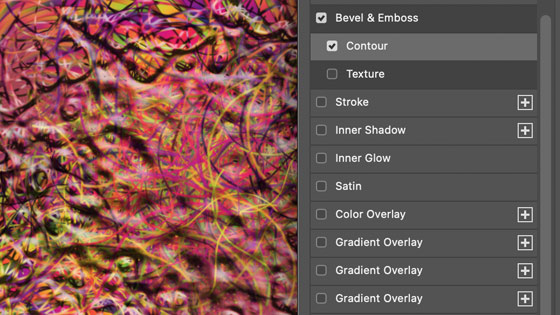
Another option would be to apply the brush strokes from the impressionist tool to a new layer so go to the layer menu and new layer and then apply the strokes to that. You can then re-size the layer as well as delete it or duplicate it as well as apply effects to it to distort it or warp it and as a layer, you can combine with the original background image using different blending modes to create different impressionistic effects. You can also add styles such as layer styles or styles from your presets panel such as giving the impressionist brush stroke some depth via the bevel and emboss.
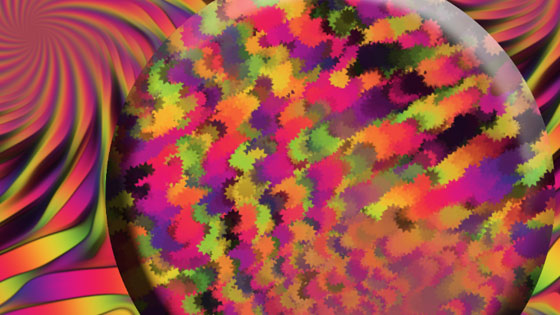
You can also use this with rasterized shapes and selections. Create a quick shape such as a circle and then go to the layer menu and rasterize the shape. Go to the select menu and load selection and use the transparency of the shape layer. You can now apply the impressionist tool brush strokes to the shape layer. You can remove the selection from the impressionist design and then perhaps apply a bevel or other effect to the newly created design layer filled with the impressionist image of the underlying image.
If you want to bring back the original image, either keep it untouched as a separate layer or you can use the history panel original history state for the image (or you can set it to a different history state at any time) and the edit menu and fill command and history option.
And to bring in more or less of the original image, use the history feature in the fill and you can also then use blending modes and opacity to create a variety of blends between the impressionist image and the original. A great way of adding some texture to your image as well as other effects.
