Affinity Photo Slice Text Using Paths Tutorial
graphicxtras > Affinity Photo tutorials > Affinity Photo Effects tutorials
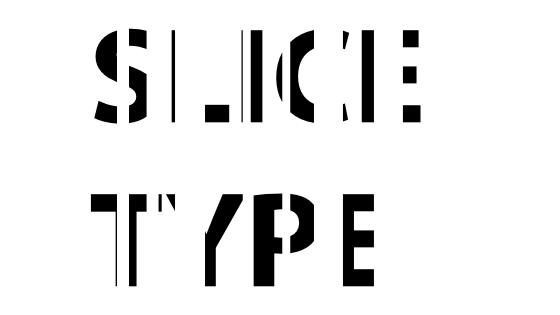
How to slice / shred Affinity Photo text into two or three or multiple parts, to create jarring intense fragmented / distressed text in seconds. Create sliced text using the powerful geometry features such as divide in Affinity Photo
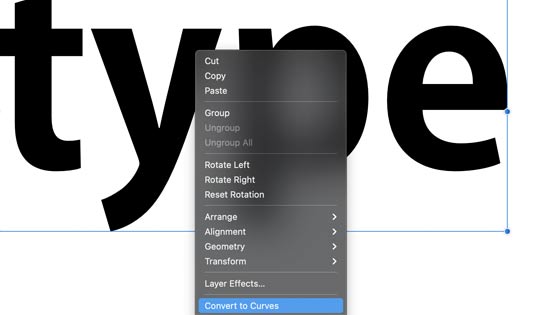
1. Convert text to curves (or regular paths)
The first thing to do before slicing the text is to convert the text to standard curves, it does mean that the text is no longer editable as text. Before you do this, make certain the text is correct as the text after conversion is no longer live.
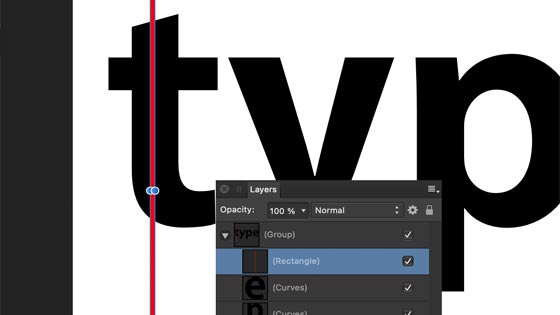
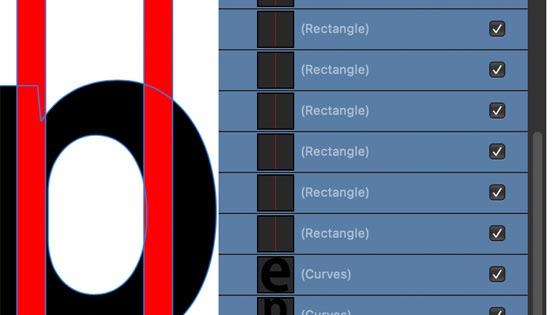
2. Adding slicing rectangles to your text in a group
Once you have the text in curves, you can now add the elements to slice the text with in Affinity Photo. If you go to the layers panel you will notice that the text is now in a group. You will need to add the items to the artwork inside that group.
Select the first letter 'curve' in the layers panel group and then add a rectangle (you will need to add multiple). I would suggest adding it in a different color to the type, such as in red if the text is black.
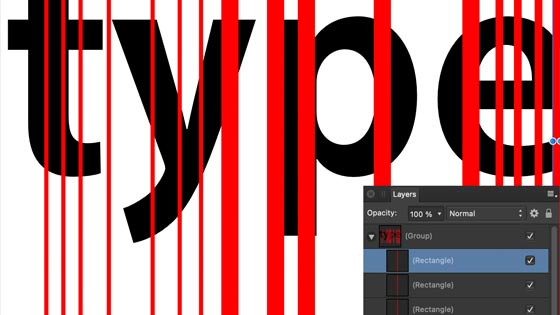
3. Add multiple rectangles or shapes across your text for the slice
You can then duplicate the rectangle shape repeatedly by using the alt / option key and dragging with the move tool selected.
You can re-size the rectangle etc, perhaps make it thicker.
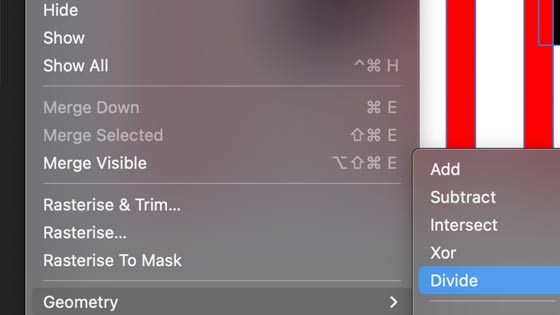
4. Select entries in the group (text and rectangles)
Go to the group now with the rectangle and converted text and select all the entries in that group (you can not select it at the group level, it does need to be selected at rectangle / curves level).
5. Apply geometry / divide command for the slices
To slice the text, go to the layer menu and geometry and divide. The divide feature splits the text as well as the rectangles so you will end up with paths created where there is an intersection of the stroke. Divide doesn't worry about the arrangement of the curves etc
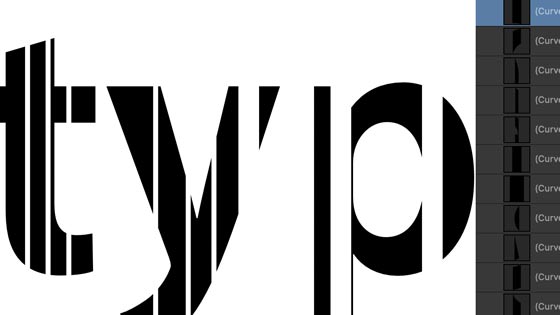
6. Select the red shapes leaving only the text
You will notice very little difference. The difference is in the layers panel where you will now see probably loads of new lines. If you have used the approach of red lines and black type, you can select the red lines very quickly in the layers panel. Sadly there is no equivalent feature to the select all shapes that are the same color etc in Affinity Photo. Delete the selected curves in the layers panel.
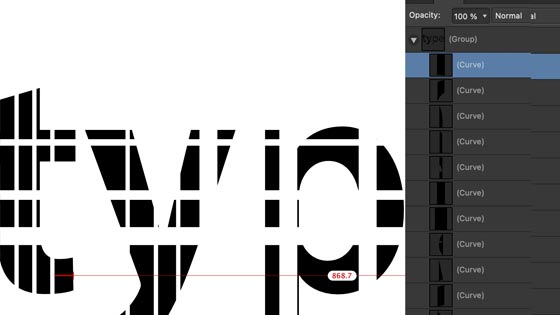
7. Repeat process if you wish perhaps diagonally
You can continue to divide the type by adding additional rectangles such as horizontally or diagonally or perhaps using different sized chunks etc as long as they are added to the same group.
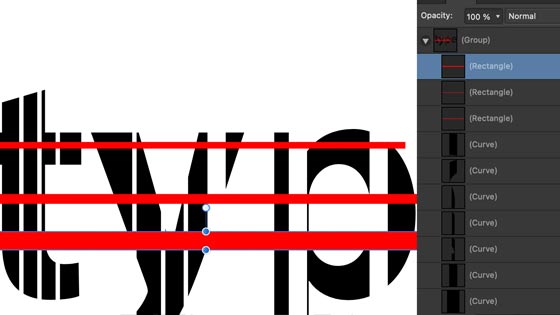
Again, select all the curves and paths you want to use (not the group) and then go to the layer menu and geometry and divide and then remove the additional red lines and curves
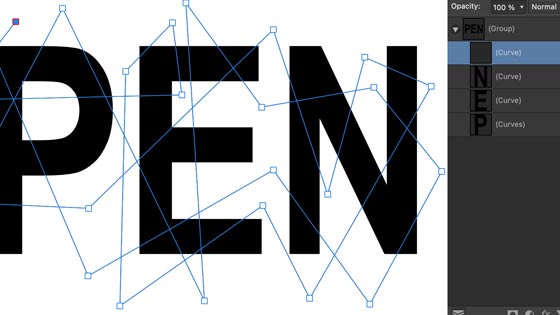
8. Pen tool and jagged text divide
The same approach can also be used with just a basic line and converted text. The line can be created using the pen tool and it can be applied across the text. It does not work in exactly the same way. If you create multiple straight lines just with a stroke and then use the divide as above then it will fail. If you use the pen tool and add lots of lines across the text then on using the divide you will notice that the lines have become a closed path and you will end up with a very patchwork set of broken / sliced text but it is still an interesting way of creating an odd design.
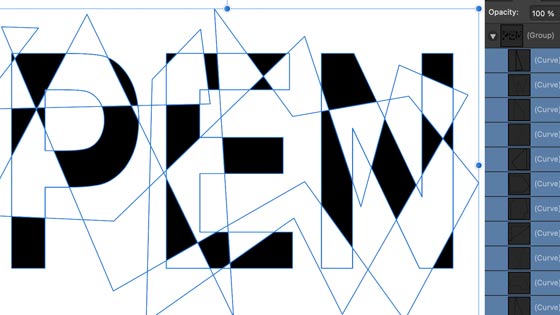
Apply the layer menu and geometry and divide to create the slicing text. You will end up with sliced text but the type is harder to see but it still can be broken apart and manipulated
9. Re-color the curved designs of the slice text
You can always re-color each of the fragments of the sliced text. Select each fragment and then go to the swatches panel and select a color. If you want you word to stand out then you can fill the word with lots of different colors. If you want the surrounding area to be colorful, select those fragments and fill with color and leave the type white or a solid color. Generates an interesting slice design.
