Affinity Photo Diffuse Glow Filter Tutorial
graphicxtras > Affinity Photo tutorials > Affinity Photo Filters tutorials
** Youtube video tutorial on how to use the diffuse glow filter in Affinity Photo for all kinds of amazing glowing effects with images **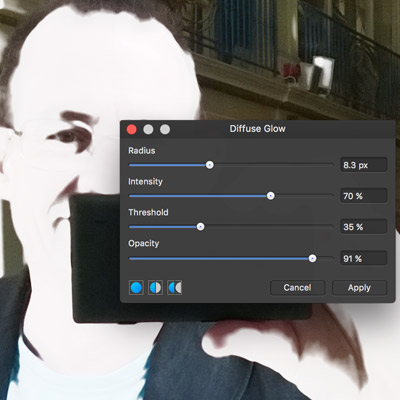
The diffuse glow filter in Affinity Photo can be found in the blur category under the filter menu command. The filter is a powerful diffuse tool but it is a destructive filter effect that modifies any image etc. There is an equivalent non destructive one in the layer menu and live filter layers
-
Filters menu
-
Blur
-
Diffuse glow filter
-
Set radius
-
Set intensity
-
Set threshold
-
Set opacity
-
Apply
The diffuse glow filter can be found in the blur menu via filters. You can apply the diffuse glow once or multiple times with the same settings or use the repeat command found at the top of the filters menu.
The diffuse filter has a number of commands, to work best the threshold needs to be set fairly low other if it is too high, though depending on the image, will make the filter seem to be doing nothing. You can change the intensity and opacity to control the wow factor of the diffuse glow as well as increase / broaden the highlights by using the radius setting.
You can also fade the diffuse filter effect via the layers menu and fade but it is not perhaps as effective as with other filters as the output is white along with the image. You can tweak the blending mode as well as opacity.
The motion blur filter can also be used in channels so display the channel panel (can be found via the view menu and studio) and with the channels, click the red or green etc and then apply the motion blur and the motion blur will only be applied to that channel. The other channels will be untouched and you will see red streaked across your image depending, of course, on the original image. This can be repeated with all the other channels and different settings can be used and also a different number of repeats
You can also use the motion blur filter with different selections, you can create a basic selection but you can also use freehand selections and then apply the motion blur to that and vary the angle and strength in different selections.
You can also use the motion blurs on shapes such as diamond shapes, star shapes as well as shapes created via the pen tool as well as modified via the node tool. You can also the motion blur filter with text, frame and artistic.
You can also the motion blur with the powerful pattern layer from selection found in the layers menu. You can also rasterize the whole design and then apply the motion blur to that or use selections to limit the range
The above motion blurs are all destructive effects, you can also use the layer menu and new live filter layer and motion blur and that is live so can be changed at any point in the creative process. You can also set the blending mode for the layer as well as the opacity of the motion blur.