Affinity Photo Lens Distortion filter Tutorial
graphicxtras > Affinity Photo tutorials > Affinity Photo Filters tutorials
** Youtube video tutorial on how to use the wonderful lens distortion filter in Affinity Photo **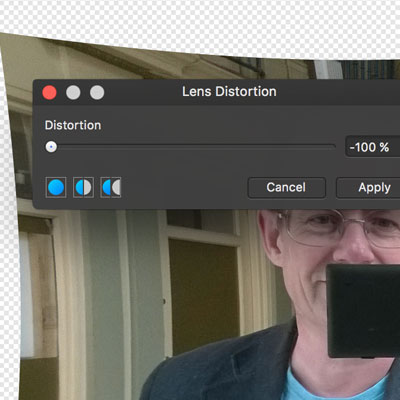
A quick tutorial on the lens distortions filter for Affinity Photo and how to use and apply
The lens distortion filter for Affinity Photo can be found in the distort sub-menu (which can be found in the filter menu). The lens distortion filter can be used multiple times and combined in 1000s of ways with the other filters that come with the powerful graphics application, Affinity Photo.
You can use the lens distortion filter with images as well as the presets
-
Filters
-
Distort
-
Lens distortion filter
-
Set distortion
-
Apply
The lens distortion filter is great for correcting lines by applying subtle settings. You can also apply larger values to really distort the image in both directions, you can you can set the value positive or negative and the default is 0.
You can use the lens distortion filter with channels so you can apply different values for the red channel as well as the green etc
You can also use the lens distortion filter on layers. You can record the settings and play it back via the macro panel
You can fade the results of the filter effect via the fade command found in the layer menu and add in a blending mode as well
You can also use it with selections, so add the filter effect to one selection and add a different filter effect to another selection to create an interesting distorted design
You can also use the lens distortion via the non destructive effects in the live filter layers in the layer menu