Affinity Photo Maximum blur filter tutorial
graphicxtras > Affinity Photo tutorials > Affinity Photo Filters tutorials
** Youtube video tutorial on maximum blur filter in Affinity Photo for surreal blurring effects emphasising the lightness of the image **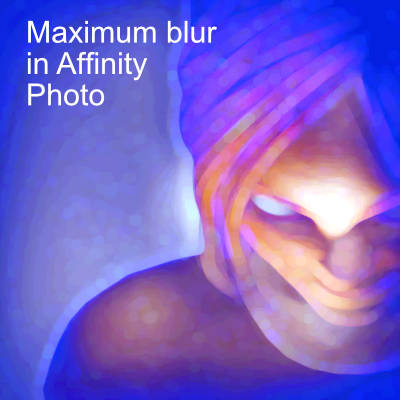
The maximum blur filter for Affinity Photo is a powerful blurring tool to emphasis the white or lightness of an image.
The maximum blur filter can be found in the filter menu / blur category. It can be used to create interesting sparkly effects with the lightness / white of the image. It can be used to totally blur and lose an image in intense white and lightness. The maximum blur filter comes with only two settings, radius and circular. If you select the circular, the result will be a circular blur otherwise the result will be a square chunky blurring effect. The higher the setting of the radius results in a great blurring of the image.
If you use the maximum blur filter with a very low setting you will see very little blurring. A mid range maximum blur results in a more sparkly effect.
If you use a dark image with a lighter / white edge then the result will be a sparkly edge effect. There is no live filter layer for the maximum blur for Affinity Photo so the closest is to duplicate the layer and use blending modes and opacity. The maximum blur filter also works amazingly well combined with other filters such as Affinity Photo gaussian blur etc. You can also use the maximum blur filter with channels in Affinity Photo to create unusual blurs with the red and green etc channels.
You can also use the maximum blur filter with Affinity Photo artistic text (as a layer or merged). This tutorial shows you how to use the maximum blur filter in Affinity Photo with layers and backgrounds as well as with other effects and channels. This tutorial also shows examples of how to use with artistic text
-
Filters menu in Affinity Photo
-
Blur
-
Maximum blur
-
Set radius
-
Set circular
-
Apply
Maximum blur filter
The maximum blur filter for Affinity Photo can be found in a sub menu of the blur filter category (found in the filter menu). The maximum blur filter is a destructive filter that can be used with images as well as resources such as fonts and brushes etc. The key point of the filter is that it blurs and intensifies the white / lightness of an image resulting a smudge or sparkle. to any image.
Settings
The maximum blur filter comes with only two settings radius and circular.
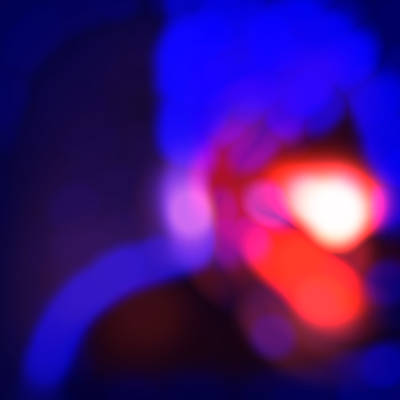
If you select circular, the blurring is circular (dots) or the blurring is square by default. The maximum blur filter radius can be set to 0 (no blur) to 100 (total white blurring of an image though that does depend on the size of the image). Any white in the image will be blurred into the darker parts of the image. If you use a low setting of radius then the result will generally be a sparkling effect. If you use a very high setting then the result will be a far more white smudged image.
Using maximum blur filter on layers
The maximum blur filter is easiest to use by duplicating the original image and then using the maximum blur on the new layer. If you use the maximum blur on a layer, you can delete the layer but you can also combine the layer and effect with blending modes and opacity. There is no live filter layer for the maximum blur filter so the layer approach is closest to the live filter approach. You can also create interesting effects by duplicating the layer and applying the maximum blur and re-sizing the layer (as well as rotating).
Combine other effects with maximum blur filter
The maximum blur filter can be used on its own. The filter can also be used with other filters such as Gaussian blur. You can use the effects pre or post the maximum blur filter to create all kinds of unique images. The filter also works amazing well with live adjustment layers so you can add channel mixer adjustment layer to modify the color of the filter result
Maximum blur filter and channels
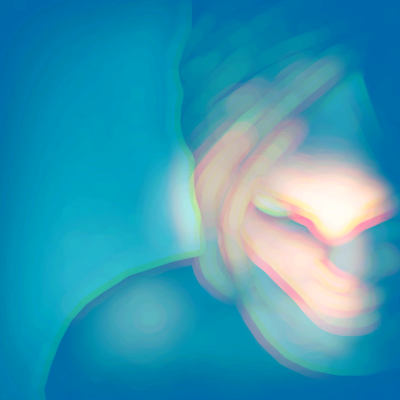
You can use the channels panel with the maximum blur filter in Affinity Photo. You can add different effects and settings to each channel
-
Channels panel
-
Select red channel
-
Apply filter with settings
-
Select green channel
-
Apply filter with different settings
-
Select blue channel
-
Apply filter with different settings
You can then merge them all back to a single RGB. You can also use the same effect with adjustment layers such as black and white adjustment layer. The channels option does allow for the interesting creation of edges in colors (if using different radius settings for the filter)
Maximum blur filter and text in Affinity Photo
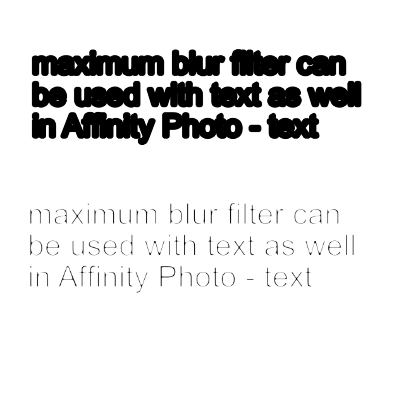
Create some text (in black) and then merge down. Use the maximum filter with that on a white background and the text will thin as you increase the radius setting. If you use the same text but as a layer with the filter, you will see black text start to thicken as you increase the radius (using either square or circular).
-
Create some text using the artistic text tool
-
Set to black for the artistic text
-
Apply maximum blur filter with a low setting.
The text becomes much bolder and nearly unreadable.
-
Create some text using the artistic tool
-
Set to black
-
Merge down via the layer menu with white background
-
Apply maximum blur filter with low setting (if set too high the text will just vanish)
The text is a lot thinner.
Of course, if you are using a black on a blue background the result is totally different.