Affinity Photo Perspective filter tutorial
graphicxtras > Affinity Photo tutorials > Affinity Photo Filters tutorials
** Youtube video tutorial on how to use the powerful perspective filter in Affinity Photo **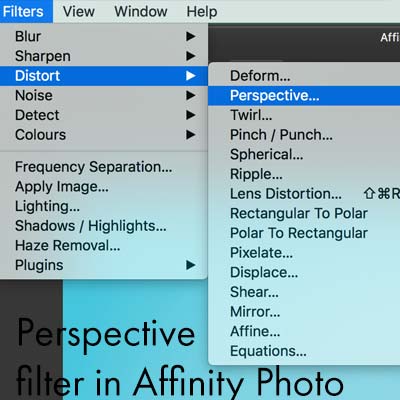
The perspective filter in Affinity Photo can be found in the distort menu beneath the filters menu in Affinity Photo.
The perspective effect is a wonderful powerful perspective distortion tool that can distort any image in many ways in single plane or duo plane mode.
You can use the Affinity Photo perspective filter with images as well as type and also resources such as patterns and brush strokes
-
filter menu
-
distort
-
perspective filter
Basic perspective filter - single plane option for Affinity Photo
-
Go to the image
-
filter menu
-
distort category
-
Perspective filter
-
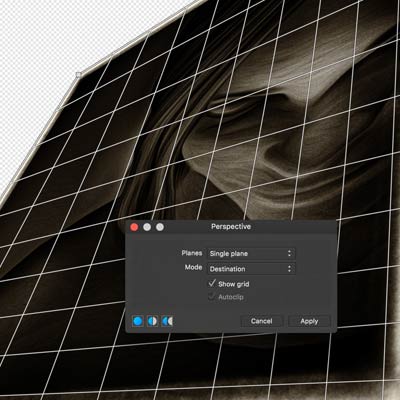
Grid appears as well as panel.
-
Select planes and mode
-
Move grid as required using the displayed control points (little square block points)
OK, there is a lot more to the Affinity Photo perspective filter such as the source mode and autoclip as well as two types of planes (single and dual plane) and you can also use the perspective filter to create subtle shifts of an image as well as truly extreme distortions, really depends on what you want to do such as add an object / layer in the same perspective as the background.
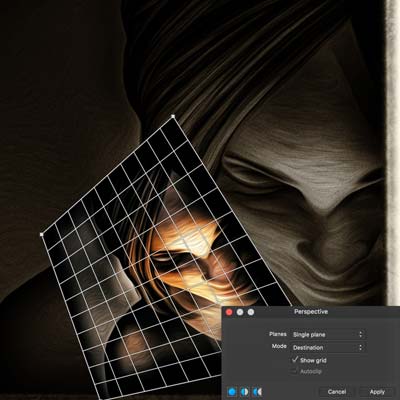
Extreme distortion using the single plane option in the perspective filter
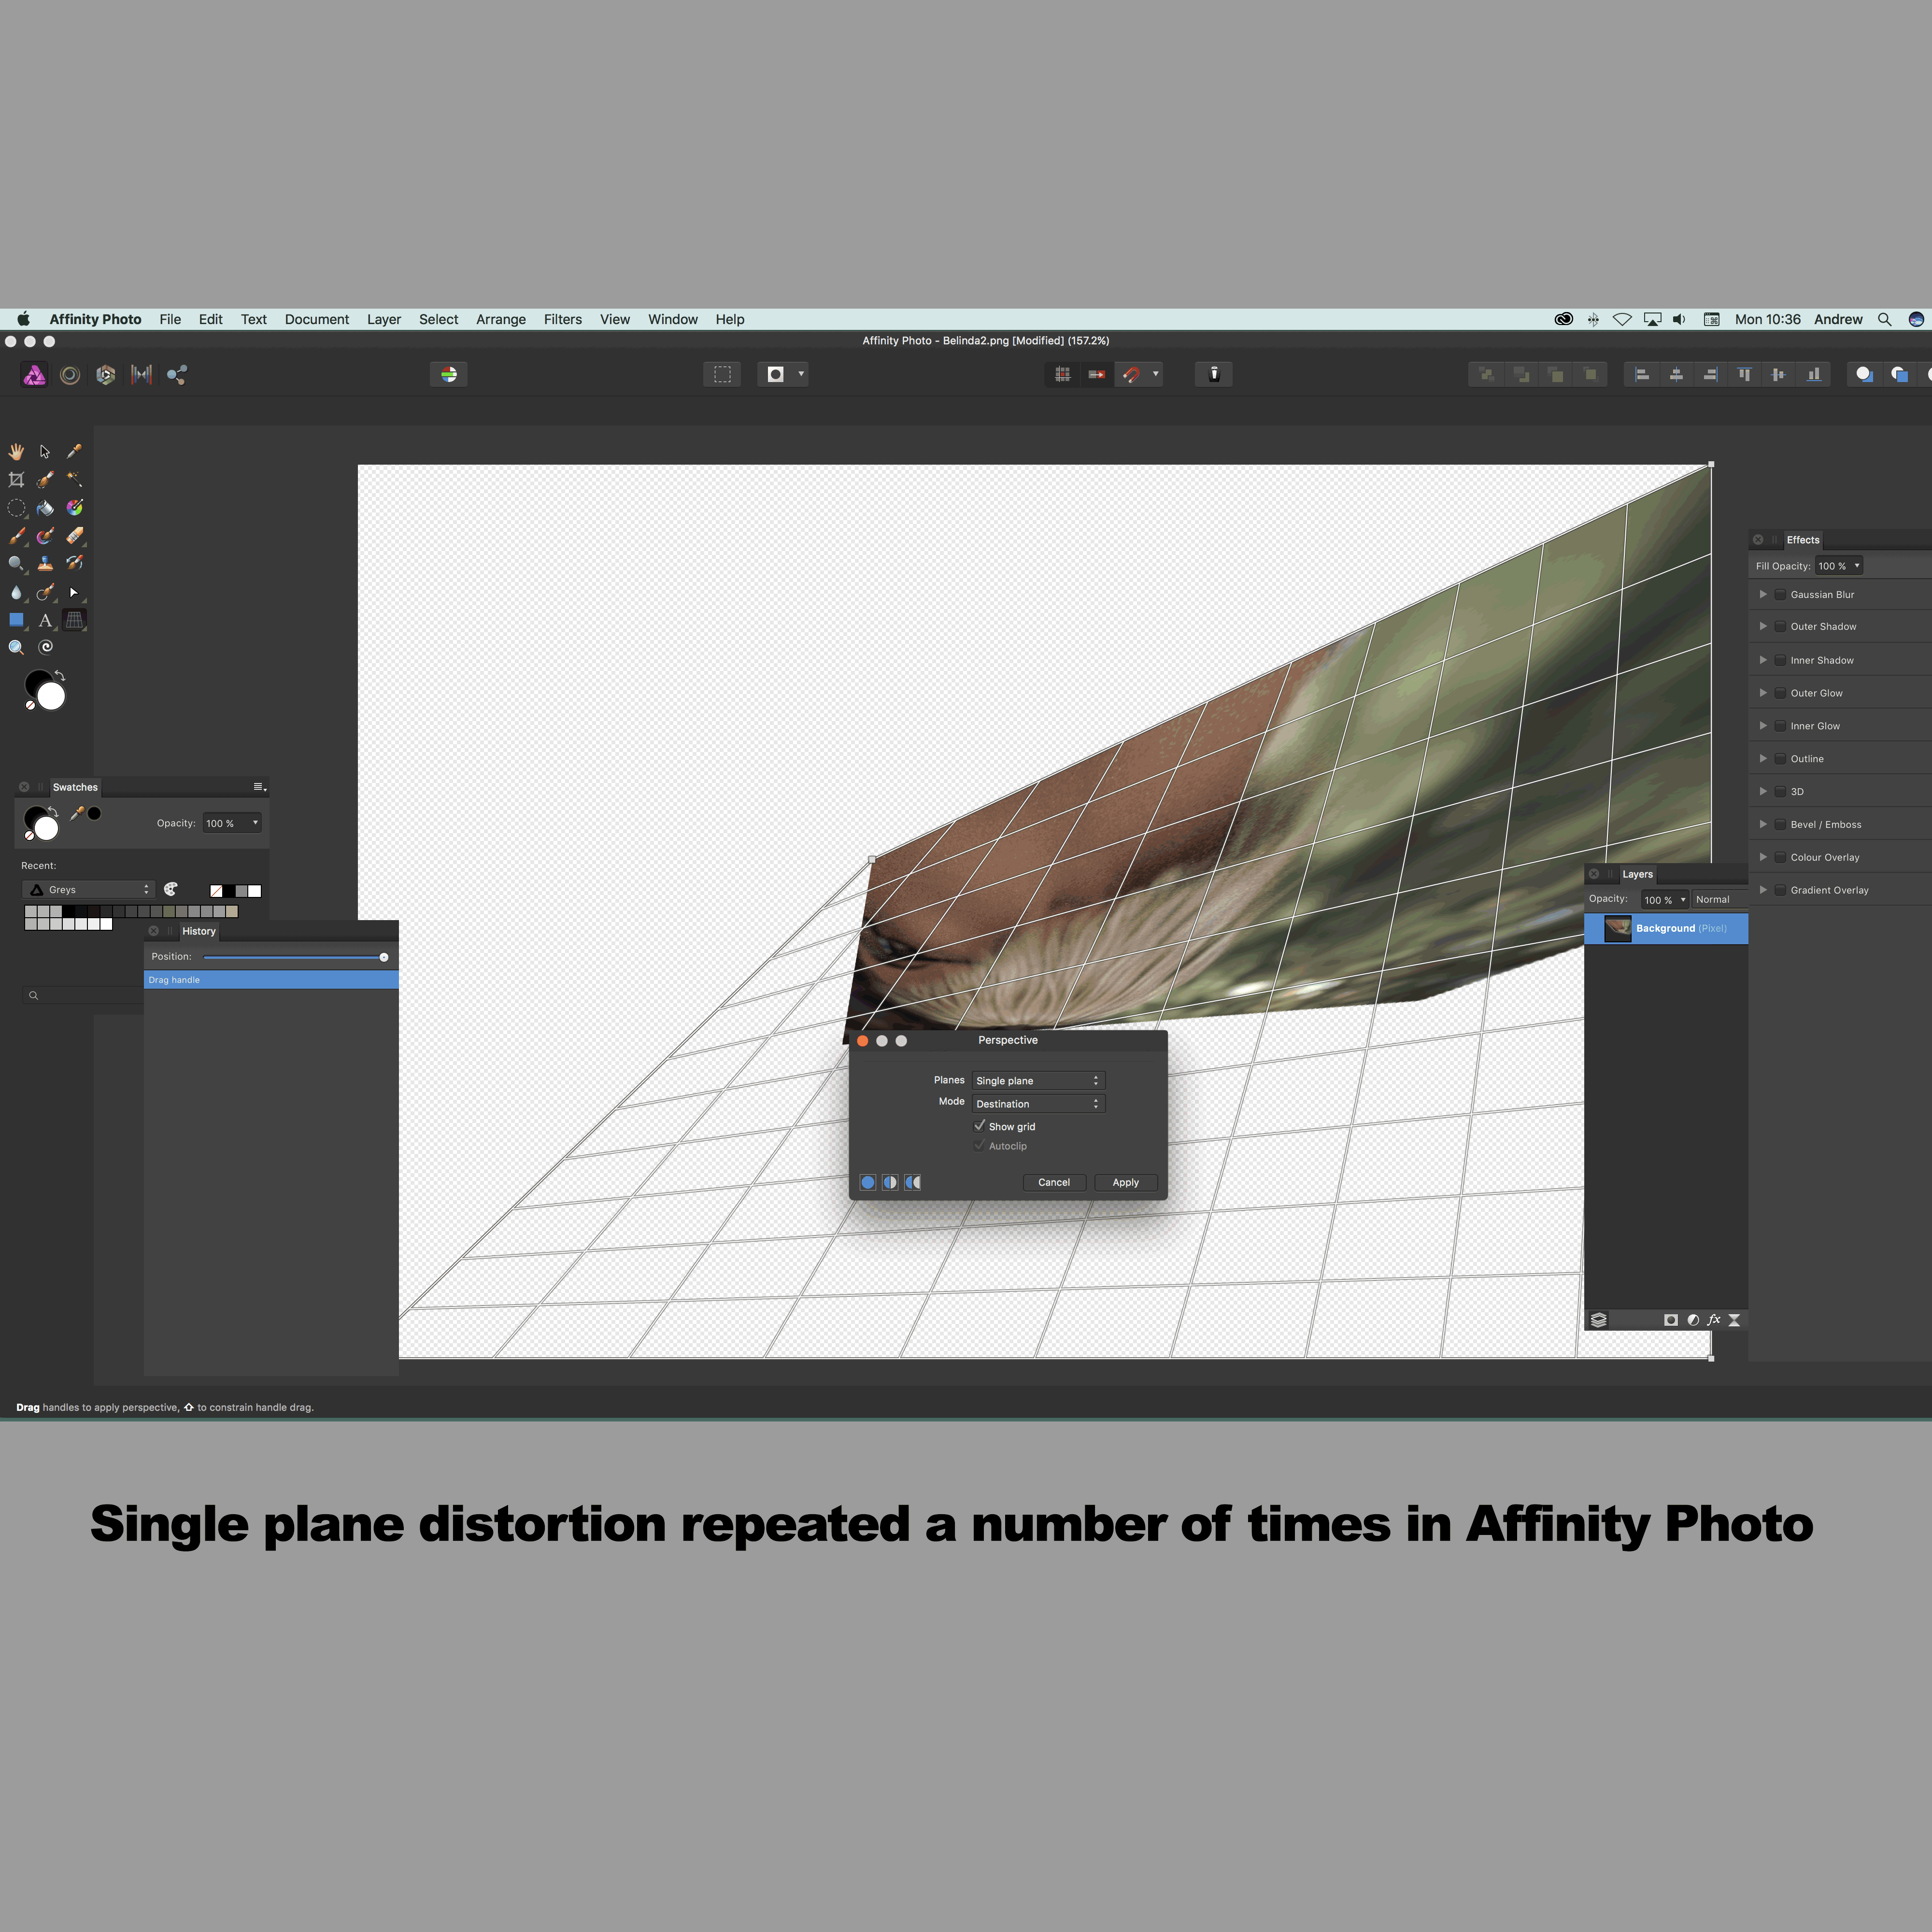
You can really create some weird distortions / extreme distortions with the single plane (as well as the dual). The perspective filter can be applied multiple times but you should realize that it is a destructive effect when using the filter and the only way to return to the original image is to use the history panel
-
Open image in Affinity Photo
-
filter menu and distort category and 'perspective'
-
Go to the top left corner of the perspective warp grid
-
select the control point
-
Drag close to the bottom right corner (not all the way but fairly close) distorting the grid (and overlapping the image) - the key thing is to make certain you still have some of the original image still there otherwise all you will get is stretched pixels from the edge
-
Press return
-
filter menu and distort category and 'perspective'
-
Perhaps choose the top right corner control point this time
-
Repeat distortion
-
Press return
-
Repeat this perspective distortion as required
Dual plane and distorting with the perspective filter
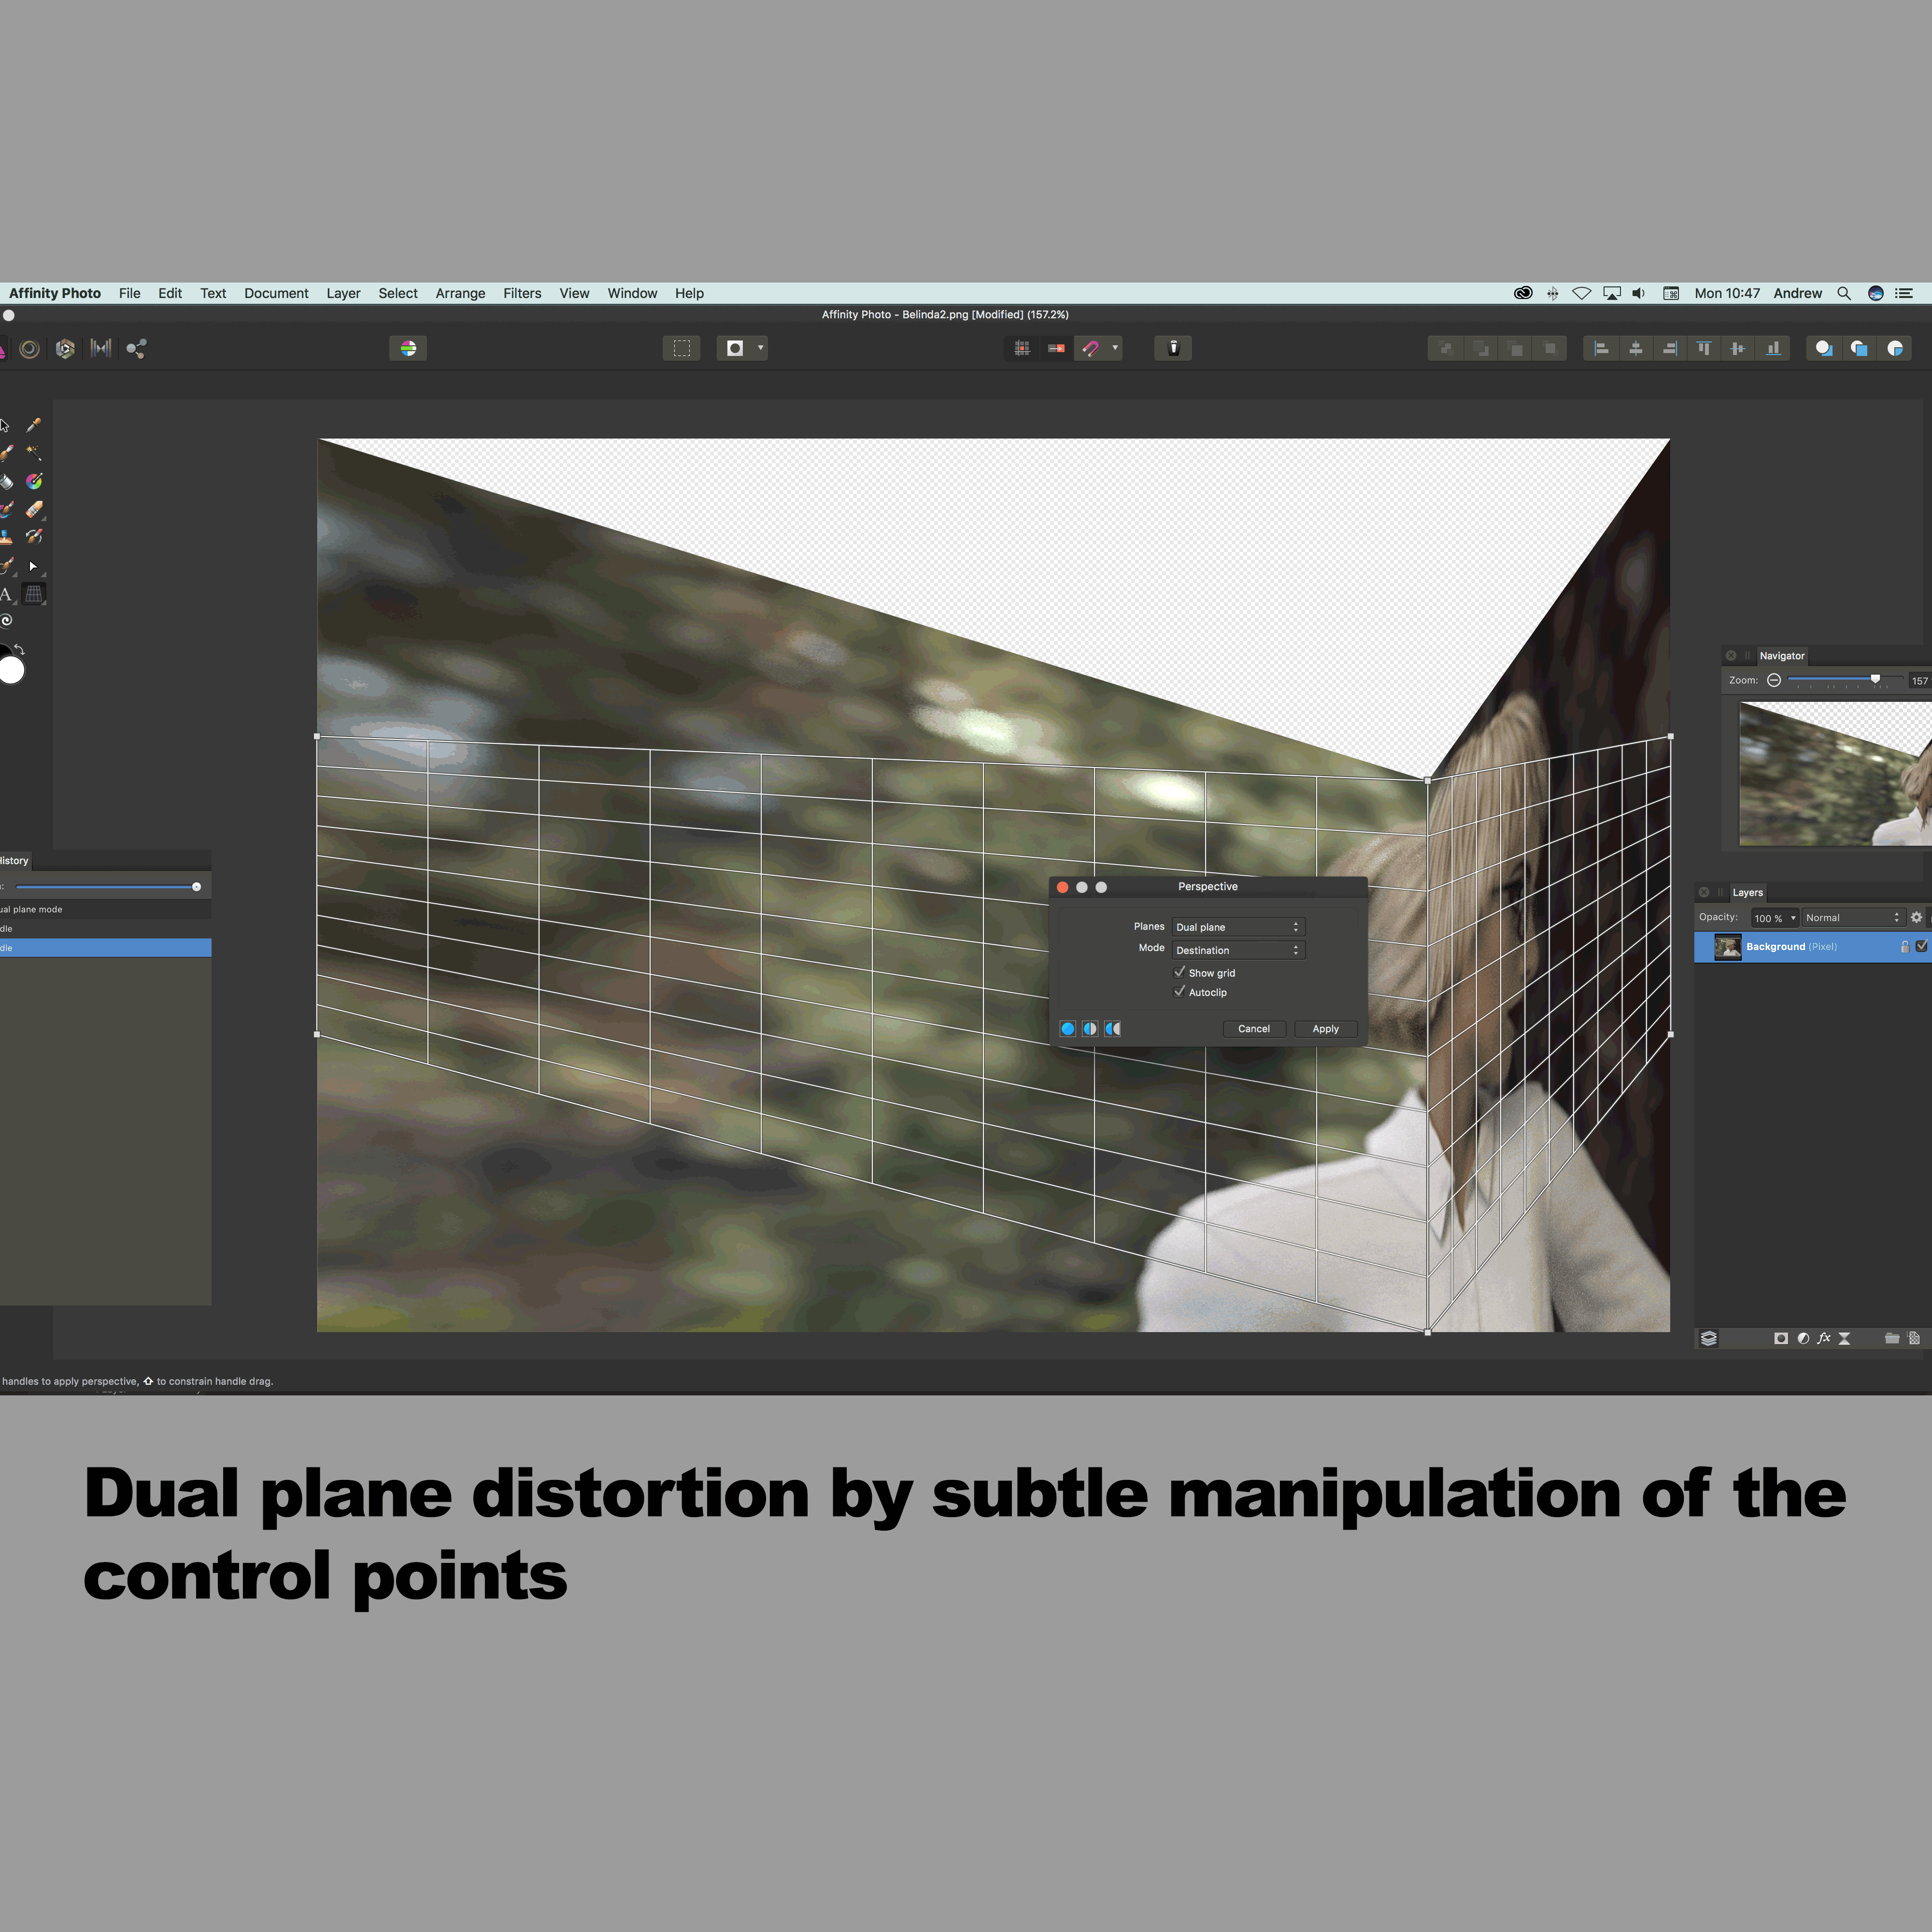
The dual plane option can be selected instead of the single plane persective. With the dual plane you have an additional set of control points to manipulate (center). You can use the tool to distort images but you can also use the tool to add perspective and alignment to perhaps buildings and text and other objects in Affinity Photo.
-
Open image
-
Filter
-
Distort
-
Perspective
-
Go to the panel for the filter
-
Set to dual plane
-
Go to the control points in the center and move up or down or left and right
-
Go to the control points at the far ends of grid and distort as well
-
Press return
You can create all kinds of unusual distortions such as a mirror effect with an image
Mirror effect using perspective filter in Affinity Photo (dual)
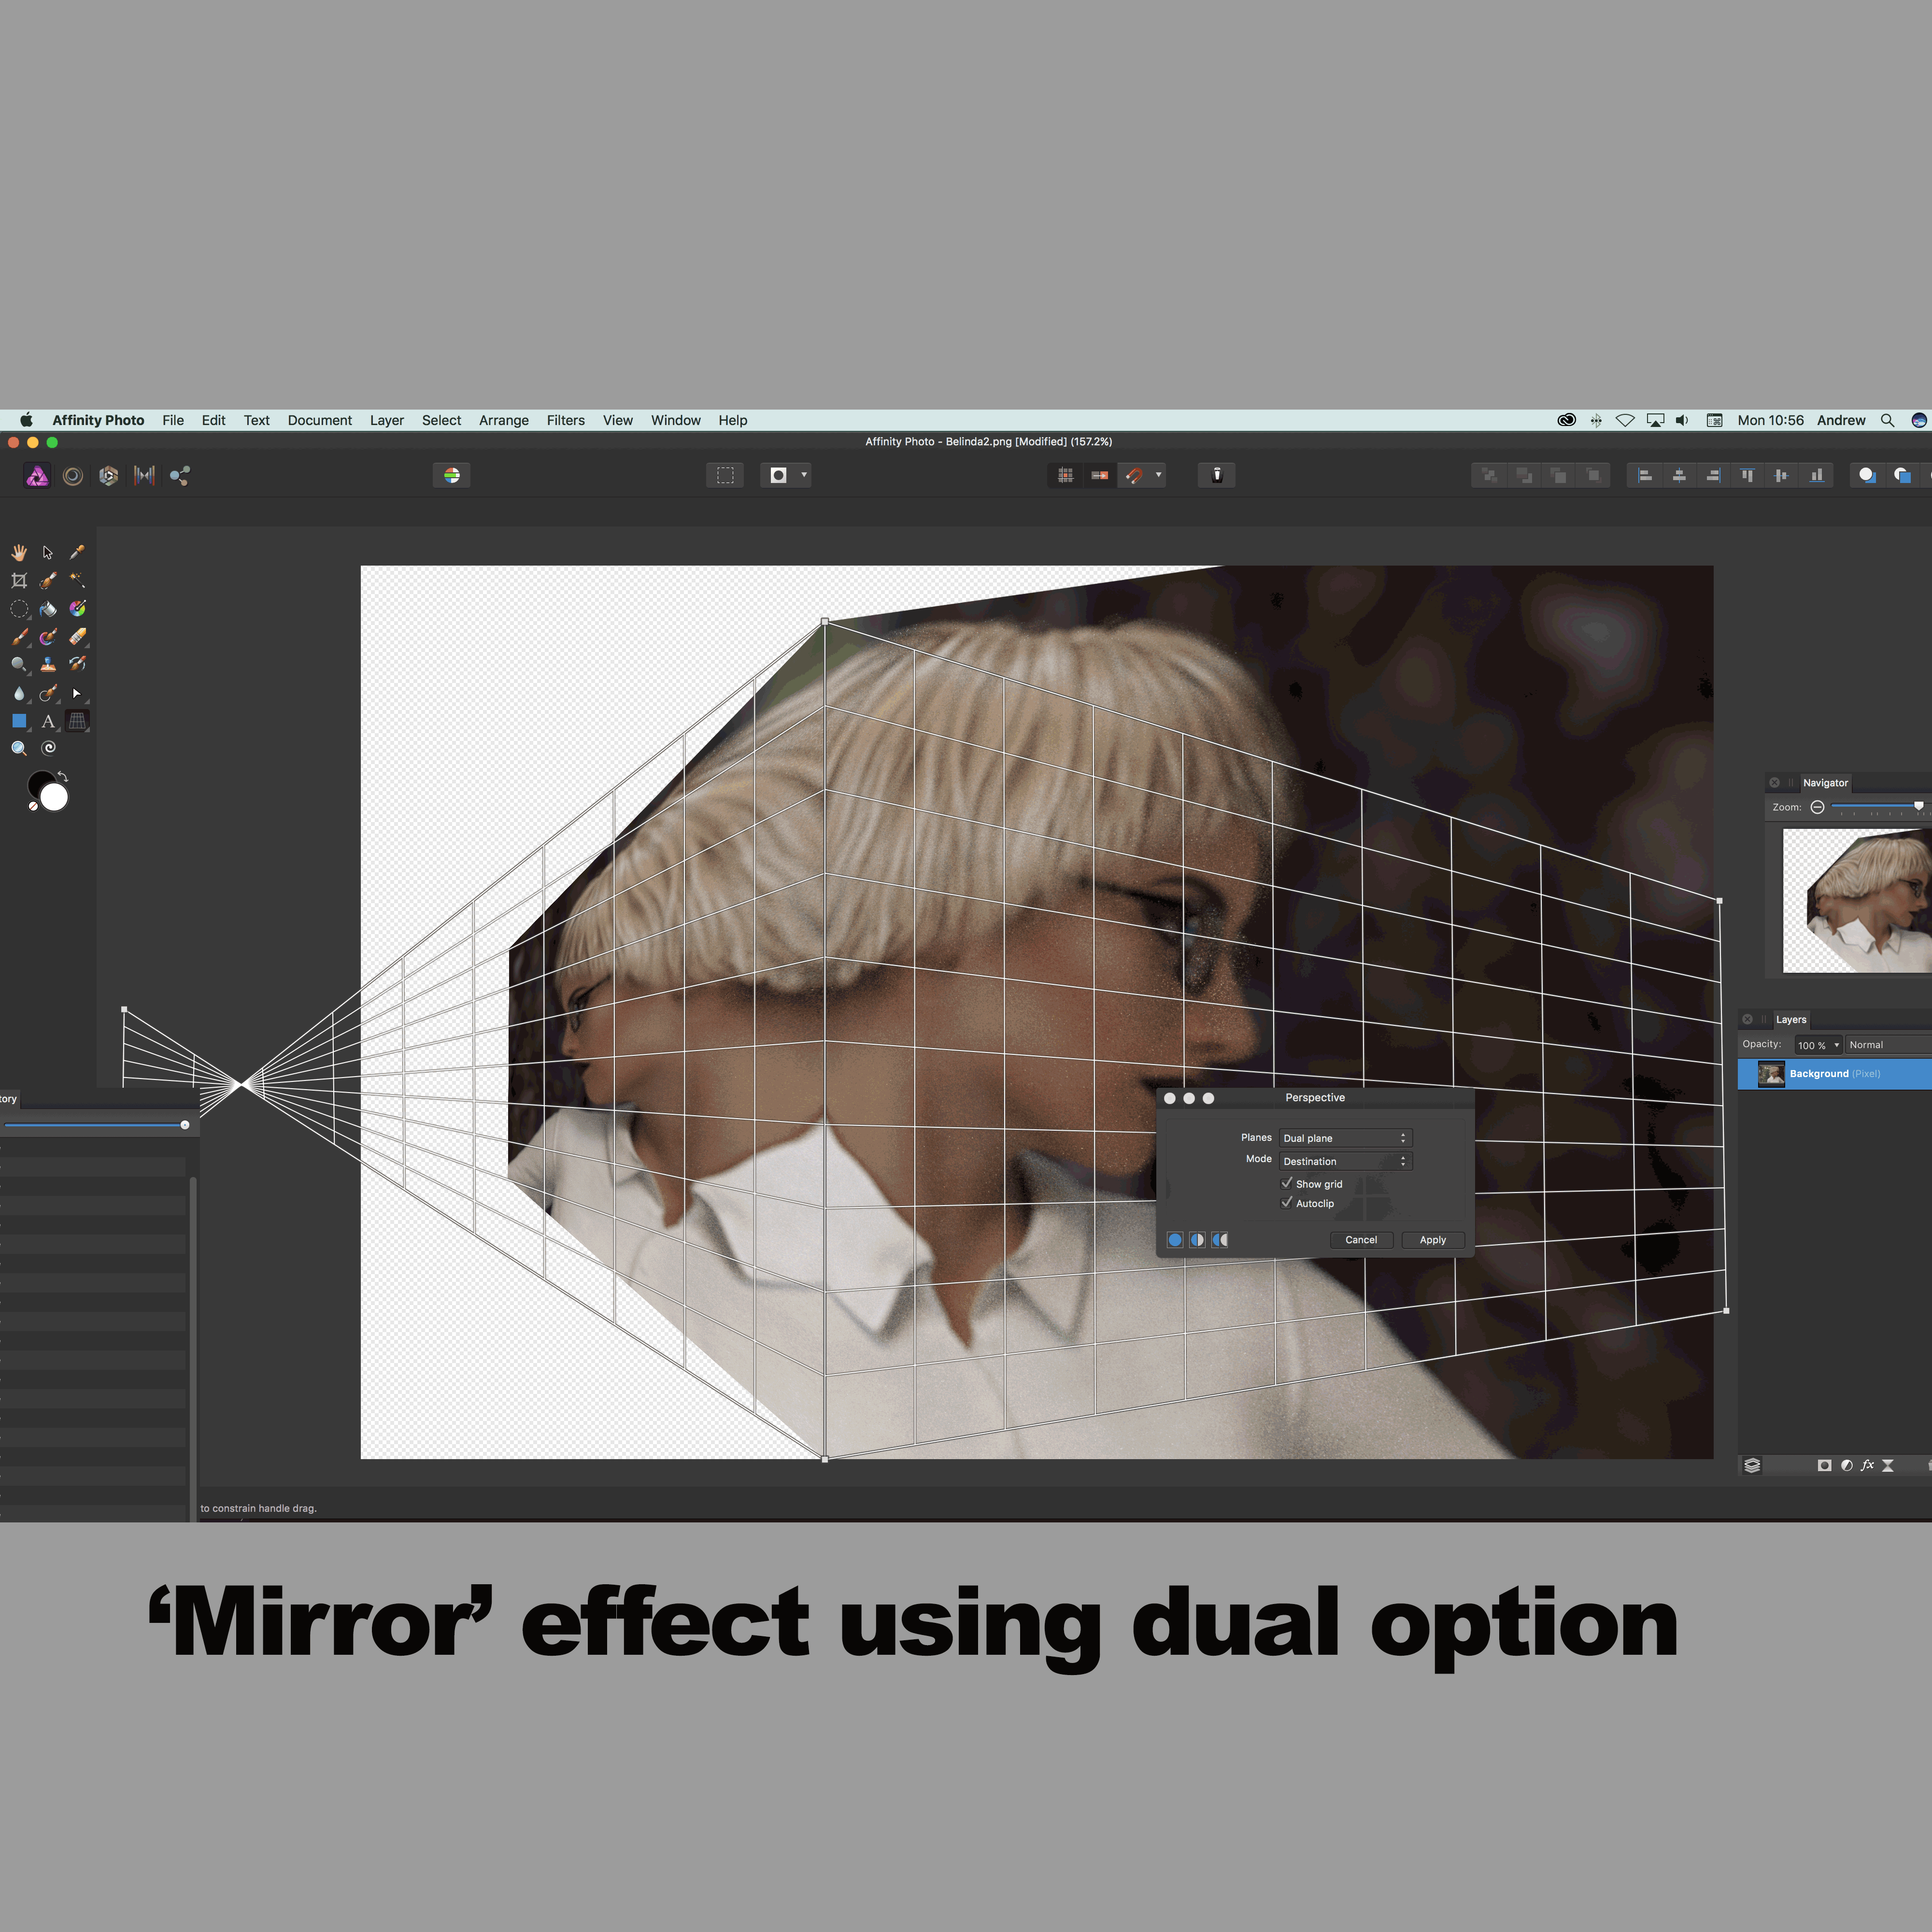
You can mirror (and distort) the artwork using the dual plane option
-
Open image in Affinity Photo
-
Filter menu and distort and perspective
-
Dual plane in dialog for the perspective
-
Go to the left control points
-
Select bottom left control point and move above the top left control point
-
Move the previous top left point further down below the previous bottom left point
-
Drag the left points off the screen
-
Move the center points to position the 'mirror'
You can create all number of variants of this twist and you can also repeat the effect again and again to create even more extreme effects
Perspective filter as a live filter layer

You can also use the perspective effect as a live filter layer by going to the layer menu and using that above existing layers or applied to a single layer (if layer selected) as well as using blending modes with the effect to see the underlying image and effect combined as well as preserving the alpha. I think the layer approach works best for many projects but the destructive filter approach requires less thought to the underlying layers etc
-
Open image in Affinity Photo
-
Layer
-
Live filter layer
-
perspective
-
distort grid as required
-
OK
-
Go to the layers panel
-
select the layer with the perspective
-
Go back to the layer menu and live filter layer and add a new perspective effect
-
Distort grid
-
OK
You should now have multiple entries with (perspective) displayed in the layer panel. You can manipulate them later if you wish as they are 'live'
Toolbar and the perspective tool in Affinity Photo
The perspective tool is also available via the toolbar with the same functionality as the filter. As soon as you select that tool in the toolbar, you will see the panel which can then be used to manipulate the grid (it is easier if you use the show grid option)
Use the perspective live filter layer as well as perspective filter with layers in Affinity Photo
You can use the perspective live filter layer as well as the normal filters with layers. You can add subtle shifts of perspective to a layer / element in an image such as distorting a house etc to match another house in the image background. You can use it also for interesting and more extreme collages of images and layers in Affinity Photo.
-
open image
-
file menu and place
-
filter menu
-
distort
-
perspective filter to the new placed layer (single or dual plane).
-
Distort the new layer (which may be the same image or not)
-
Repeat with a new layer and so on
This can be done with a couple of layers as well as many layers.
In the image on the right, only two layers are present but you could easily have 10 layers and the perspective filter applied to each and every layer and distorting them all to create a truly abstract design.
The great thing about the layers is that they can be used with blending modes as well to create even more interesting color effects as well as adding masks and layer effects into the mix.
Single plane / dual plane for extreme distortions as well as subtle scaling of a layer etc in Affinity Photo
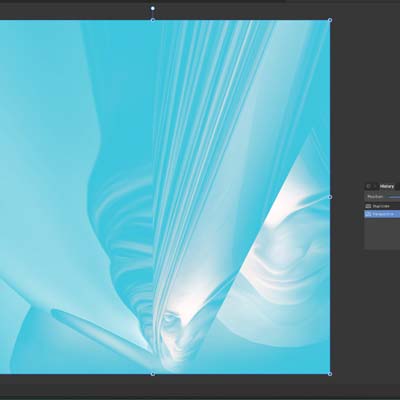
With the single plane, you can move the four corners which by default fill the entire image or layer. With dual plane, you can move the four corners as well as the central line (two points) but sadly there is no rotation ability for the line though the four corners can be twisted over themselves to create some truly extreme distortion of images.
All kinds of extreme distortion can be created as well as subtle changes in both plane types. Personally, I like to work on a layer as you can see the original image behind the distortion in the left image (it is a dual plane image with the left half hardly distorted and the right half stretched to the near limits)
You can also use the single as well as the dual (but I think the single works best for basic transforms) just to add a subtle scaling of a layer as well as add some elements of perspective such as on the right and it can be combined with layer effects as well. To have the image slightly shift into the distance, as a plane on the ground.
-
select image
-
duplicate layer
-
use filter menu and distort and perspective and single plane
-
shift the corners down into the bottom half of the image and slightly distort
-
use the effect menu and add an outer shadow
Mode - destination and source in perspective panel

Probably the oddest, the destination mode gives a more visual feedback as the grid moves as you move the points. With the source option, you can't see anything but the results can be even more dramatic (though perhaps not so predictable). As with all filters in Affinity Photo, you can re-apply the perspective filter either using different settings or just the same settings via the filter menu and repeat. The repeat with the source as well as destination mode can result in even more extreme image effects with the distortion fragmenting the original image.
Selections and Affinity Photo and perspective filter
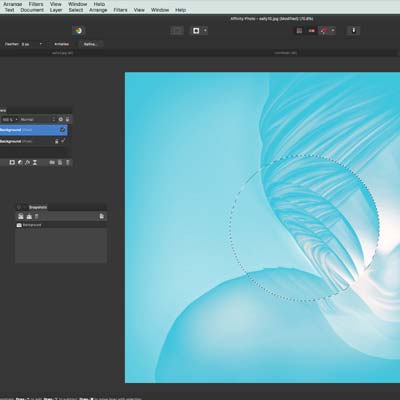
You don't have to use the entire layer, you can use the perspective filter with a selection.
-
Open image
-
go to the elliptical marquee tool in toolbar
-
go to the filter menu
-
distort
-
perspective filter
-
apply perspective to that selected area
-
press return
You can now distort just the selection part. Weirdly, you can create interesting echo or fragmented effects with the destination mode such as on the left (the source mode still does the same fragmentation with the selection as with the full layer). Anyway, you can use the selection approach with the Affinity Photo perspective filter to create some subtle changes to a particular area of an image but also for some really unusual distortions of an image. Of course, you can also use different selections and not just circular ones