Affinity Photo Rectangular to polar filter Tutorial
graphicxtras > Affinity Photo tutorials > Affinity Photo Filters tutorials
** Youtube video tutorial on how to distort images using the rectangular to polar filter effect in Affinity Photo **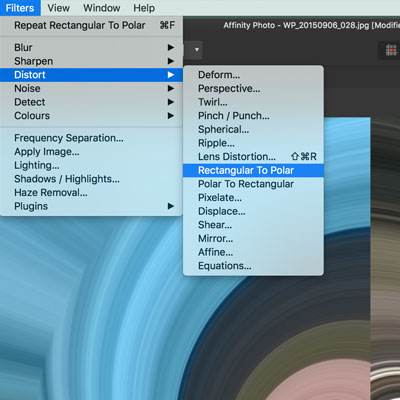
The rectangular to polar filter in Affinity Photo can be found in the distort sub menu (which can be found in the filter menu). It is a fairly basic but powerful filter with no options but it can be used more than once as well as combined with other filters to create some truly unusual effects. You can use them with brush strokes and fonts and images and layers etc
-
Filters menu in Affinity Photo
-
Distort
-
Rectangular to polar filter
The Rectangular to polar filter is limited if applied once but it can be applied multiple times and each time the effect starts to accumulate and you can end up with some pretty amazing designs. You can, of course, also combine it with other filters such as mirror and then re-apply the rectangular to polar as well as combine it with the layer menu and fade command where the rectangular to polar effect can be blended as difference or darken or lighten and more as well as the opacity changes so you can see the original image more or less.
You can also use the rectangular to polar filter in Affinity Photo in selections and you can create a basic selection and then apply it but you can use the freehand selection tool and create a very complex selection by using the add and subtract functionality for the selections and with that the effect is applied to just that selection thought it will still follow the path of the polar effect.
The workaround for that is to add the selection design to a layer by copying and pasting to create a new layer and then applying the rectangular to polar filter to that. As a layer the effect will be applied differently and you can also combine the layers by duplicating the designs and you can also add layer effects and you can also then re-run the rectangular to polar effect
The rectangular to polar filter can also be applied to different channels via the channel panel which can be found in the view menu and studio and channels. Select the red channel and then apply the filter and then go to the green channel and apply the filter etc and you can also combine with other filters to create a very complex design. These layers can all be merged via the layer menu and then duplicate and the filter re-applied and then combined and so on, also combined with different blending modes.
Check out the video at the top of the page to see many examples of how you can use the powerful filter effect in Affinity Photo, rectangular to polar is not a one trick effect pony.