Affinity Photo Twirl Filter Tutorial
graphicxtras > Affinity Photo tutorials > Affinity Photo Filters tutorials
** Youtube video tutorial on how to use the twirl filter in Affinity Photo to create all kinds of amazing twirled effects such as in selections, layers etc **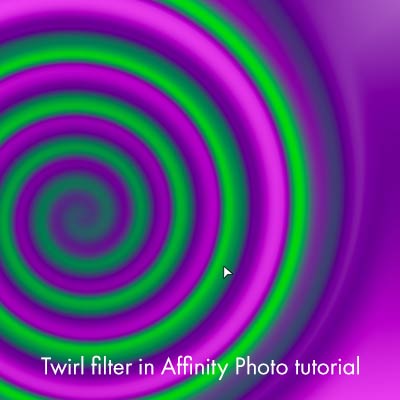
How to use the twirl filter in Affinity Photo, how to distort and more quick guide tutorials and use with images and text and layers. The Affinity Photo twirl filter is found in the distort category. The twirl filter can be used to create amazing twirl effects with any image as well as text.
The twirl filter in Affinity Photo has two options: angle and radius. You can also set the position of the twirl filter origin to create twirls in any location on the image. You can also use the interactive twirl settings to create interesting designs.
You can use the twirl filter on layers in Affinity Photo and that can be used to create unusual distortions of layers for combinations (the twirl takes into account the transparency of the layer). The twirl filter can also be used with channels to create interesting red and green and blue color effects in Affinity Photo.
The twirl is also available via the live filter layer menu and can be used as a layer effect to modify a particular layer or all layers. The twirl filter live layer can be removed as well as duplicated to create many different interesting and unique distortions. This tutorials show you how to locate the twirl filter and use the settings. It shows how to use with layers as well as text layers and color channels. It also shows you how to use it with the live filter layers. The twirl filter can also be accessed via the toolbar in Affinity Photo
-
filters menu in Affinity Photo
-
distort
-
twirl
-
set angle
-
set radius
-
set center for the twirl by clicking document
-
apply
Basics of the twirl filter
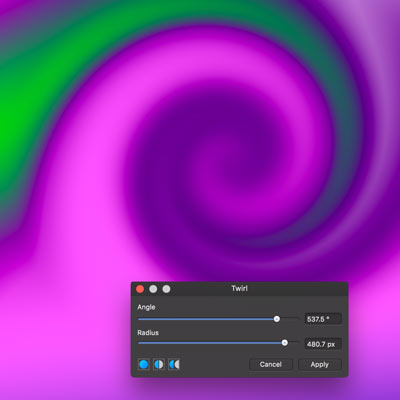
The twirl filter in Affinity Photo can be used via the distort category (in the filter menu command in Affinity Photo). The twirl filter can be used to create amazing distorted effects in the application and can be combined with layers and images as well as brushes and patterns and fonts
You can change settings via the twirl panel and also apply the twirl via the twirl cursor on the document or layer or text etc
By default, nothing appears to happen so you first have to set the angle and radius and then apply the twirl filter on the document using the cursor (slightly odd default setting). It can only be applied once per filter application though you can re-apply the twirl filter in Affinity Photo multiple times to create all kinds of distorted image. You can use a low radius and angle setting to perhaps slightly shift an image or you can use a large radius and angle setting to create a truly large twirl in an image
Control the position of the twirl by the cursor. You can then just re-apply the filter and use a different location for the twirl origin or just use the same origin position and repeat apply the twirl filter to that location to create a more intense image
Use twirls on layers in Affinity Photo
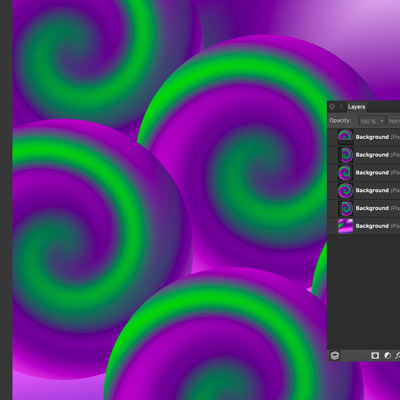
You can use the twirl filter also on Affinity Photo layers, such as a duplicate of an image layer
-
layer menu and duplicate
-
filter and twirl filter
-
Set the angle and radius
The advantage of using a layer is that the layer can be re-sized, rotated, it can be blended using blending modes, you can use masks with the layer as well. You can also apply multiple effects to the layers and also the layer can also be deleted. The layer does not need to be same size as the original layer. You can also quickly create a layer using a selection of the image and copy and paste and then apply the twirl filter to that layer
-
elliptical marquee tool
-
create a selection
-
copy
-
paste
-
apply twirl filter to the pasted layer
-
duplicate multiple times
Twirl filter and channels
You can also use the twirl filer with channels panel
-
view menu
-
studio
-
channels panel
-
select red channel and apply twirl filter
-
select green channel and apply but with a different setting
-
repeat with blue etc
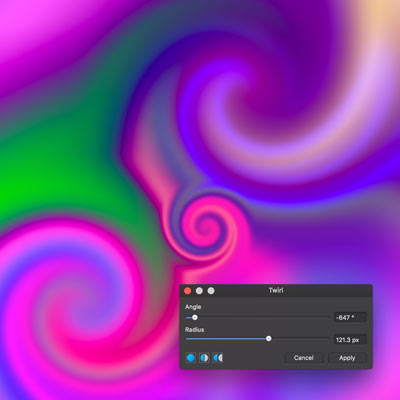
Live filter layer and twirl filter
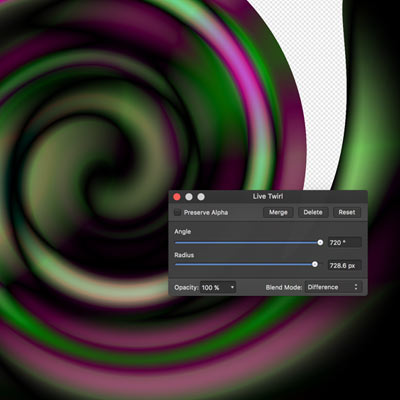
You can also use the twirl filter as a live filter layer via the layer menu and the advantage here is that the angle / radius / position are live and can be modified at any point and you also have inbuilt blend mode with the effect as well as opacity (as well as the blending mode for the layer itself)
-
layer menu
-
new live filter layer
-
twirl filter
-
apply settings such as angle and position and radius as well as set the blend mode and opacity
The result will be a new layer also with transparency which can then be blended with other layers and other effects as well as twirled again using the filter in Affinity Photo.
Text and twirl filter (live)
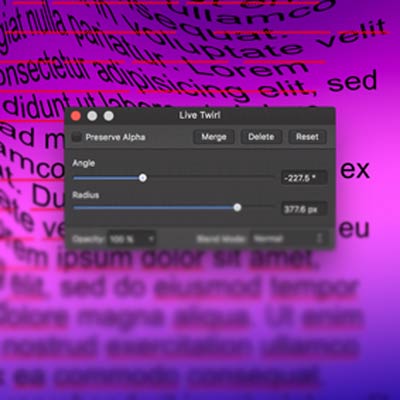
You can also distort text with the live effect layer, so the text can be twirled in 1000s of ways (it is a much better approach than using the destructive filter effect approach)
-
create some text (perhaps using the frame text approach)
-
select the text in the layer panel
-
Go to the layer and select the new live filter layer and twirl
-
apply settings
The effect is then only applied to that text object.
You can, of course, apply the layer to the whole image or just use the destructive filter effect via the filter menu.
Customize the toolbar
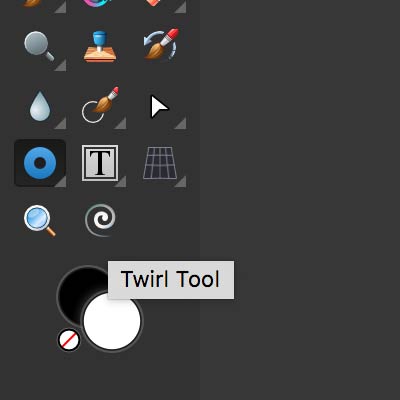
You can also add the twirl to the toolbar for quick access (it is the filter and destructive effect)
-
view menu in Affinity Photo
-
customize tools
-
drag the twirl filter to the toolbar.
-
close
-
Simply select the tool in the toolbar and apply to the current layer
-
set angle etc
-
set origin by clicking the document
-
apply