Affinity Photo Grid Layout Manager Tutorial
graphicxtras > Affinity Photo tutorials > Affinity Photo How To tutorials
How to use the grid manager in Affinity Photo, how to create super useful grid designs in seconds using the powerful layout features found in the view menu and grid manager. Create isometric, triangular, ratio designs and more in Affinity Photo.
** Youtube video tutorial on how to use the grid and grid manager feature in Affinity Photo to create all kinds of wonderful layouts for your work **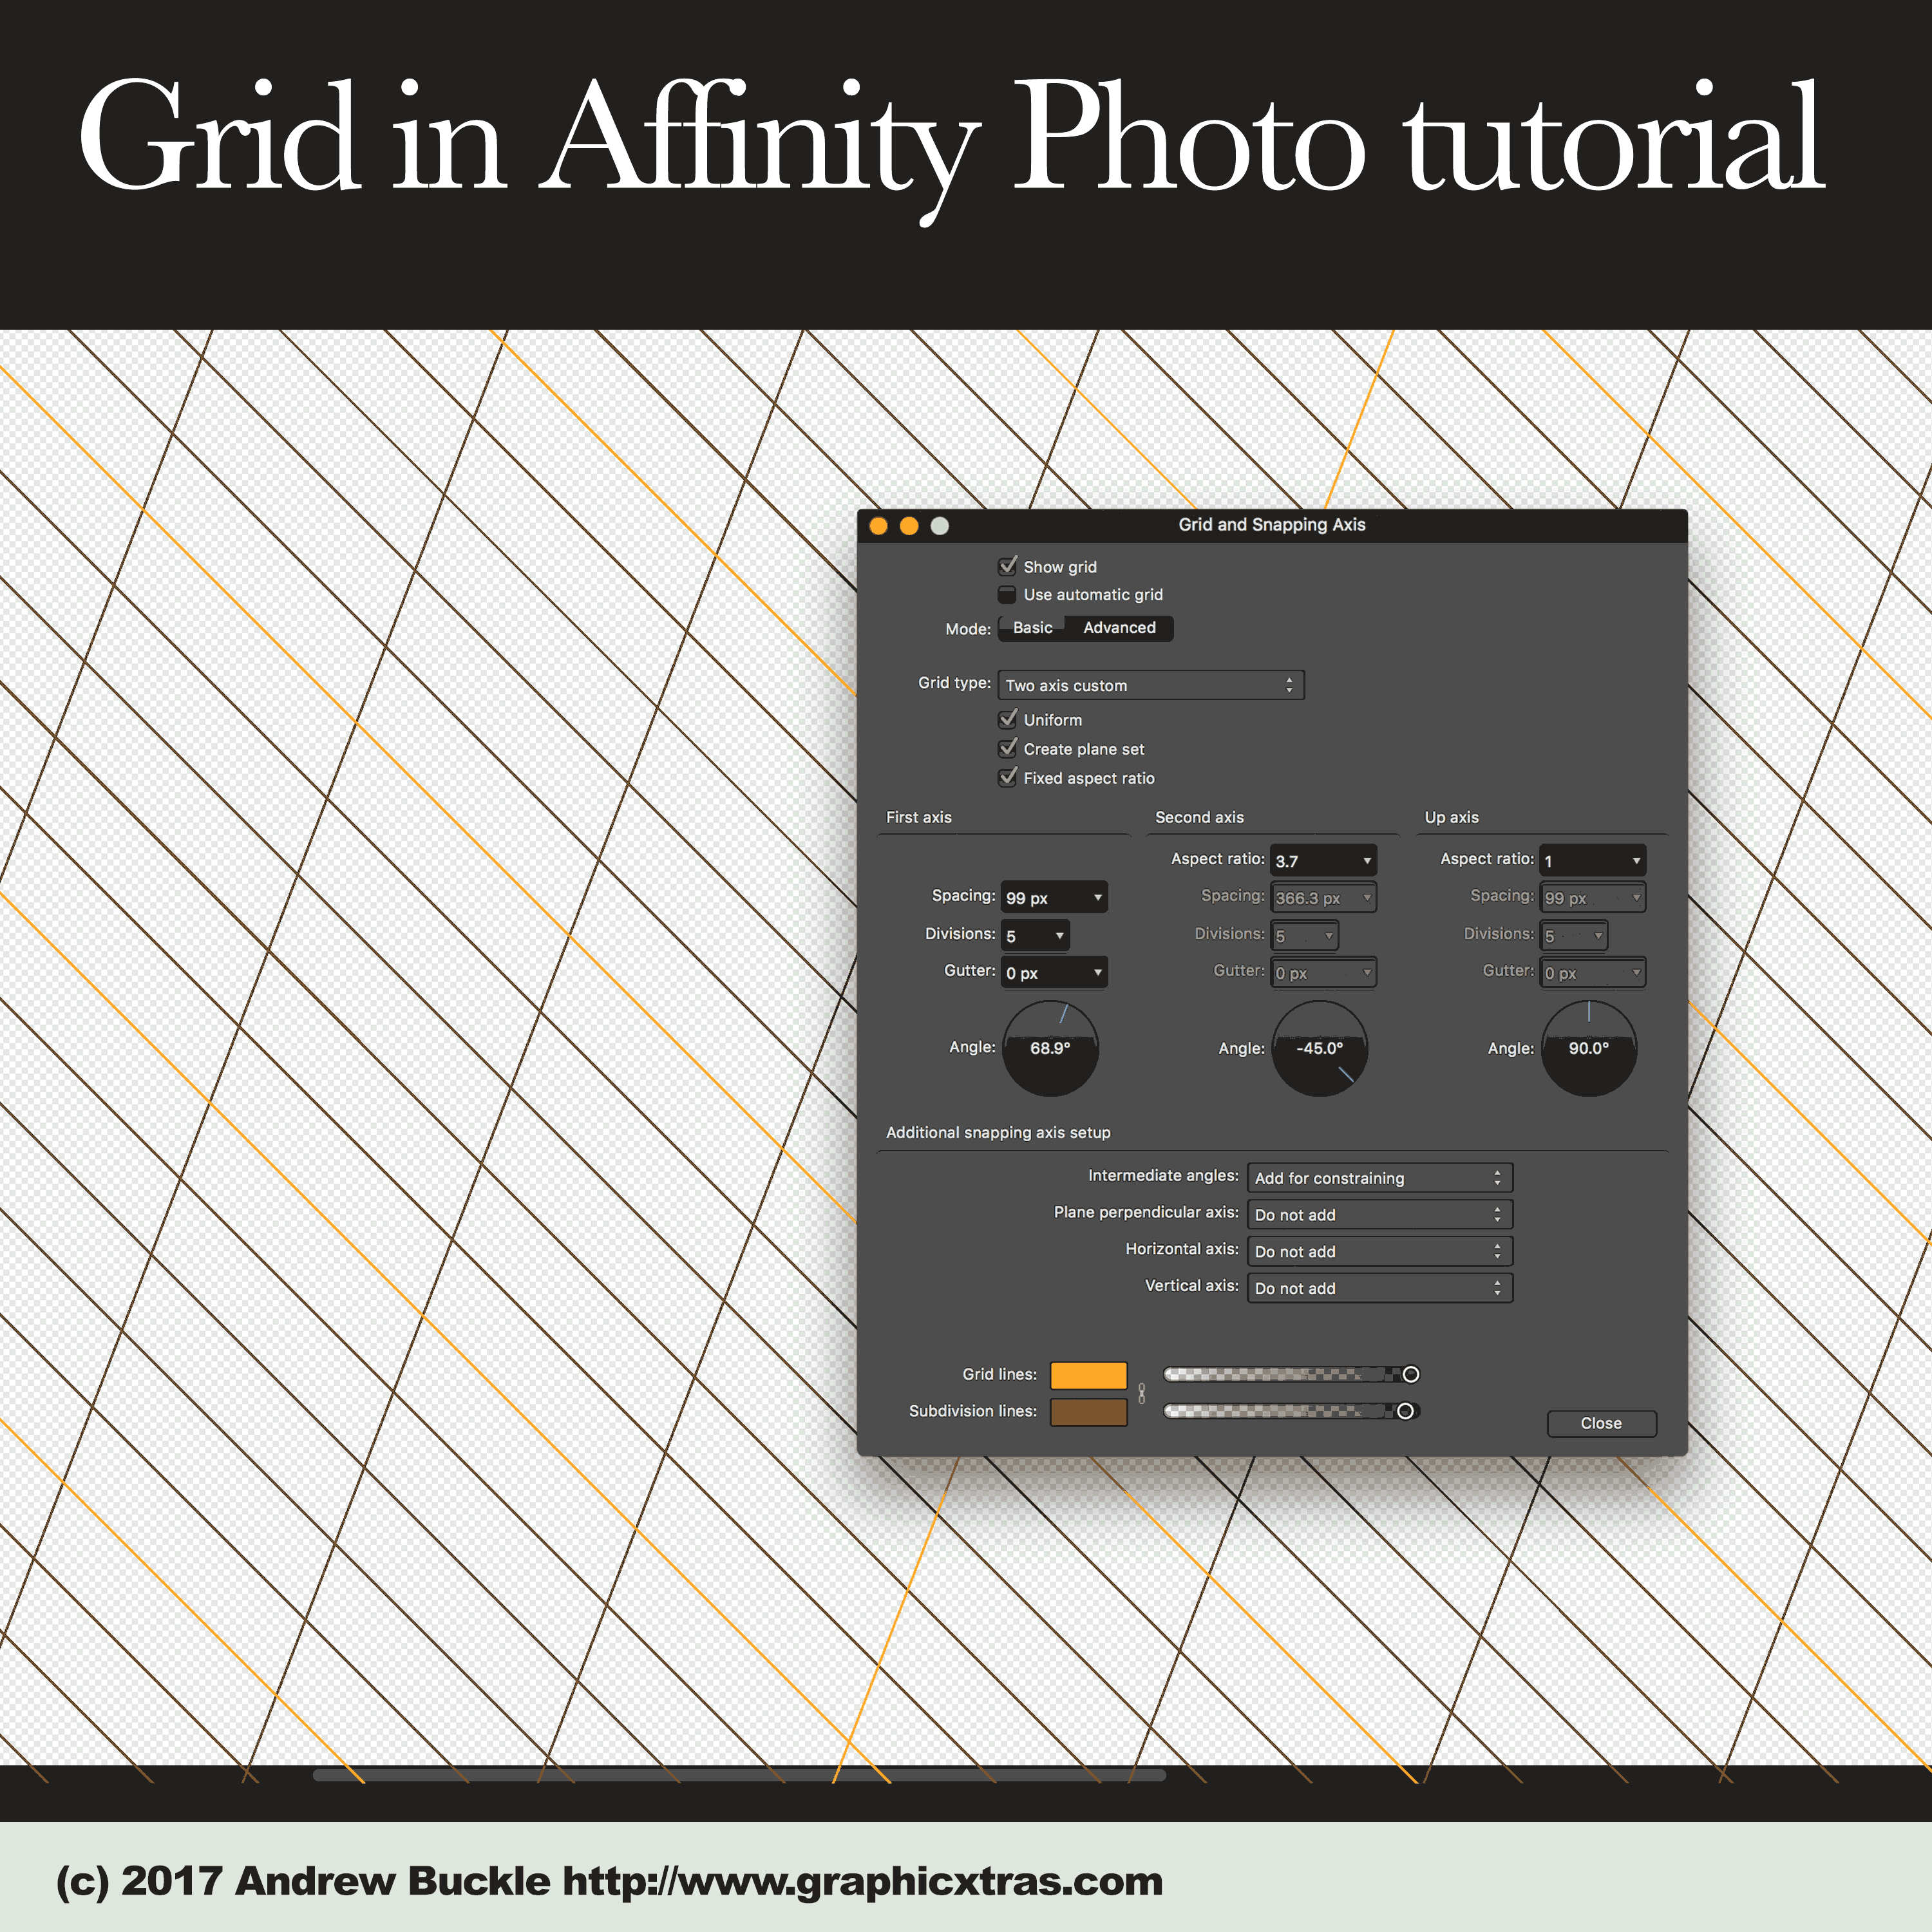
1. Display the grid in Affinity Photo
How to display / use the grid (and grid manager) in Affinity Photo. Goto the file menu and open document and then view menu and show grid.
2. Uses of the grid
The grid can be used for create objects and snapping to a predefined grid. You can use the grid with images and then use that image and grid to create a sketch / drawing / painting (the main reason I use grids in Affinity Photo and it is amazing how many apps do not have this feature so thank you Affinity Photo for including grids in 1.5 etc). You can use the grids to align text and objects and much more in Affinity Photo
3. To hide the grid in Affinity Photo
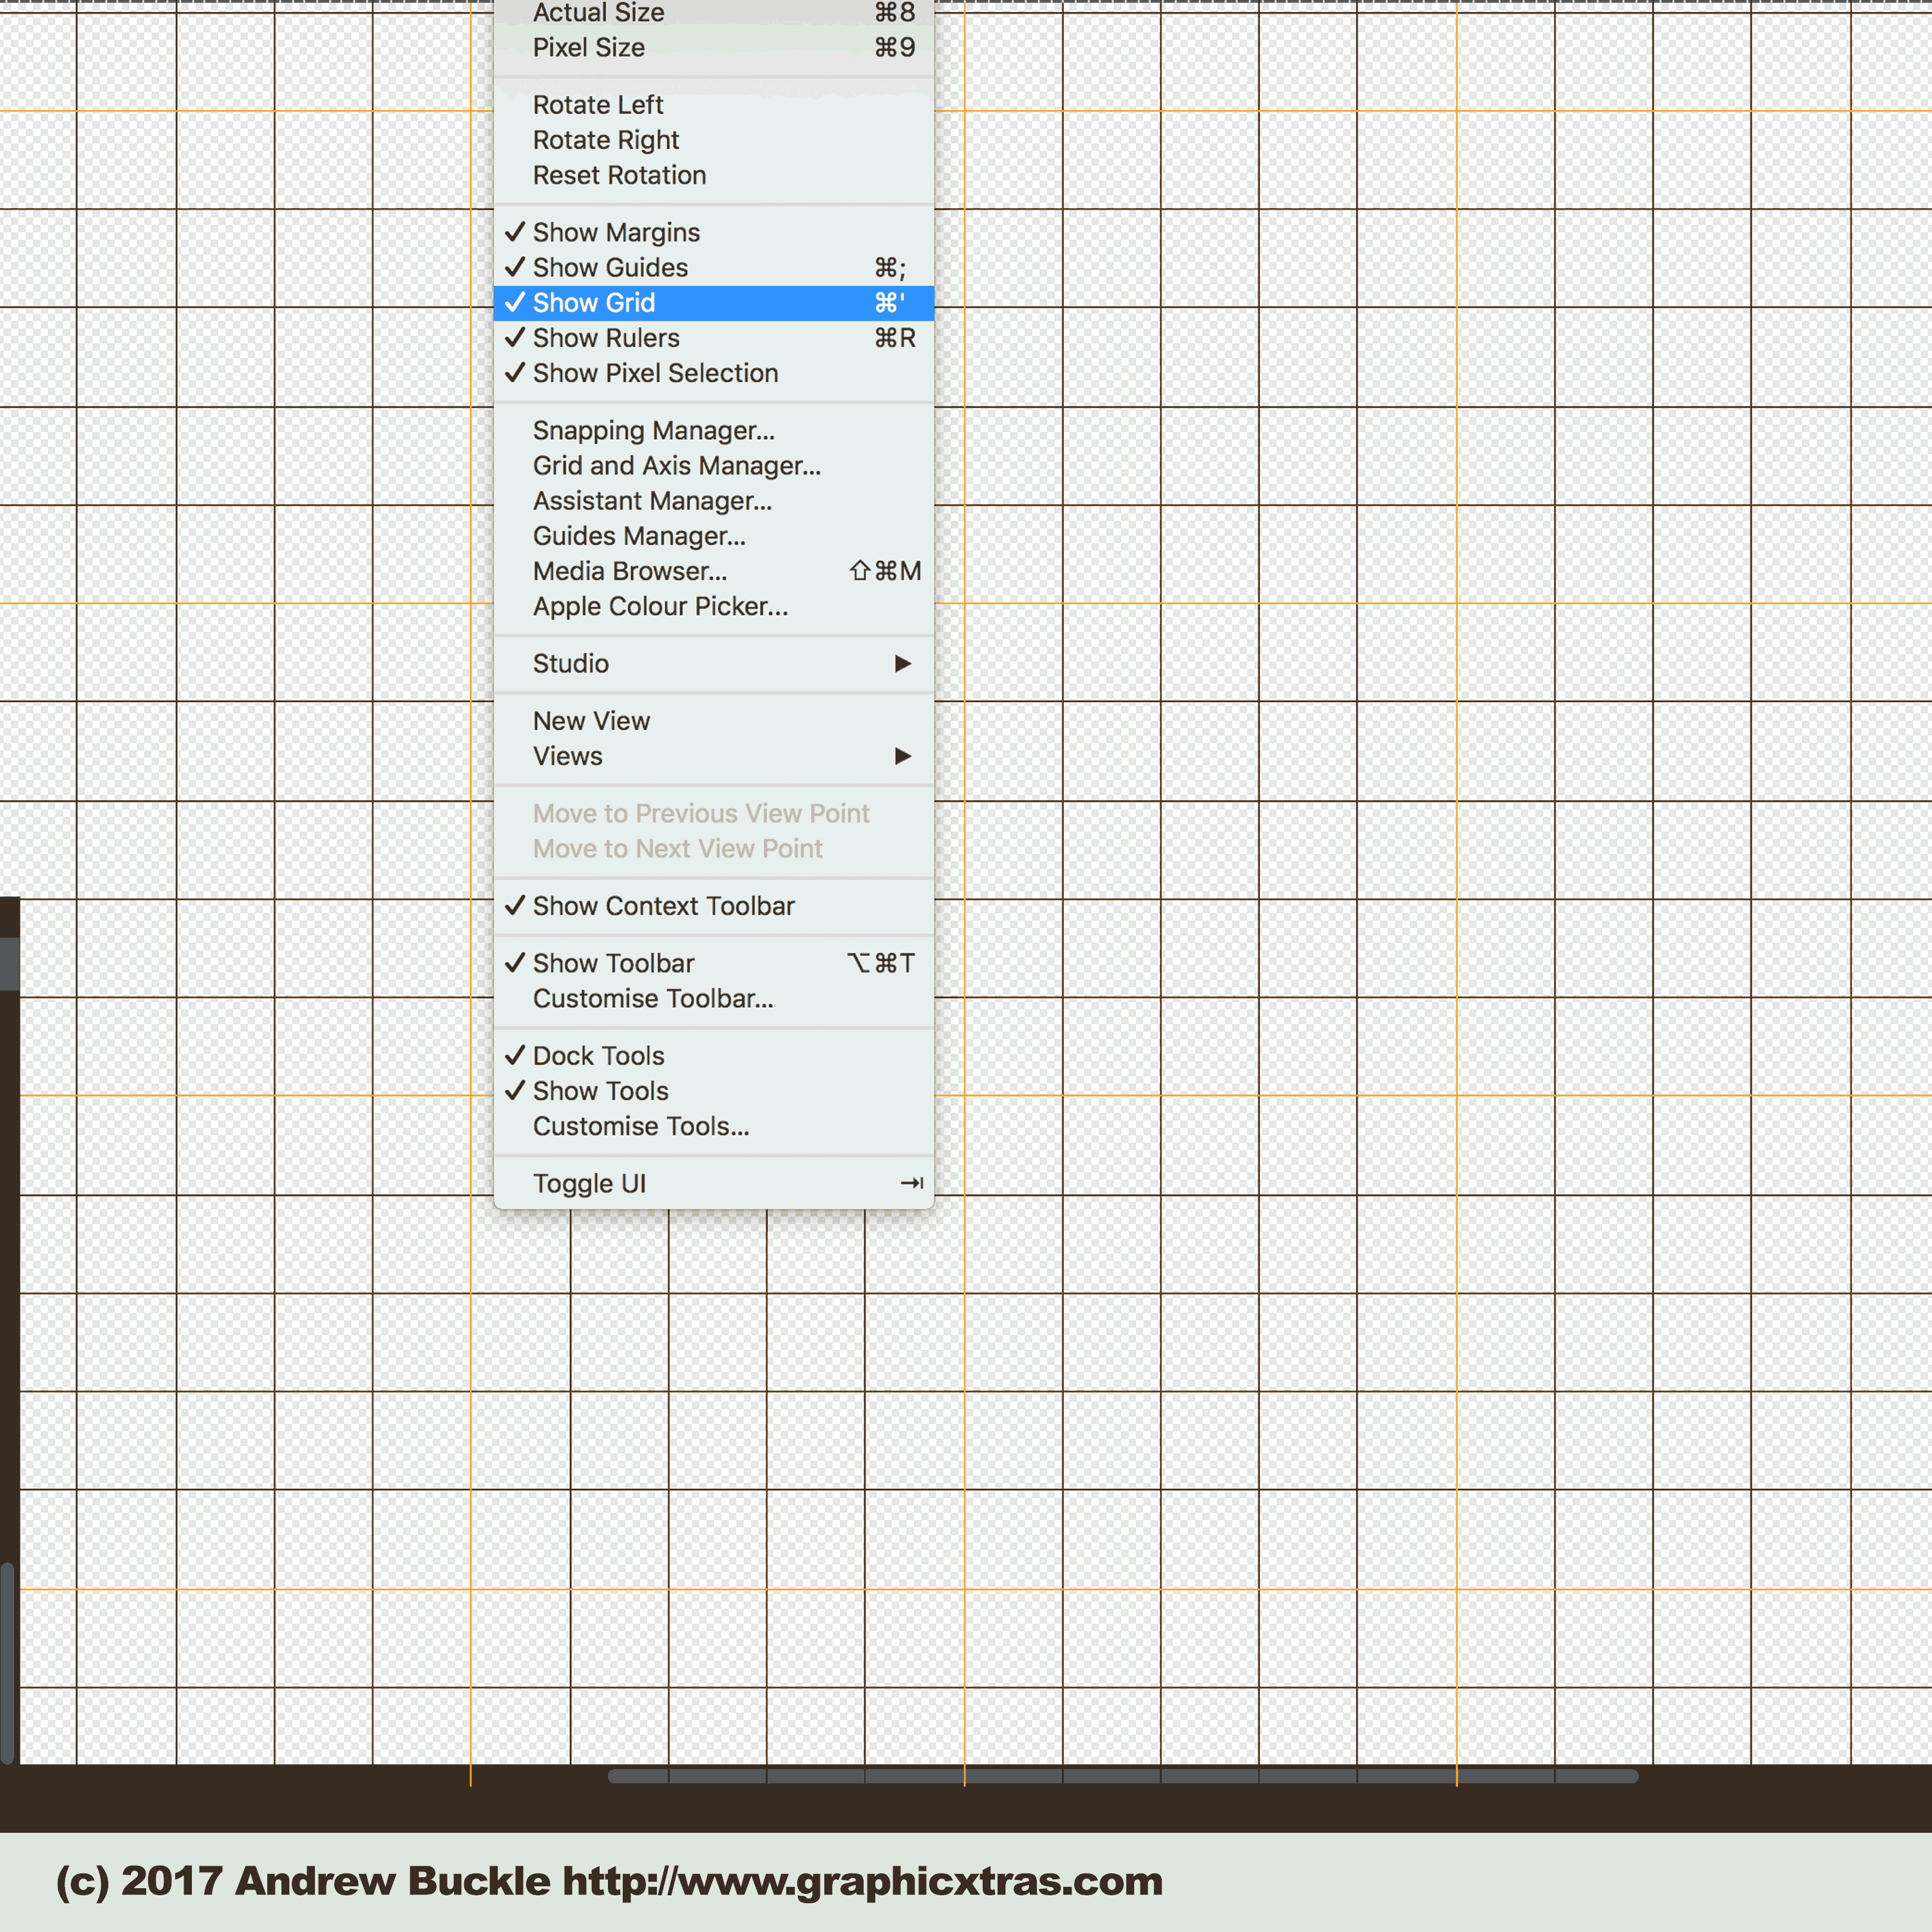
View menu and show grid, which then hides the currently displayed grid
4. To set the grid settings in Affinity Photo (basic)
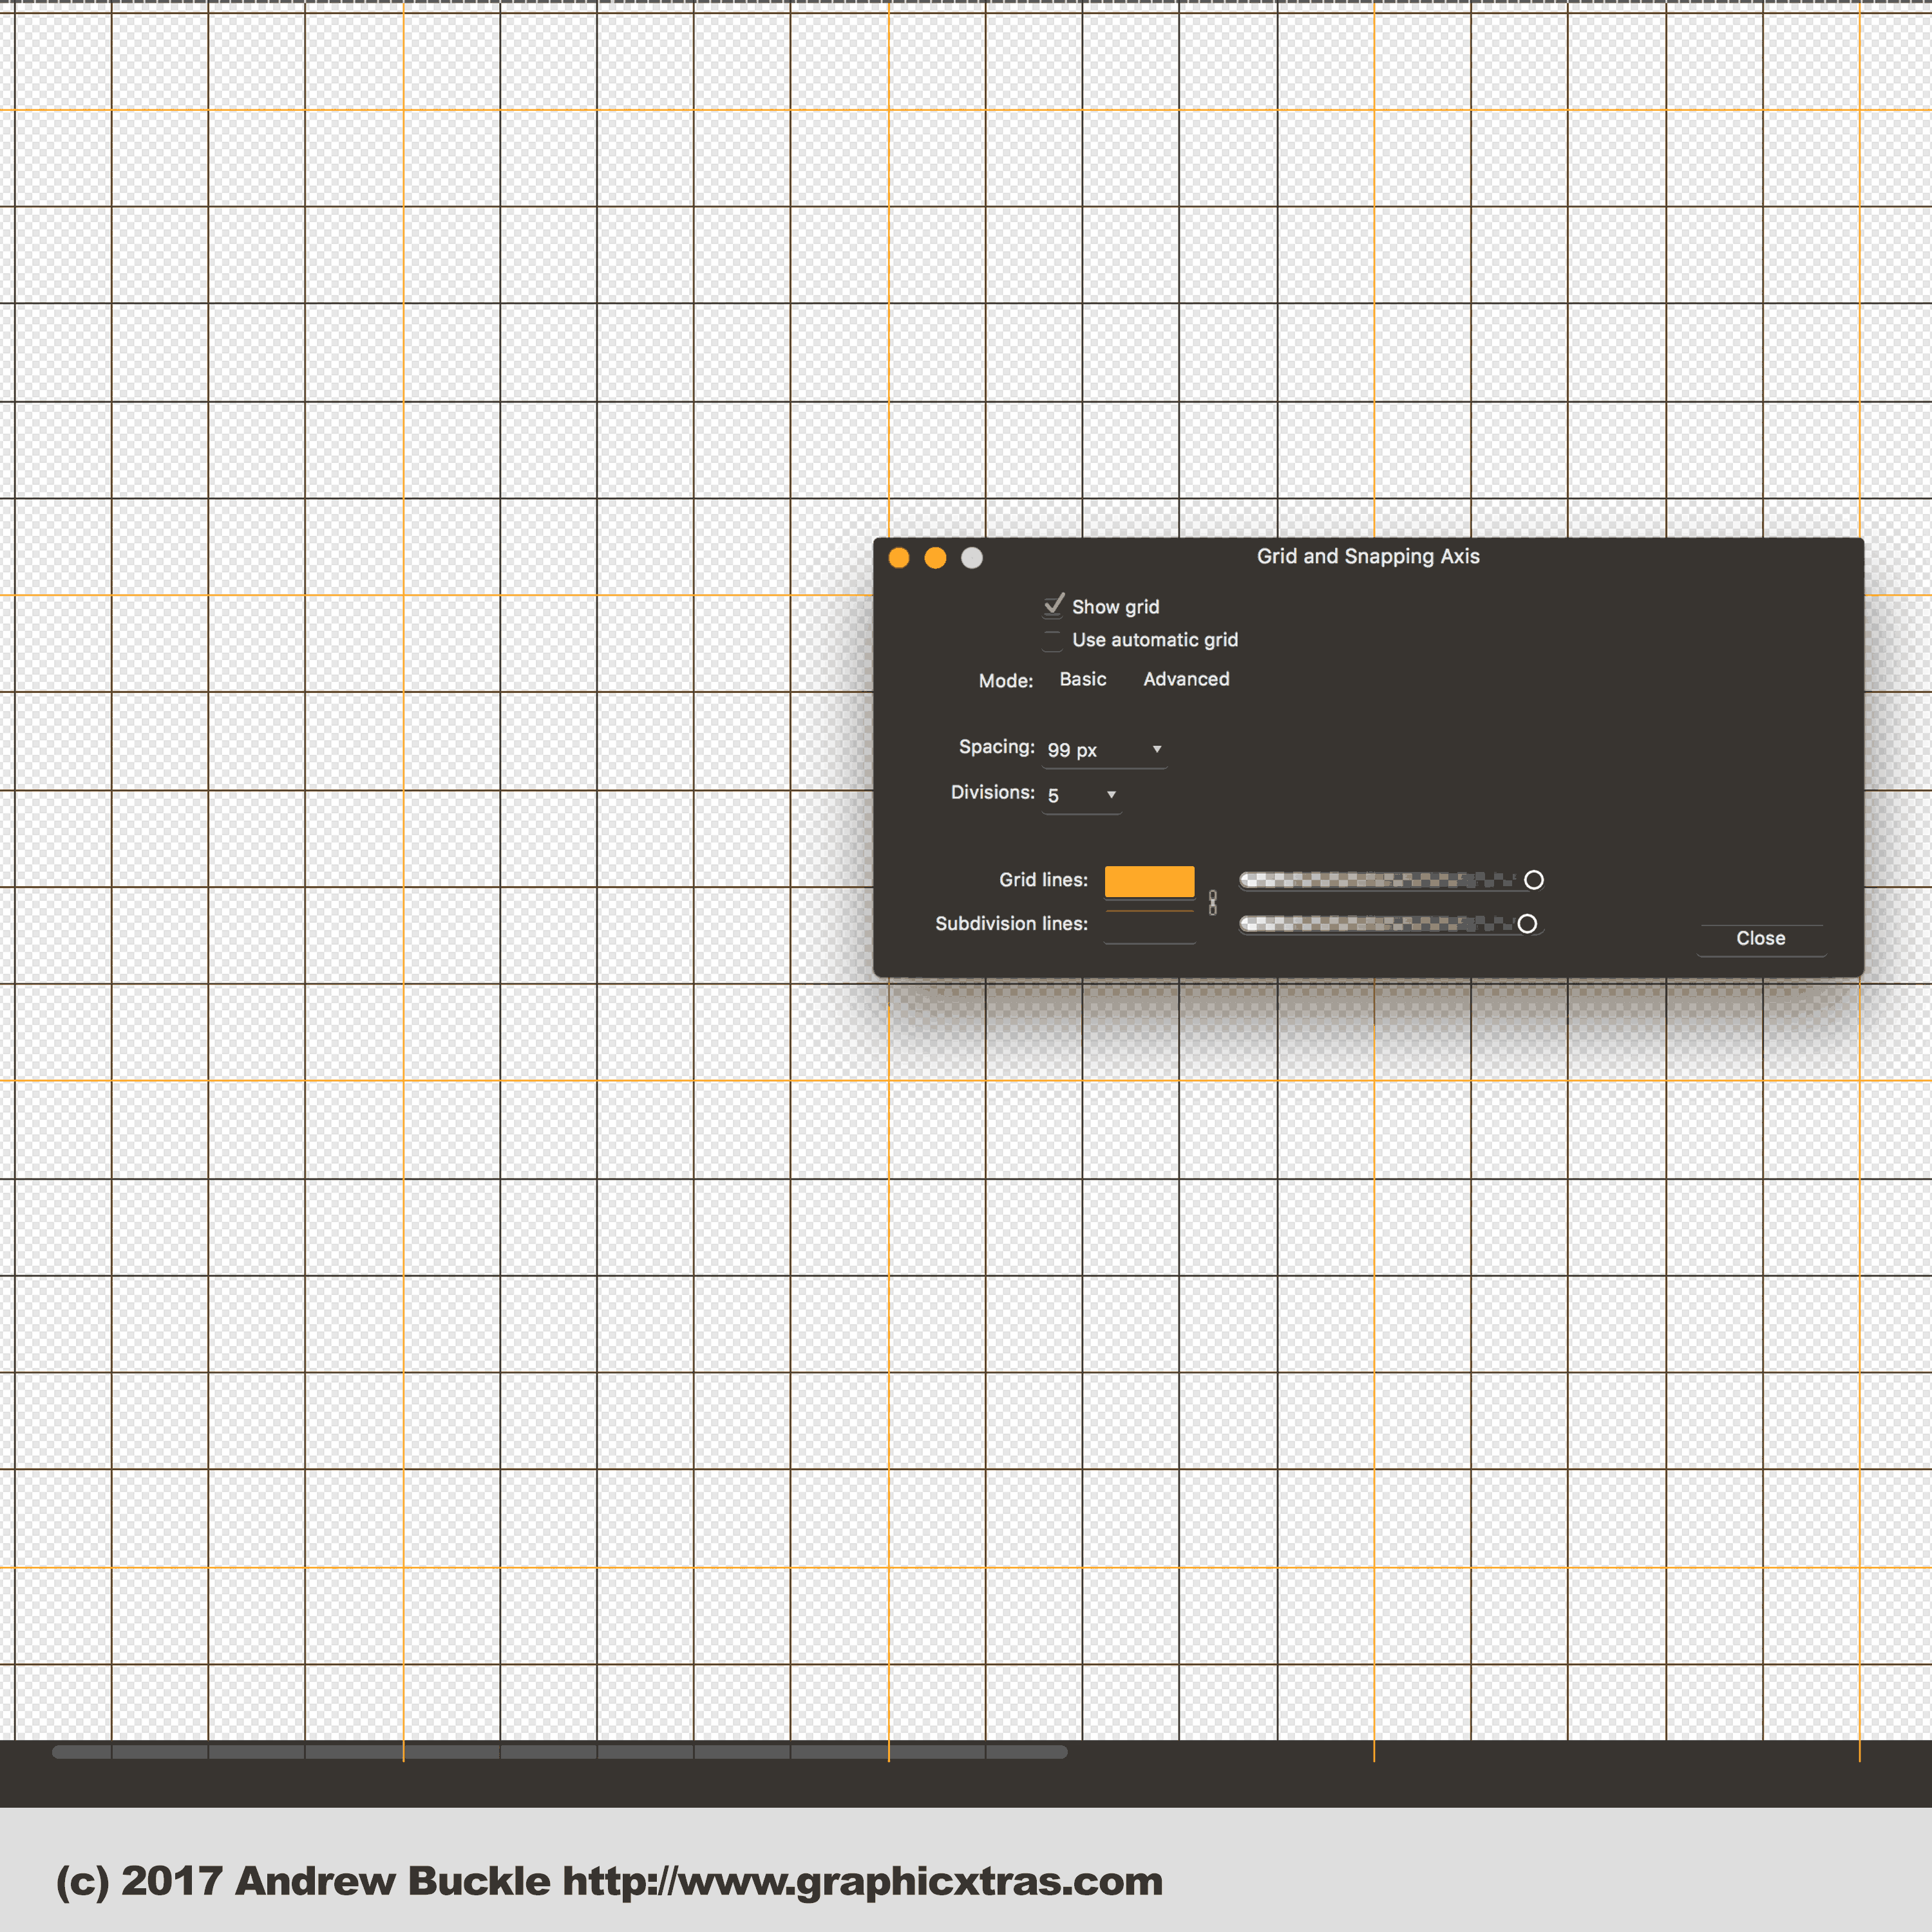
View menu and Grid and axis manager. Use automatic grid (to just use the default grid though personally I never like that feature) and set the show grid set to ON. Set spacing to 100px or 600px etc (make certain that the opacity makes the lines visible) and set the divisions to 10 etc (make certain that the opacity for sub divisions allows them to be visible) and set the color of the grid lines and set the color of the subdivision lines and set the opacity for both types of line. Link the color for the lines if required and close.
It should be noted that if you set the opacity to low you won't see the grid and I have often found I am changing the settings and nothing happens and the main reason I have set one of the grid line's opacities way too low.
5. For more advanced grids in Affinity Photo
You can set a whole lot more advanced lines for setting up grids for your images by clicking the advanced tab and you have : standard OR isometric OR diametric OR oblique OR trimetric OR triangular OR two axis etc as well as a number of variants such as changing aspect, gutter, angle etc.
It should be noted that some of the grid types do not allow for the full range of settings to be used and that some of the settings will be disabled. many of the second and third column settings in the grid manager are often disabled for most of the types of grids.
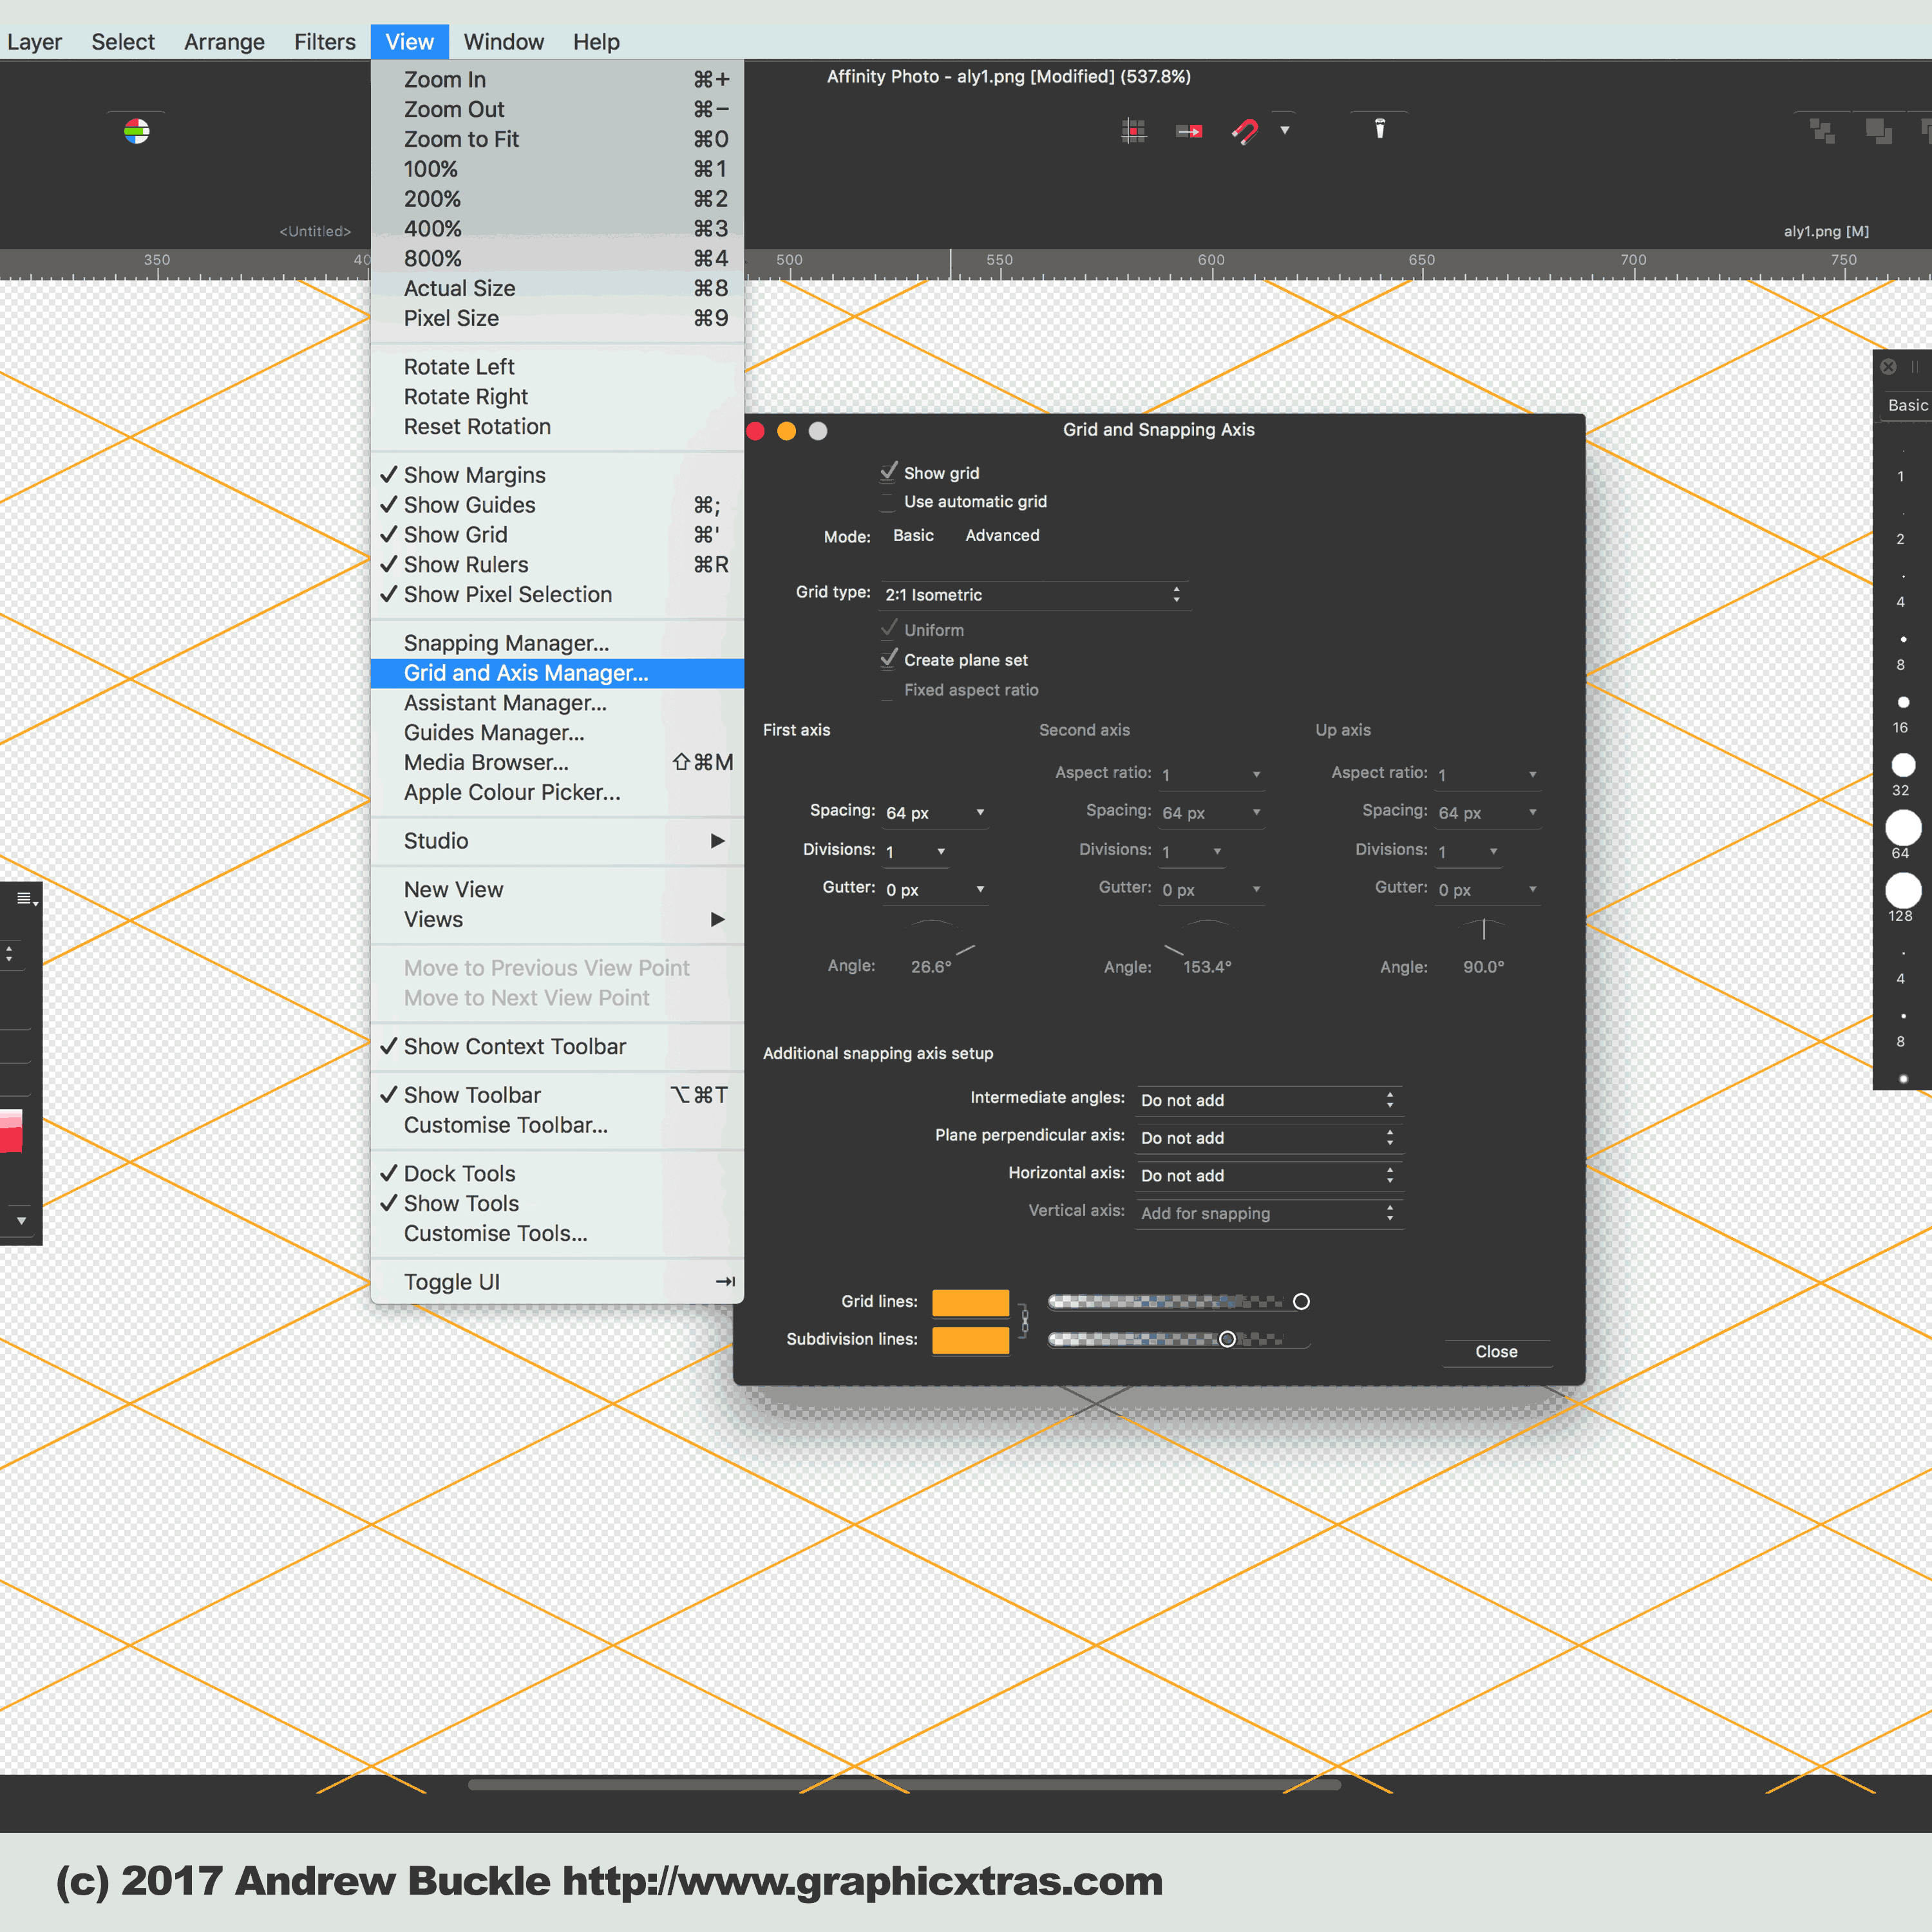
6. Snapping to the grid in Affinity Photo
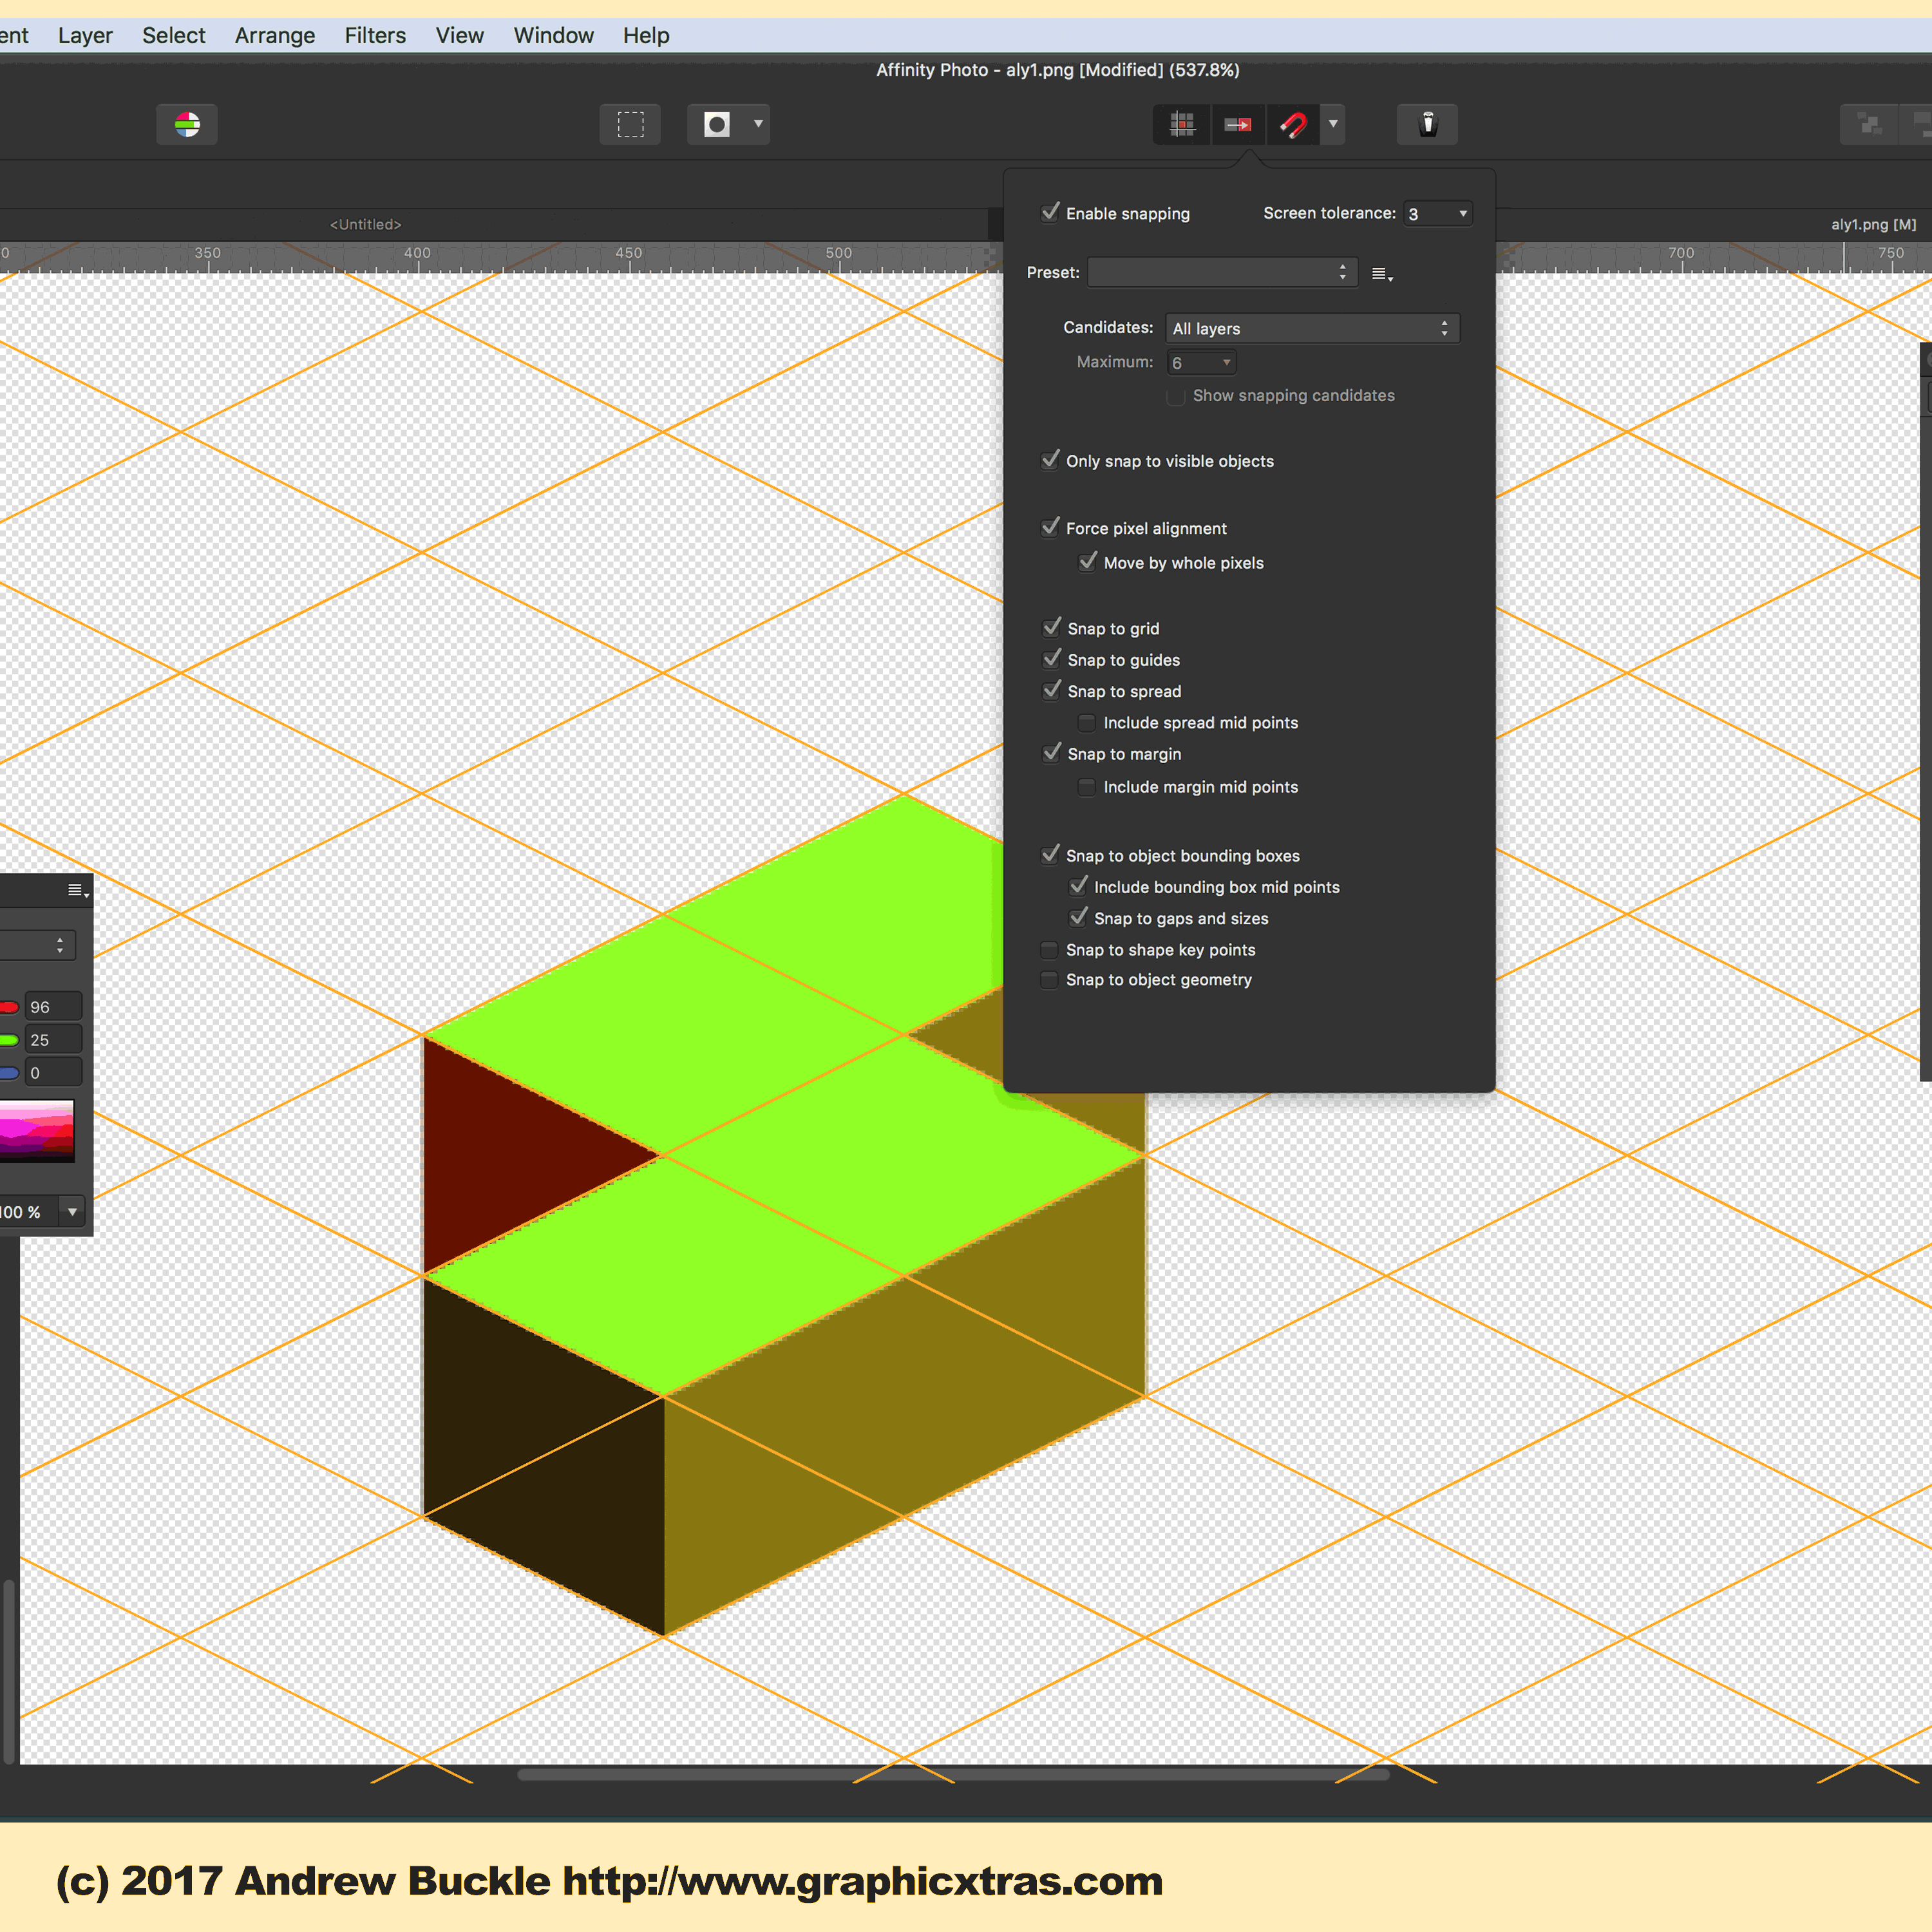
Once you have added a grid, you can also use the snapping features included in Affinity Photo. Goto to the View menu and then Grid and axis manager and make certain the use automatic grid is OFF and then go to the Advanced tab and select the 2:1 isometric method. Set the spacing and set the gutter (creating a nice space between the cells) and set the divisions and click close for the grid panel.
Go to the snapping at the top of Affinity Photo : enable snapping ON and make certain the snapping to grid is ON and pen tool in Affinity Photo toolbox and click at the intersections of the grid
7. Creating a physical grid in Affinity Photo
Sadly, the grid cannot be turned into an actual grid - hopefully that will be a feature in a future version of Affinity Photo. You can, of course use the grid to create a physical grid by using paths with a stroke and especially useful is the snapping ON feature. Set the stroke to 10pt and the stroke color for the lines and then duplicate the lines across your art board and space it using the alignment tools / distributions. You can then group all the lines in the layers panel found in the window menu by right clicking and selecting group. The group can be duplicated and rotate 90 degrees to form the grid. You can use the stroke settings such as caps etc to create the perfect grid. The design can also be then grouped and saved for future use.