5000+ PSP Preset Shapes for Corel PaintShop Pro In PSP Shape Vector Format
graphicxtras > Corel tutorials > Corel PaintShop Pro Preset Shapes tutorials
$17.99 Secure / E-Download - commercial use, royalty free
Buy Now 5,000 Shapes Collection for PaintShop Pro (Latest versions and earlier + EPS shapes + selection of fonts)
** Youtube video tutorial on how to use PSP vector shapes in PaintShop Pro **
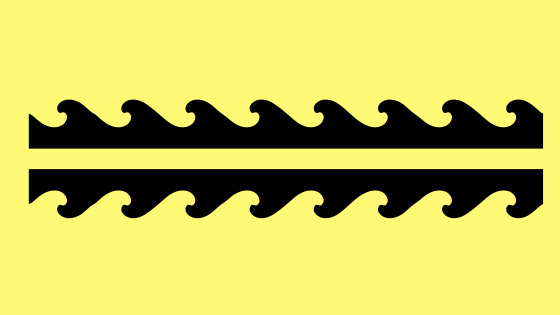
Preset shapes are for Corel Paint Shop Pro (Corel) / PSP for use on the PC / Windows. The preset shapes for PSP are all for commercial use, all are royalty free, no credit is required, all are by graphicxtras.com. The preset shapes for PSP are for use with scrapbooking, logos, books, illustrations, surfboards, hats etc. The preset shapes for PaintShop Pro sets include 3D, swirl shapes, flourish shapes, Christmas shapes, 3D shapes, rosette shapes, chevron psp shapes, flower shapes, Easter egg shapes, border and frame shapes and more. The preset shapes for psp are all vectors for any size of work in PSP and so can be set to any size such as 100x100 to 10000 x 10000. The preset shapes are all access via the psp shapes tool in PSP and via the preset shapes panel. They can be set to any color such as solid colors and gradients and patterns and textures can be added as can styles. The PSP preset shapes can be added once or multiple times. You can edit the psp shapes. You can use them as layers. You can use them in images. You can use the preset shapes for psp as a frame. You can use them as a great source for picture tubes. You can use them as a great source for amazing new patterns. You can use the preset shapes to create surfboards, kindles, videos, hats, fashions, shoes, adverts - basically anything. On purchase of the preset shapes for PaintShop Pro you receive the artworks in PSPshape format as well as notes and gallery and serial



















1. PSP Shapes Can Be Used in 1000s of Ways
You have full extended license, they are for commercial and personal use. You can do everything with them in all your projects. Use them once or multiple times. Use them combined with others, create new items to sell on and much more. All royalty free
2. PSP Shapes are Easy to Add to the PSPShapes Folder
To install them, you must first find the location of the install folder for your version of Paint Shop Pro and this can be found via the file menu and preferences command and file locations - there are lot of other file locations for deformation maps, environment maps etc You can see the one you want highlighted in the image before. You can either use the existing file location or you can create a new folder for the files, it is up to you. Once found, place the files in that location and re-start. You can add locations as well as remove them. The best location is in your user section (especially if you are just using a standard user account and not admin) as you will not need a password etc to add the files.
3. Change the PSP Color via Materials panel
They are all vectors and are stored with an arbitrary color (in most cases though some of the sets have bonus items and other color effects attached to the decorative graphic). Before you add the vector, you can change the default color to be used via the materials panel (such as texture, pattern, gradient etc) This does depend on the retain style option though. You can also change the color (or the other color options as well as adding a grain to the vector) via the object selection tool. Click on the vector properties button on the tool options panel, the dialog will allow you to modify the color (though sadly not in real time as it only changes after you click the OK). The fill and the stroke can be modified and can have texture, patterns and gradients added. You can also further modify the color by using effects such as the "artistic effects" "texture effects" "image effects" "art media effects" and many more but any change with these filters will turn the vector into a raster format (sadly there appears to be no smart filter feature as yet available)
4. PSP Shapes are layers
Using the tool initially creates a new layer, all subsequent applications of the vectors are added to the same vector layer. You can see all the elements added to the layer via the layers panel. If you wish to add the graphic to a new vector layer then you have to create a new vector layer via the layers menu and then the next drawn graphic will be added to that (and so on). You can double click on the vector layer to display the layer properties such as the blend, opacity as well as styles. You can click on the sub layer items and you can then modify the fill and stroke as well as stroke width and line style etc
5. PSP Shapes Can have layer effects added via layers panel
Go to the layer panel and double click the vector layer (or raster if you have converted them to a raster format). You can modify the opacity, blend mode (normal, darken, burn, dodge etc), blend channel, layer styles such as bevel, inner glow, reflection (something that even Adobe Photoshop doesn't have) etc. The layer styles are very useful if you wish to save the vector (and the vector can have styles) as a PSPTube file. The layer styles are also saved with the preset format so as soon as you select the tool again, you will see the bevel etc as well as the gradient etc
6. PSP Shapes can be transformed via the bounding box
They can be re-sized, rotated etc via the toolbox in PSP so any path can be changed to any angle. To rotate, use the shape tool by going close to the corners and the rotate cursor will appear. Pass over the top of the corners and the scale option will appear. Hold the shift key down when you pass over the middle edge points and you can skew the the selected vector up and down OR left to right. Hold ctrl and shift to skew in both directions.
7. Edit PSP shapes using the pen tool
Select the vector and then click the pen tool - it is just below the tool that creates them in the first place. You will then see the points for the current selected graphic, you can now edit them in countless ways such as shifting individual points or multiple points. Select a point and then drag the point to a different location. Click the nodes (or points on the curve) and you will then see the anchor points for that segment and you can then rotate and drag those anchor points to modify the curve for that selected segment. You can alo right click the nodes and set various things such as node type 'asymmetric' 'symmetric' 'cusp' 'convert to a line' etc which are also very useful in modifying the graphic. You can also use the various options along the top of the app to change the angle of the anchor points etc. You can also right click with selected nodes and flip, mirror, rotate, skew etc to create all kinds of new forms. You can remove all curves by using the convert to line command with all the nodes selected. You can also duplicate them using the edit command (right click with the pen tool) duplicate and then you can also use contract and expand (you can set the expansion via the top bar options) There are also other options available to reverse the path, merge etc. The options are pretty decent and you can use it to manipulate your paths in all kinds of ways
8. PSP Shapes can be searched via the organizer
You can also use the organizer feature of PaintShop Pro to scan through all the artworks you have, simply point to the folder and small thumbnails will be generated of all the artworks found - the quality of the image generated is less then desirable though. it does mean you can print out a complete printout of all the artworks (probably a better copy than the one supplied with the set in the ZIP)
9. See all your Preset shapes via the Preset Brower
You can display the available graphics via the tool options (you might have to go to the view menu and panels menu to display the tool options, though by default the toolbar is displayed). You can also change the category but the third party ones are only visible in some of the categories such as ALL. You can also specify the file location from this panel as well as how the thumbnails are dispayed
10. EPS Shapes
The set also includes EPS shapes as well as these are accessed via the open command.
11. JSL format is an earlier PSP shape format and still supported
The set also includes some very old PSP sets but in JSL, that format is also supported in PSP
12. PSP Shapes - How did you create them ?
They come from our earlier fonts sets and we are now including most (not all) of our fonts that were used as the source material, they are in TTF format