Illustrator Adjust Color Balance Tutorial
graphicxtras > Adobe Illustrator tutorials > Illustrator how to tutorials
Using the adjust color balance panel in Illustrator, You can rapidly change the color of all kinds of designs such as swatches, paths, repeats, meshes, gradients and more. Tutorial showing how to make paths etc more red or more green etc
1. Basic adjust color balance
The paths / pattern swatches can be re-colored in a number of ways such as using the color libraries, you can also use the powerful adjust color balance feature in Adobe Illustrator to change the color of many different designs, single path or multiple paths and much more.
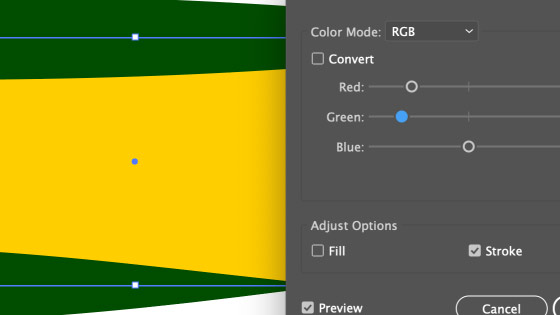
The adjust color balance command can be found in the edit menu. Select a path, apply pattern swatch (or not) by using the swatches panel and go to the edit menu and hen edit colors and adjust color balance and you can then change the red / green / blue etc for the fill / stroke
2. Use adjust color balance to change to gray scale
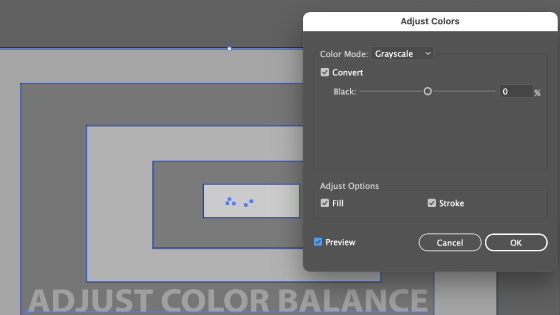
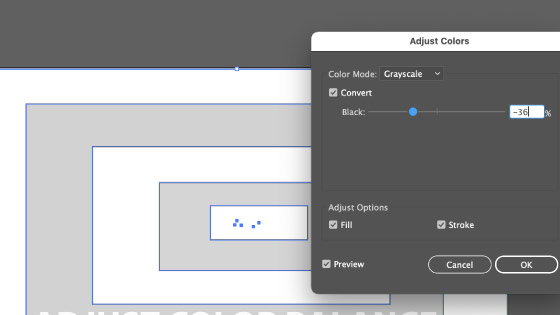
If you have a selected path (filled with swatches or not), you may wish to turn the artwork into a black and white (gray scale) vector pattern then you can use the convert command
Select path and edit menu and edit colors and adjust color balance command and select the convert check box and then set to gray scale (if available) and change the black setting to left or right (left for lightness)
You can turn any colorful path into a gray scale design
3. Green design via the Adjust color balance
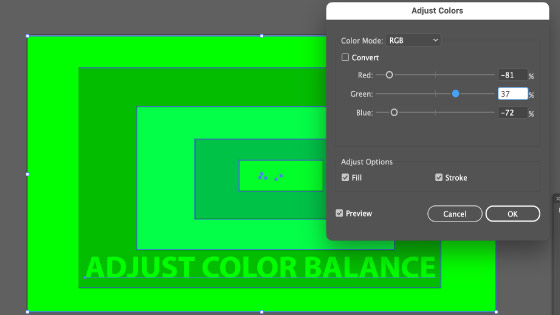
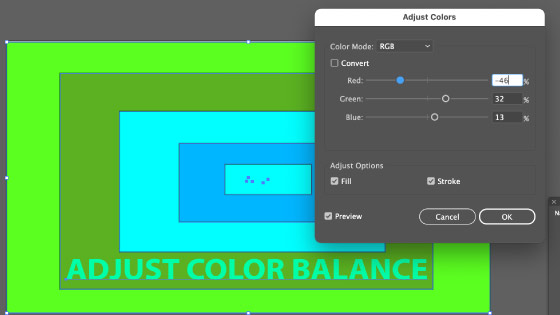
You can turn any colorful path into a red design (or a green design or blue design etc).
You can do this by using the adjust color balance. Select a path and / or swatch and then go to the edit menu and edit colors and adjust color balance and select the preview on and go to the red slider and then slide to the red to the extreme right or the green to the extreme right
4. Re-color pattern via the pattern editor
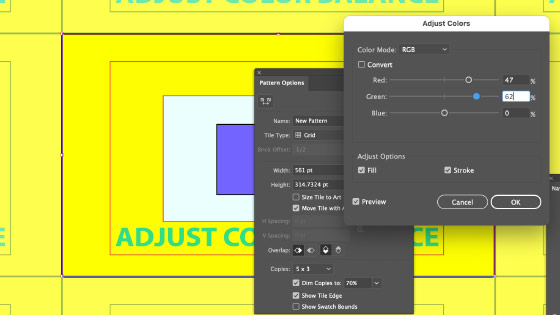
You can always edit the original source swatch by double clicking the swatch in the panel and then selecting paths in the pattern editor and then using the adjust color balance, such as changing the color from green to blue etc. The advantage is that you can always tweak the artwork using the color adjust balance and then use the save a copy command to capture the new colorful pattern after each change and create multiple colorful pattern swatches from a single swatch (as well as edit and transform the artwork).
Display swatches panel by going to the window menu. Double click a swatch in the panel. Select the paths in the pattern editor and then use the edit menu and edit color and adjust color balance in Adobe Illustrator. Click the "save a copy" and then done.
5. Duplicate swatch before using Adjust color Balance
As the pattern swatch in the panel is updated with the new color. You can always duplicate the original pattern. Go to the swatches panel and select the pattern swatch and right side menu and duplicate swatch and edit the swatch using the color adjust balance
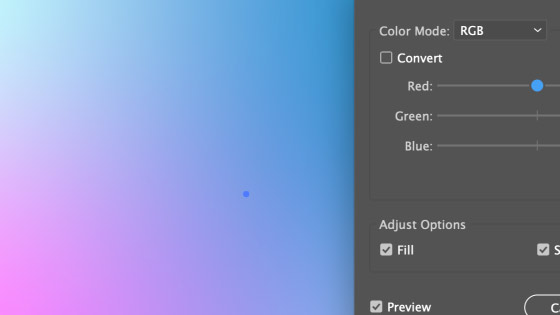
6. Re-color selected gradient using adjust color balance
Select a path filled with a gradient and you can go to the edit menu and edit colors and adjust color balance and modify the color of the gradient, making it more red or green etc
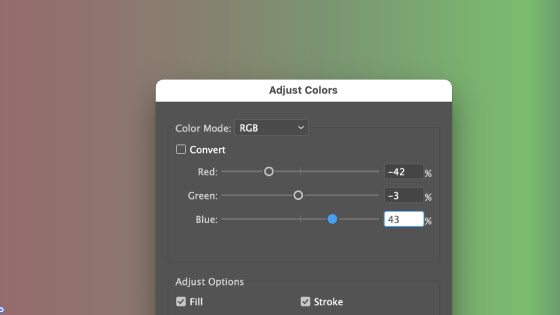
You can also re-color a freeform gradient with the adjust color balance, all the stops in the path will be changed with respect to the red, green and blue etc (depending on the color mode chosen)
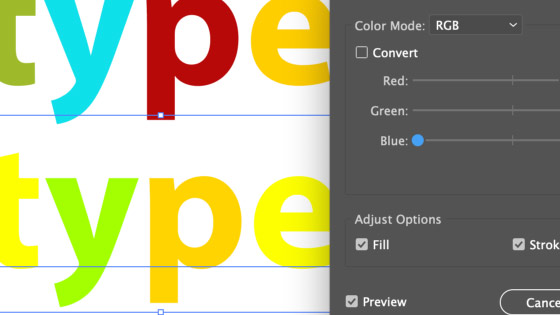
7. Type can also be modified by adjust color balance
You can select any number of characters and re-color them using the edit menu adjust color balance
8. Stroke can also be re-colored
You can also use the same panel to modify the stroke, just set the stroke option in the panel to ON and the color for the stroke will change. The fill can be set to on as well but if you don't want the fill to change then turn it off.