Illustrator Freeform Gradient Tutorial
graphicxtras > Adobe Illustrator tutorials > Illustrator gradients tutorials
1. Basics of the Illustrator Freeform Gradient
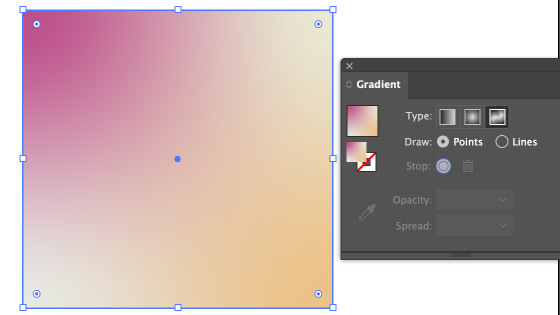
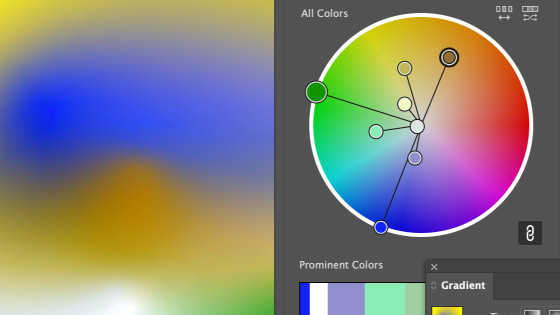
Select the gradient tool and open the gradient panel found via the window menu. You can find the freeform gradient next to the linear and radial. Select a path to fill with a gradient and then click the freeform gradient button on the panel. You will now see four default pins appear with a variety of colors, this does vary. You can change the colors and positions of the stops (or pins).
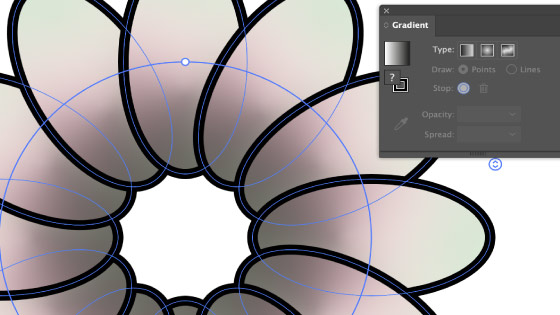
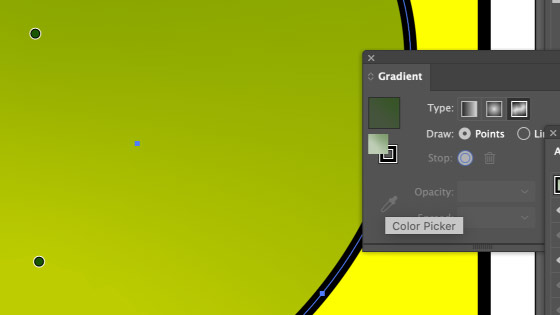
2. Freeform gradient options on panel
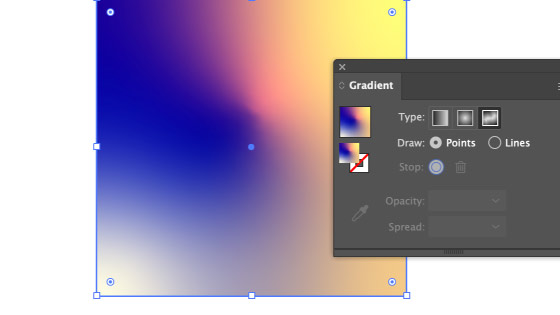
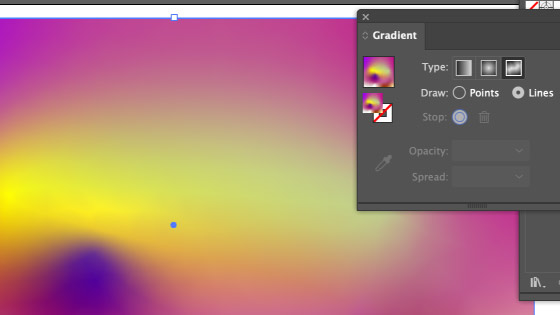
You will see the type which has been set to freeform. You may have to click the 'edit gradient' button. You have two draw types as well, points and lines and you can switch back and forth between those and have combinations and that is the way the color spreads through the path. You can select either points and lines and you will see different indicators shown. Select one of the stops and the panel will then indicate the current color along with the opacity and spread of the color. You can interactively change the spread or just use the panel. The panel also has an option to hide options and show, must admit to never using that.
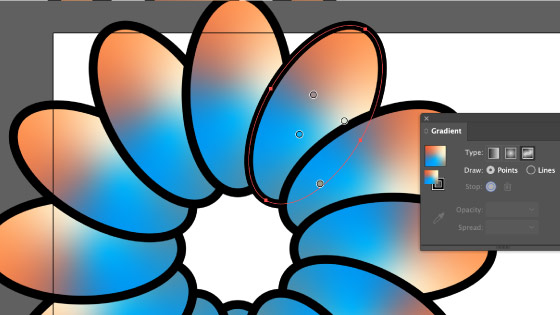
3. Freeform Gradient stops
The gradient stops can be re-colored by selecting them and changing the color by clicking the little circle stop color. You can also select that stop and then change the color by clicking a solid color swatch in the swatches panel. You can also also interactively change the spread by dragging the circle surrounding the stop. You can also change the opacity of the stop color in the panel. You can also move the freeform stop around within the confines of the path, if you go outside of the path then the stop is deleted. As you move the gradient stop around you will notice how the colors of the gradient change and interactive with the other stops on the panel and this depends on the other stops, color and spread and also dependent on the points and lines.
You can create lovely smooth colorful transitions as well as intense ones by changing the spread and the positions / closeness of the stops in the path. You can create millions of different color combinations just by using three or four gradient stops and you can add many more than that but the results will vary, definitely one that needs experimentation to see what works such as how many stops, how few, how close etc they need to be to achieve the correct look.
4. Gradient Freeform points and lines
I generally start with points for the freeform but I prefer the lines approach and that is very similar to using the curvature tool. With the line button selected, you can create all kinds of curved color paths in your current path and the curve is editable and all the points in the line (or curve) can be set to different colors as well as moved along the curve.
Points can converted back and forth between being points and curves but once a point is in a curve, it doesn't suddenly become disconnected from a curve when changed back. The lines also cannot cross over themselves or another curve so there is no overlapping of color sources for the lines and stops. Points and curves have their pros and cons.
4. Adding stops and deleting in freeform gradients
You can delete them by dragging them off the path or selecting them and pressing delete. As you move the mouse over the gradient, you will see a plus cursor appear when you can add a stop, normally anywhere over the path or over a line, though this changes when you pass over an existing stop as you can move that (or delete it). I don't know if there is a limit to the number of stops but the more stops and the more complexity of the freeform gradient will slow your machine, certainly does with mine.
5. Re-coloring the entire gradient
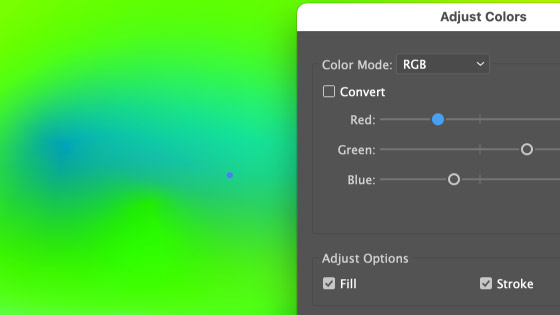
You can re-color the entire set of stops by going to the edit menu and recolor artwork and selecting a different color library or using the color handles in the panel. You can change your greens and blues to reds and yellows for the entire path or selected paths
You can also recolor the entire design by using the edit menu and adjust color balance command and making everything more green or red
6. Appearance panel and freeform gradient
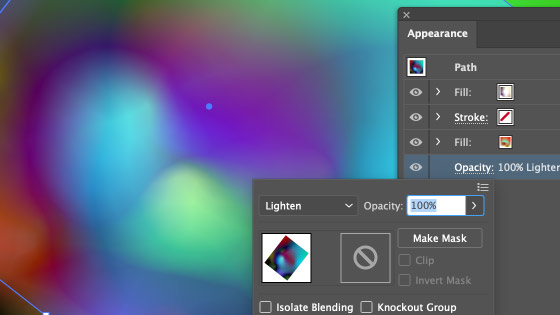
You can use the appearance panel to add an additional number of fills on top of any generated gradient and you can then blend that fill via the opacity and blending mode of the top level fill. You can use this to re-color the freeform gradient. You can also add a new freeform gradient to that fill and so you can blend and combine multiple sets of stops in numerous ways all on a single path. You can also go to the graphic styles panel and save this as a new style.
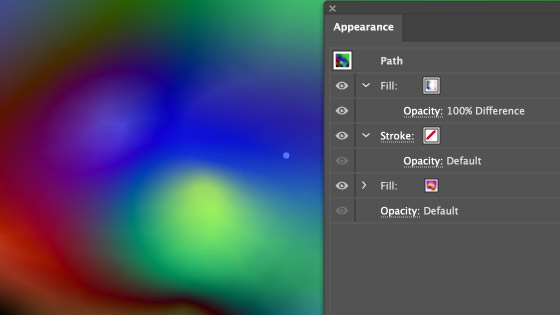
7. Blending multiple paths
You can create multiple paths with multiple sets of freeform gradients added and they can also be then combined. Create a path and fill with your design, duplicate that path and then fill with a different number of stops etc and change the colors etc and then go to the appearance panel and change the opacity and blending mode of that path to difference or lighten and the colors will then be blended between those two or more paths to create all kinds of awesome color combinations
8. Eraser tool and freeform gradient
A path can be cut into multiple different paths in a number of ways in Illustrator, select the eraser tool and draw through your path and you can split it into say six different paths and each of those paths will be filled with your color stops and you can create all kinds of lovely colorful designs in this way. You can also select the individual paths and manipulate them in many different ways such as combine them using blending modes as well as continue to edit the color stops
9. Shapes filled with color
You can use the tool with all kinds of paths, ones created using the various tools such as the star tool or polygon tool or the live ellipse shape etc

10. Repeat feature and freeform
You can also use the tool with the repeat feature found in the object menu and repeat and radial (mirror etc). Select an object and then use the repeat option. The stops are still all editable within the repeat object so if you double click one of the repeat instances, you can continue to modify the points / line colors and spread and opacity
Edit the stops inside the repeat
11. Freeform gradient spread
You can modify the spread via the panel and the selected color stop. The higher the spread, the more intense the change when it clashes with another color stop. Setting it to 100% and you will notice the boundary between the other stops is more extreme, set it to 10% and it is a much smoother blend. If you are using lines / curves then the spread is unavailable.
12. Opacity
Each of the stops can have an opacity between 0% and 100%. Anything less than 100% means you can see through the path at that point.
You can use the gradient freeform stops as opacity stops by keeping all the colors of the freeform gradient the same for a single path, say green and then you can set the opacity at different points in the path to 20% or 50% or 100% etc to create an interesting overlay shape with mixed opacity at different locations on top of existing paths
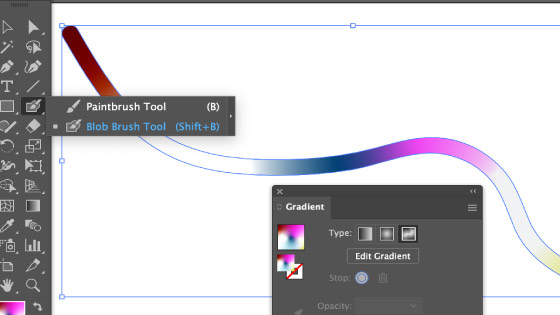
13. Blob brush
As the blob brush tool generates a fill and a fill can be filled with a gradient freeform, you can apply a brush stroke and then fill it with the lines or points option with the tool and create a lovely unusual color fill for your brush stroke which can then be duplicated, effects added, combined with other fills, used in repeats and much more.