Photoshop gradient types : Linear, Radial Tutorial
graphicxtras > Adobe Photoshop tutorials > Photoshop gradients tutorials
** Youtube video tutorial on how to use the gradient types in Photoshop such as reflected, angular, linear and radial and diamond **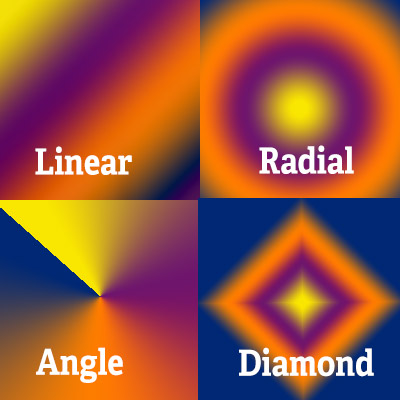
A quick guide to the Photoshop gradient types / styles (radial, linear, diamond, reflected, angle etc) tutorial. Gradient styles for Adobe Photoshop are linear gradient style, radial gradient style, angle gradient style, reflected gradient style and diamond gradient style.
You can change the style / type for the gradient when ever you select the gradient (such as the Photoshop gradient tool or in gradient overlays and fill content in Photoshop).
-
Select the gradient tool in Photoshop toolbar (before you can select the different gradient styles in Photoshop such as linear gradient style, diamond as well as radial etc - great for adding glowing effects to all kinds of designs)
-
Go to the top bar beside the drop down with the gradients
-
Select the linear, angle gradient etc for Adobe Photoshop
-
Apply current gradient in that style
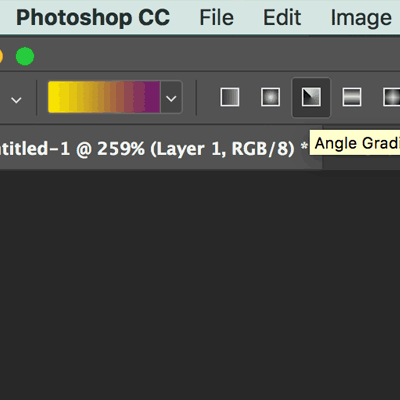
The gradient type / style is accessible via the gradient tool via the top bar of Photoshop next to the gradient drop down. To change the gradient style, just click the linear or radial etc and then apply the tool. Each gradient style in Photoshop has its own uses. You can them multiple times.
You can use the diamond also as a square style by applying at 45 degrees. The gradient styles also uses the origin and length and angle of the application of the Photoshop gradient. When you use the gradients in the layer styles, you are also offered the angle and scaling. The stroke setting in the layer effects dialog also offers a shape burst which follows the selected shape / path design depending on the position and size used. The gradient styles are displayed as five small buttons next to the drop down.
This is the case for Adobe Photoshop. This tutorials shows you the gradient styles in Photoshop and their individual uses such as linear style etc. This tutorial also shows how you can combine the linear and radial etc styles to create totally unique combinations of the gradients.
Gradient styles for Adobe Photoshop - linear and radial etc for all kinds of amazing effects
Select the gradient tool is the key to the whole thing or select the gradient style in a variety of panels such as fill content and layer styles / gradient overlay.
You can find the styles for the tool along the top of the Photoshop application along with the actual colors you will be using and other settings such as opacity etc.
You can apply the Photoshop gradients with different style such as as radial / mirror / angle / reflected / linear. Each style has its use.
The Photoshop help guide offers more explanation about the particular styles and how the colors are mapped in each. You can use the gradient styles in a variety of tools in Photoshop such as via the fill layer as well as Photoshop layer effects as well as the gradient tool and else where in the application.
-
select the custom shape tool
-
select a shape from shapes panel
-
apply as shape layer
-
go to to the top bar and fill
-
select gradient
-
bottom of fill content panel - select the gradient style such as linear etc
Linear Photoshop gradient style - apply across, down, up, diagonally and more

-
Select the gradient tool
-
style field at the top of Photoshop select 'linear'
-
select the gradient
-
Click on the document to set the gradient origin
-
and drag and release to generate the gradient
The origin of the linear style can be anywhere, off document as well or you could use guidelines to add the preset at any position. You can use blending modes as well as transparency in the preset to re-apply the preset over and over to the same document or layer. You can extend the length of the preset to the document and beyond. You can also angle the linear preset
Radial gradients for amazing highlights and circular designs and more

You can set the origin as well as different lengths of the preset. Again, you can combine them depending on opacity and blending modes as well as transparency stops in the actual preset. You can click the document to define the start of the gradient and stretch out to within the confines of the document or layer or beyond the confines of the artwork and then release to generate the Photoshop radial gradient. You can also apply effects and adjustment layers etc to the radial gradients of Photoshop
-
click on the gradient tool
-
set the style 'radial'
-
select gradient
-
click on the document and origin for the radial
-
stretch the gradient
-
release
Angle gradient style for some truly abstract designs in Photoshop
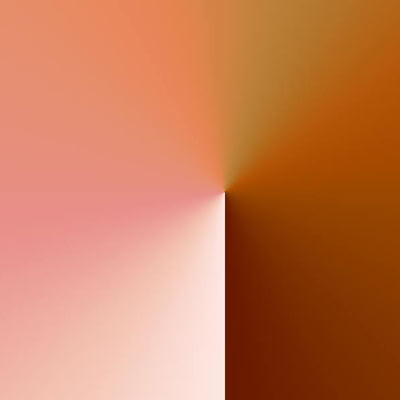
You can control the position of the origin as well as the angle for the angle gradient style in Photoshop. You can hold down the shift key to define the angle of the gradient to 45 degrees etc. If you want to avoid that ugly seam then you can always set the gradient stops at the ends to the same color
-
select the gradient tool
-
go to the styles and select the 'angle'
-
go to the gradient drop down and select one
-
click the document to define origin
-
drag at an angle and release
Reflected Photoshop gradient style for interesting mirror effects and frames etc
Reflected gradient creates a mirror of the current preset - though this depends on how it is applied - if you add it from one end (left to right) to the other (or top to bottom) then you will see the mirrored effect otherwise not. Personally, I wish Photoshop would add a mirror feature to the application such as the excellent effect in Affinity Photo. Use guides to quickly find the center Via the view menu). You can also use selections to say create a column of reflected presets - select one half and fill and select the other half and fill again with the preset added to the center of the selection instead of the document
Diamond gradient style for Adobe Photoshop and Elements for frames and squares etc
The Photoshop diamond can be used to create a square effect as well by just holding down the shift and applying it at 45 degrees and not at 0 degrees etc Of course, it can be used at any angle and length of preset as well as any origin point, inside or outside of the document or layer. You can use selections to create an area for one preset and the inverse selection for another
Photoshop gradient styles combined - create ever more unique designs
-
Select the gradient tool
-
Select the gradient style
-
Select a gradient
-
Apply the gradient in Photoshop
-
Go to the gradient preset picker and select a new one
-
Select a different blending mode such as darken or perhaps lower the opacity for the gradient
-
Apply the gradient in a different origin point or length
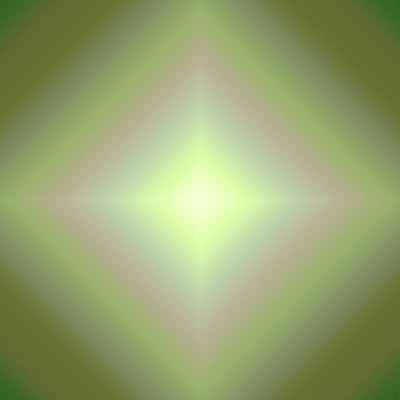
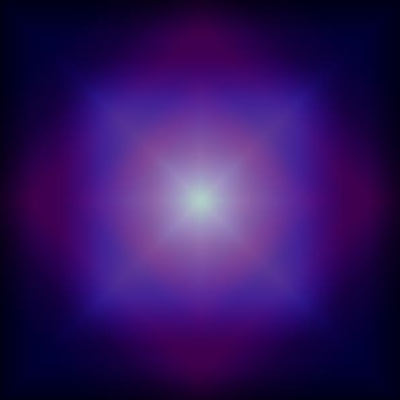
If you combine the styles using blending modes such as darken or screen etc (set that while you are adding the Photoshop gradients via the top line blending modes drop down), you can create star styles, polygons, crosses etc. They are fairly limited in their styles compared with applications such as Painter or Sumo Paint (that has some amazing fractal effects which can also be combined and manipulated using the plugin effects to create all kinds of amazing overlays and backgrounds etc as well as combined with symmetry settings) or plugins specific for creating color effects such as the ones available on this site via the Andrew's Plugins section but you can certainly combine them to create a wide range of unique preset styles
The combination on the left uses a number of color effects along with the multiply mode as well as difference mode. You can add the result to a layer and then duplicate that layer and use it again and again.
You can also drag the result to the CC libraries and have a folder of colorful objects that can be quickly accessed again and again in your projects and perhaps also use in tools such as After Effects if you use them as part of the Creative cloud. You can use all the diamond / linear gradient styles etc in a number of ways throughout the application such as in layer styles and you can also now use the multiple overlay feature in the layer styles to create truly amazing colorful styles that can be used again and again with layers as well as text / type layers. Any number of amazing color artworks can be created for use with the presets in combination. They can be used to create unique skylines, backgrounds, overlays, effects and more
Shape burst gradient style
This is available only via the layer effects panel and the stroke setting. The shape burst follows the shape's path. You can set the position as well as the size of the shape burst (such as inside, center, outside)