Photoshop Color burst Pattern Tutorial
graphicxtras > Adobe Photoshop tutorials > Photoshop patterns tutorials
-
Create guides in Photoshop for the color burst pattern
-
Use pen tool to create a triangle from the edge to the center
-
Repeat but make sure opposite sides match
-
Change the color of the triangle
-
Edit menu
-
Define pattern
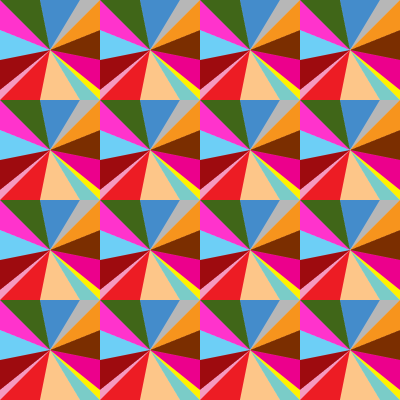
How to create a colorful triangular / triangle pattern in Photoshop tutorial. The initial setup for the color triangle is some guides. The guides are useful for the points for the triangle and other triangles (instead of guessing and using smart guides which can get more confusing with lots of paths). Use the pen tool to make the triangle pattern. Make another triangle pattern to the same center point. You can also match up the edge points on opposite sides. The color of the triangles can be set to different colors via the fill. The artwork can then be defined as a colorful triangle pattern in Photoshop via the edit menu define pattern command. You can also select the center point of all the triangles by using the direct selection tool. You can then re-position it so it is off center. You can then define that as a new color triangle pattern. You can also apply effects to the colorful triangle patterns such as twirls (just avoid the seams of the pattern tile). This tutorial shows you how to create wonderful colorful patterns themed on random triangles.
The quick and easy way is to use guides and guide layout and the pen tool
This triangular pattern will be pinned to the document edge so point 1 will be repeated on left and right and top and bottom. Use guides to aid in this.
-
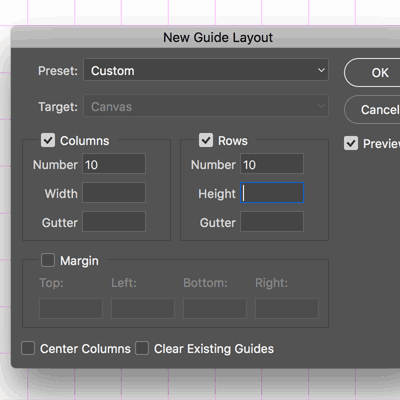
Go to the view menu and new guide layout.
-
I am using 10 x 10 guides but you could do the same with 15 x 15 etc 4 x 4 or so on.
-
Once the guides are in place. Go to the pen tool.
-
Set the option to 'shape' (not path).
-
set the color for the shape
Use the pen tool to create the triangles for this artwork
-
Click one of the guides that cross the edge of the document.
-
Now go to another point along the edge (either direction) and click at another guide intersection.
-
Now click in the center (or offset from the center) at another guide intersection to create another anchor point and then go to the first point.
-
Now the shape layer is still selected. You can de-select it via the layer panel or you can avoid accidently removing anchor points by going to another guide intersection (along the same edge)
-
click a new anchor point / edge point
-
go to the same central point and click again to create a new point for the triangle.
-
Then go back to the first triangle's second anchor point (on the edge of the document) and add a new anchor point
-
go to the start point for the the second triangle.
-
Go to the fill dropdown and select a new color.
-
Repeat this over and over for as few or many of the guide intersections you want to use.
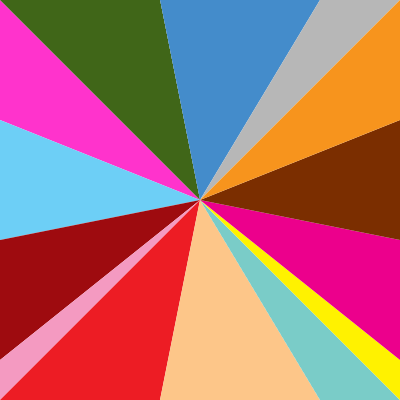
Set the color to random colors or perhaps alternating colors or all blues or all reds or red and green etc.
You can make it seamless by matching the points to each side of the tile
The guides for the triangle are also useful so you can match the anchor points on the left and the right edge as well as the top and the bottom edges i.e if you have a point at 0,0 grid position then set a point at the 10,10 position. If you have an anchor at 0,5 then set one at 10,5 etc - both sides need to match or you will have a slightly more jarring triangle design.
So if you create a point at the intersection of the 3rd along the top then you can also create an equal point at the 3rd intersection along the bottom (and the same for the left and right).
If you want to have no obviously jarring structures such as matching colors from one side (top to bottom or left to right) then you should have a very nice colorful triangle color pattern
You can then save it as an amazing new pattern tile via the edit menu
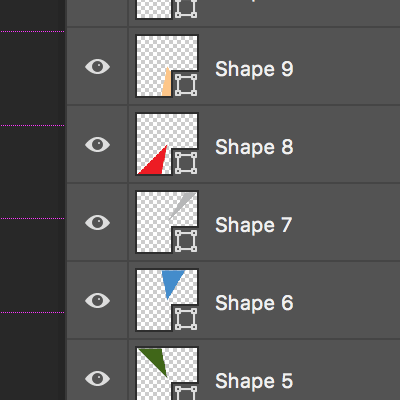
Once you have created all the paths (you can have as many shape layers as required) then you can flatten the layers and edit menu define pattern.
The fill on the right is based on a fill layer content using the previously defined pattern (from above) and then set to scale at 25%
You don't have to keep the center in the center, it can be dragged anywhere

You can unflatten (just go back in the history panel) and select the central point by using the direct selection tool and move the center for the triangle pattern.
You can duplicate the triangle pattern and re-color that and apply transformations such as rotate and then combine using blending modes or opacity.
The image on the right uses the same triangles as before but by using the direction selection tool the central point was moved to the left and up and then the design was flattened and then re-colored using the hue and saturation adjustment
You can also add all kinds of variants such as distortions and twirls or adjustments
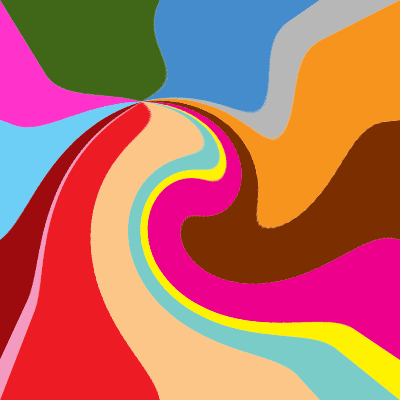
You can apply effects to central part of the triangle pattern artwork such as a twirl (use selections) and the image on the right has had the twirl pattern added and it can be used to create a more wavy unusual artwork (you could also use tools such as Affinity Photo to modify the twirl or deform in many other ways or perhaps use the Photoshop liquify but the key thing is to avoid modifying the seams / edges of the artwork).
You can add adjustment layers to the mix and re-color using color lookup or photo filter etc and then define those as a pattern.
You can create multiple layers of the triangle patterns and then set different scales such as 50% etc and blend those to create more fragmented jarring imagery.