Photoshop adjustment layers Tutorial
graphicxtras > Adobe Photoshop tutorials > Photoshop adjustment tutorials
How to use Photoshop adjustment layers. Use to change colors of underlying layers. Add adjustment layers via the layer menu and new adjustment layer command in Photoshop.
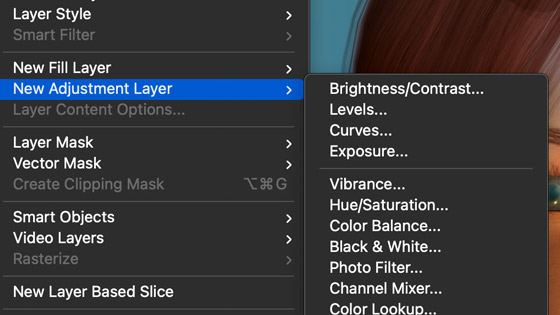
** Youtube video tutorial on how to use adjustment layers in Photoshop, how to create them, set the properties of the adjustment layers and more **1. Where are adjustment layers in Photoshop
Adjustment layers can be found via the layer menu and the new adjustment layer command and there a number of adjustment layers such as photo filter and color LUT and hue and saturation, gradient map etc.
2. What do the Photoshop adjustment layers do
They re-color any layers below. If there are layers above the adjustment layers in the layers panel then they are not affected by the tool. Anything below is modified in some way. The colors can be changed in countless ways such as turning an image black and white or applying a change to the hue or levels of an image
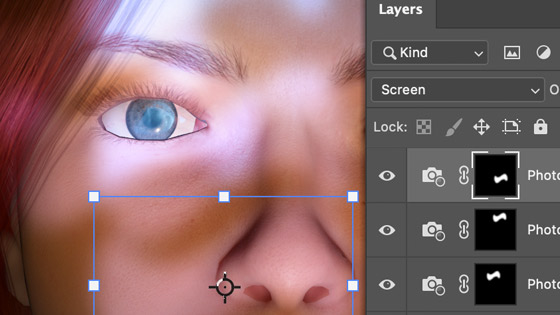
3. How many adjustment layers can you add
As many as you wish, you can add multiple adjustments and you can re-position them everywhere and anywhere in the layers panel
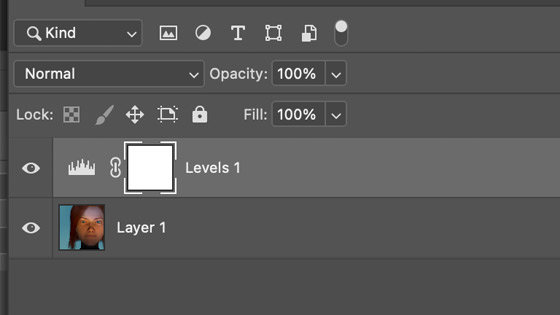
4. Layers is the key panel for all adjustments
The key panel to manipulate the adjustments is the layers panel and that is found in the window menu and layers.
5. Is it a layer and can be manipulated as such
Yes, the adjustment layer is a standard layer but just instead of holding pixel information / images etc it is an effect that modifies the color of the underlying layers. You can re-size etc the layer as well and much more though this can only be done if you add the adjustment layer in a selection or add a design to the mask of the adjustment layer (that is the little box on the right in the entry in the layers panel)
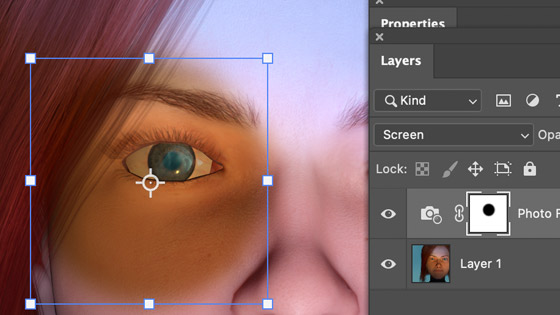
6. Add an adjustment layer using a selection
You don't have to add an adjustment layer to the entire image or layer, you can use the selection tools and select part of the image and then go to the layer menu and new adjustment layer and you will see the color change only applied to part of the image selected by the selection
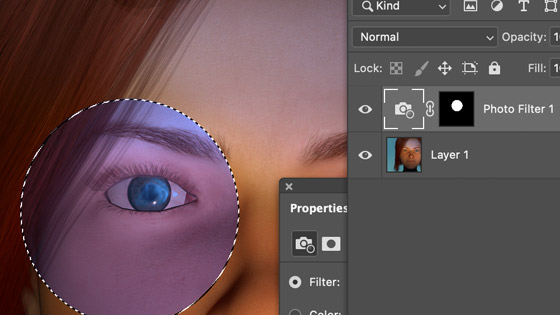
7. Feather the adjustment layer using properties panel
You can also apply a feathering to the current mask for the adjustment layer using the properties panel and masks tab. You will then get a blurry edge to the adjustment (levels, hue and saturation, photo filter, LUT, gradient map etc)

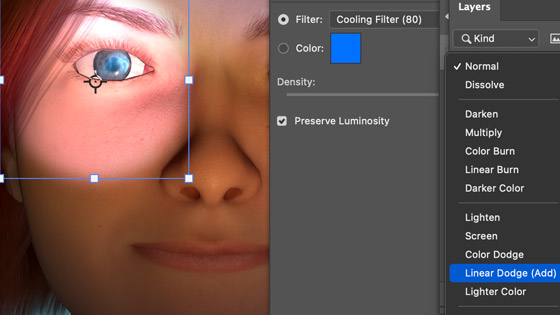
8. Blending options for the adjustment layer
It is a layer and it has blending modes as well as opacity etc. You can set the blending via a right click of the adjustment layer in the layers panel or just got to the top of the layers panel and set the blending there to lighten or difference etc
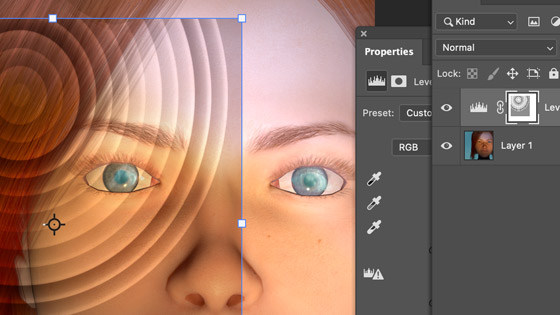
9. Warp the adjustment layer etc
You can apply transformations to the adjustment layer so instead of having a rectangular or circular adjustment layer, you can have a warped or scaled or sheared one
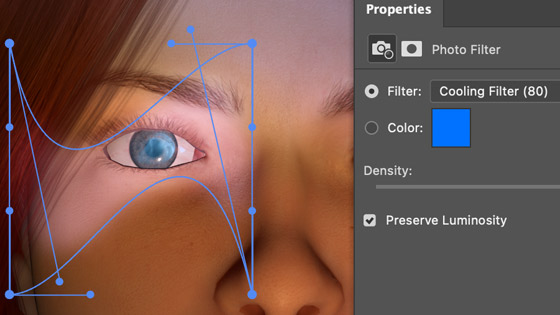
Which also makes it easier to add multiple adjustments and re-position them with different warps or sizes etc - great for creating all kinds of interesting lighting effects added to faces etc
10. Invert the adjustment layer
If you want the image to be the inversion of the current image, say you have a bright adjustment layer over an image but you would prefer that part to be darker and the rest of the image to be brighter, go to the layers panel and select the thumbnail (second box on the layer entry) and go to the image menu and adjustments and invert command
11. Add a mask to an adjustment layer
A mask is super great for stopping or displaying the adjustment. It is the second box on the layer entry, it is created when you add the layer. You can add brush strokes to it and gradients etc, in fact, anything is you wish and you will allow more or less of the adjustment to change the image. If you go to the channels panel then you will see the mask channel and it can be manipulate there also