Photoshop Record Tool Actions Tutorial
graphicxtras > Adobe Photoshop tutorials > Photoshop tools tutorials
How to record tool actions in Photoshop / tool recording for the vector designs tutorial. Record tool actions such as custom shapes, brushes etc in Photoshop and playback the actions to create all kinds of amazing artwork
** Youtube video tutorial on how to record actions made by tools such as brushes, shapes etc in Photoshop **1. Setup of recording tool actions in Photoshop
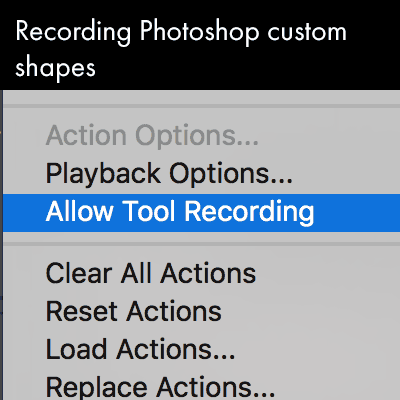
Display the actions panel (this can be found in the window menu)
Go to the right side menu
Select the 'allow tool recording'
Now use the custom shape tool (or another tool) and create
Once this is done, the tool's actions are recorded though sadly not always in the way you would expect. If you use a shape marked as 'shape X' then 'shape X' is recorded and that is what the recording playback expects.
2. Recording Photoshop actions of the shapes
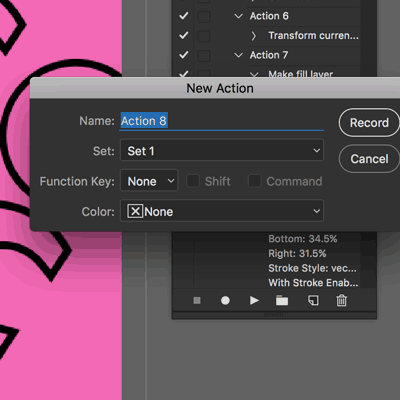
Display actions panel and then Select the custom shape tool. Select the shape option. Select the required custom shape. Click the new action button in actions panel. Apply the tool as required and then Stop recording
The position of the custom shape, the type, the color of the custom shapes etc are recorded.
3. Recorded steps of the Tool action in Photoshop
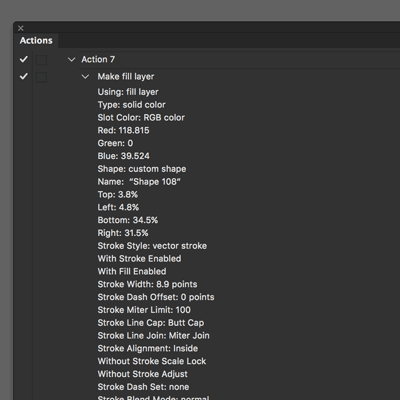
You can see the steps of the action via the actions panel by expanding the recorded shape action. You will notice that the recording lists
'make fill layer' (that is the action of adding the shape). You can also expand that out as well and see all the information stored such as color, position, stroke details, name etc
Actions panel and Go to the recorded action and Expand and Expand out again to see all the details such as make fill layer in Photoshop
4. Changing the shape used in the Photoshop action - you don't have to use the original shape in the playback

The Photoshop action records the name and if a path is called 'Shape 22' then it will use 'Shape 22' each and every time the action is run. If you have multiple shapes then change all those as well
Change the name of a shape used in the recording (so if shape X then use shape X in the layers panel) and Remove the previously named shape or rename that to something else and Select the action and then Click the play selection
So you can just change any path to 'Shape 22' and then that will be used in the same position, same type and color. I would suggest changing the action to a name such as 'X' and then record a vector with the same name.
You can then, at any time, rename any other to X and run with a different vector artwork. One thing you should note is that the dimensions of the artwork is recorded so if you use a thin artwork in the Photoshop action then the replacement will also end up thin (even if they are wider than the original designs). If you want to create a similar look then the replacement path should be approx the same dimensions as the original.
It does make it whole lot easier if you name the item something unique instead of searching for a 'letters 1242' etc in a selection of 1500 vectors (it is a pity that the app does not allow for the movement of an artwork in the panel so you can add the items to the top of the panel for easy changing of the name)
5. Repeat shapes playback and again - create a vast range of designs using the recordings of the shapes
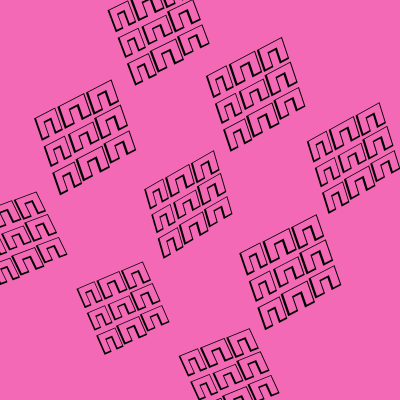
The custom shapes recordings can be re-played over and over again to create all kinds of designs such as the grids
Change the shape name in the layers to the name used in the recording
Delete or rename the previous shape used (you don't want to have two shapes with the same name). Go to the Actions panel and Apply the action. Go to the toolbar in Photoshop. Direct selection tool. Select all the shapes used in the action. Use edit menu and transform (if you wish) to resize selection. Go to the edit menu and Define custom shape. Give the custom shape the name used in the action
Rename or delete any previous with that name in the custom shapes panel. Repeat the apply of the action and repeat again if you wish