Affinity Designer Grid tutorial
graphicxtras > Affinity Designer tutorials > Affinity Designer How To tutorials
1. How to show the grid in Affinity Designer
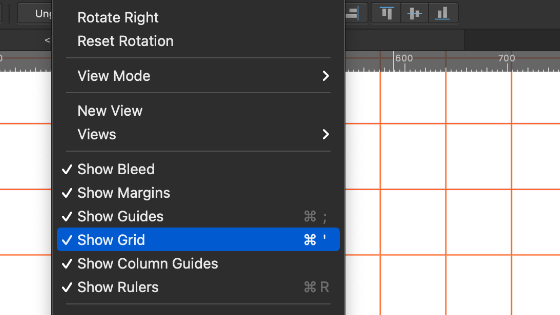
Grids are super useful. You can use them to align paths such as designs created by the app such as stars, rectangles, cogs etc, for the size of paths and much more. How to show the grid ? view menu and show grid and to hide the grid, just repeat. The grid can take many forms, there are lots and lots of different settings and probably more hours in the day to go through every possible combination of the grids. The grid is per document, so go to another document and you will find the grid is off or on depending on the settings
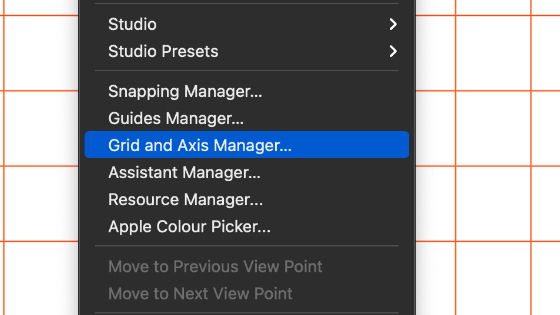
2. Grid settings for Affinity Designer
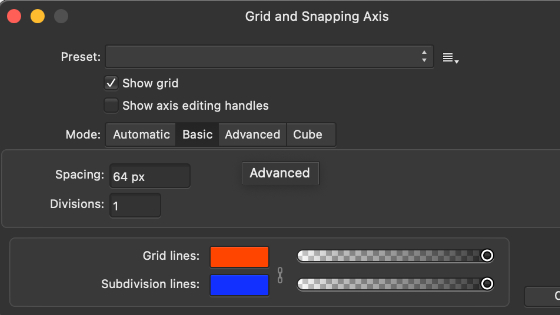
You can always use the default standard grid or automatic grid as displayed in the grid and snapping axis settings. If you want to tweak things, you can via the grid and axis manager
view menu and then go to the grid and axis manager and set automatic grid to OFF and then use basic grid and set the spacing and set the number of divisions between the main grid lines and set the color of the grid lines and set the color of the subdivision lines. Set the opacity for both (as required) and finally use the grid
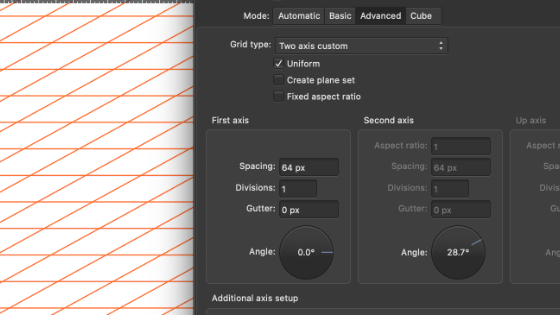
3. Advanced grid settings in Affinity Designer
You can always just use the basic settings but there are a vast range of other types of grids which can be used with technical drawing etc.
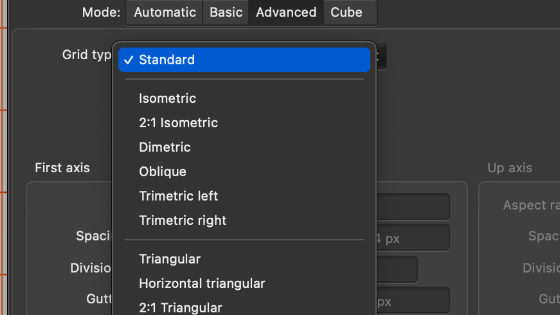
Click the advanced tab and set the grid type to something other than standard such as isometric, trimetric, triangular, two axis etc. Depending on the type, some settings will be disabled. Set uniform or not and set first axis settings for the grid and set angle if available and set gutter if available and set second axis if available and set additional snapping axis setup
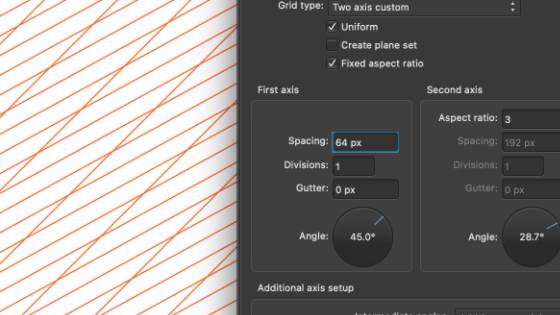
All kinds of amazing grids can be created and then used with snapping and objects in Affinity Designer
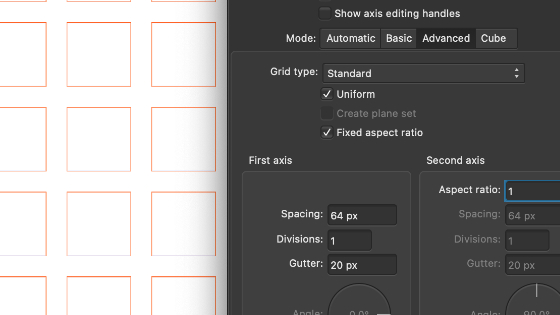
4. Add guttering to your grid
You can enter a value for the gutter in the grid manager, you need to be in advanced panel. You can set the gutter to 20px etc for the first axis as well as the second axis.
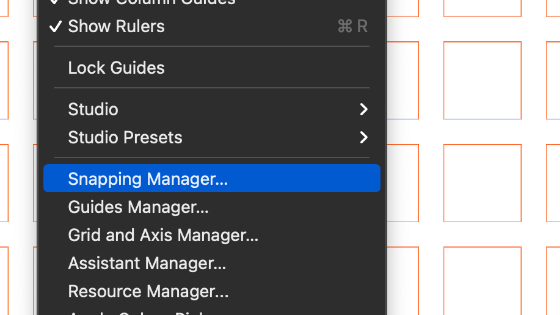
5. Snapping objects to grid in Affinity Designer
Go to the snapping panel along top bar of Affinity Designer and enable snapping and set snap to grid ON. Go to the pen tool in the toolbar / box and click on grid to add points (you will see a little indicator for the snapping)
6. Create an actual grid in Affinity Designer
After going to all the effort to create a grid using the grid features of Affinity Designer, you can use the grid to snap to the grid (snapping manager ON in the view menu). Draw a line with the pen tool say to 8 line's worth.
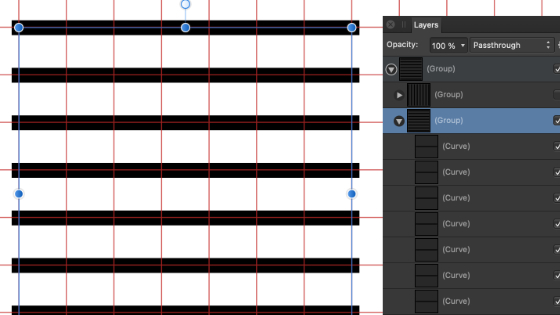
Duplicate that line 7 times and position them on the next line below. Select all the lines and right click and group and then right click and duplicate. Rotate one of the groups via the layer menu and transform and rotate 90.
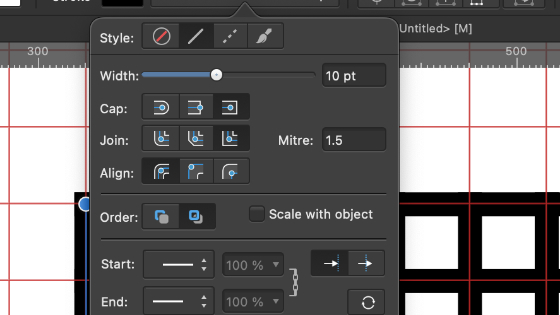
Select all the lines and then go to the pen tool and set the stroke weight (10 pt etc) and then set the cap to square cap and join to mitre join and align stroke to center
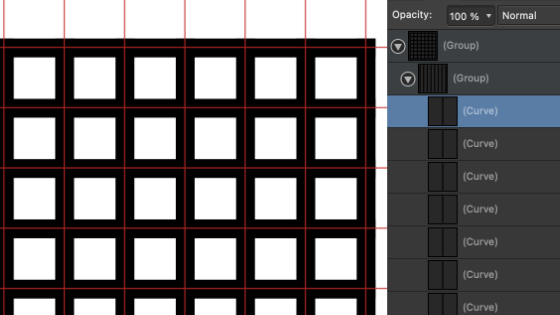
All the lines in the grid can then be grouped into a single group.
You can also use the design as a fill by using the expand stroke command in the layer menu but I would suggest you do this to the line right at the start when it is a single line and the opt / alt those lines to create the grid as the grid seems to not always work well if you try to expand the entire thing later. You can also then use the layer menu and geometry and add and merge to merge all the shapes into a single design grid.