Affinity Designer Contour Tool Tutorial
graphicxtras > Affinity Designer tutorials > Affinity Designer Tools tutorials
How to use the contour tool in Affinity Designer, how to use with open and closed paths, how to use the contour tool with different shapes such as circles, cogs etc, how to use with different options such as mitre join, bevel join, how to add different effects to the contour design, how to bake and convert the contour design into a regular path and more in Affinity Designer.
** Youtube video tutorial on Affinity Designer contour tool and how to create amazing contoured designs in seconds **1. Location of the Contour Tool in Affinity Designer
The contour tool is found in the tools box of Affinity Designer. Click on that and you will see the options for the tool appear along the top

2. What does the contour tool do ?
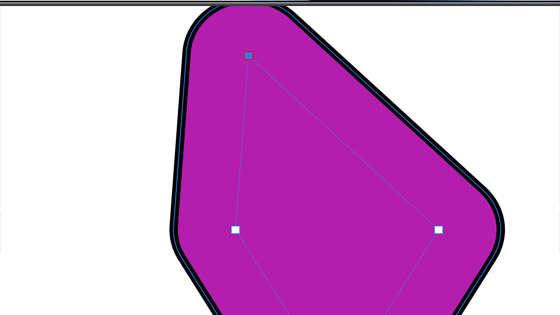
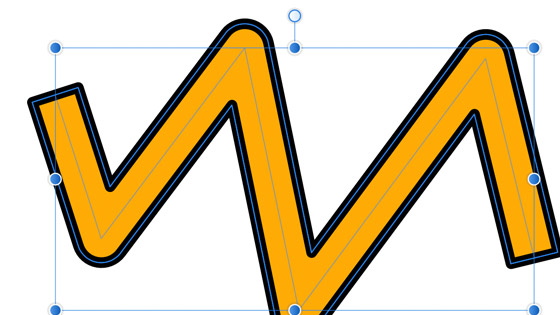
It creates a basic contour at a certain distance from the original design either positive or negative in the same color and stroke. The contour tool can be used with normal paths as well as text and also open paths.

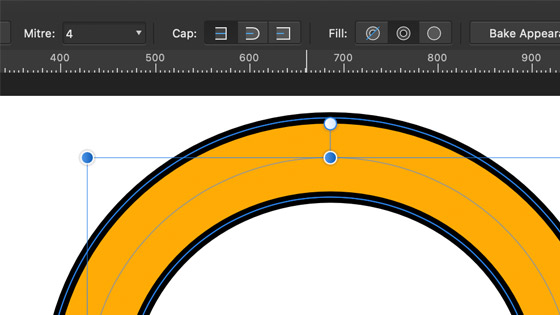
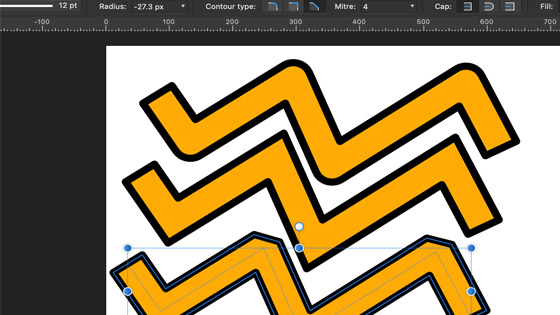
3. Contour tool options
The contour tool has a number of options which can be found in the options bar of Affinity Designer along the top of the app. The options include the radius for the contour as well as different types and the fill / stroke as caps and also fills. Some are useful for certain types of shapes so the caps are of no use if you have a closed path but are super useful if you use an open path. They are all live so once you have added the contour, you can go back to the contoured path at any time and change the type, fill, radius etc.
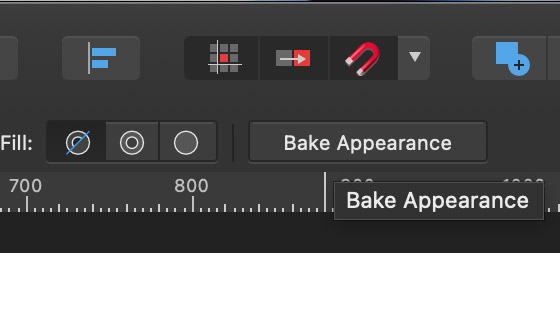
4. Contour tool is a live tool until you bake the appearance
Select a path or multiple paths and then apply the contour tool such as dragging the contour in or out or using a bevel or mitre or rounded type etc and then go off and work with another tool / path. You can always come back to the contour and modify it with the contour tool either interactively or via the options along the top. This is the case until you bake the contoured design. If you are using a live star tool or live donut etc they are also still live until you bake the design. It should be noted that there seems to be an issue with the contours / interactive shape settings if you have multiple shapes, it only works with one shape at a time.
5. How to convert the contour shape to normal - bake appearance
There is an option on the top right of the screen in the options, 'bake appearance'. Click that to freeze or convert the contoured design to a curve and then you can continue to add a new contour to that and so on.
6. Contour paths and nodes - if you have access to the nodes, you can move and modify those and the contour will follow.
Select a path and if curves (convert to curves if not) and then you add a contour to it via the contour tool, you can still modify the nodes and change the overall shape of the path and the contour will follow that, it is still live.
7. Multi-color contour tool
There is no multi color contour tool but you can create the effect by selecting some type or a shape and then simply dragging out the contour and then going to the layer panel and right clicking and duplicating the layer and then changing the color of the new layer and then with the contour tool reduce the size a little to show the underlying layer and repeat the duplicate multiple times

8. Contour tool works with open as well as closed paths
You can create a standard path via a shape or the pen tool (closed) and apply the contour tool to it. You can create a quick open path with the pen tool and use the contour on that and create a fillable object
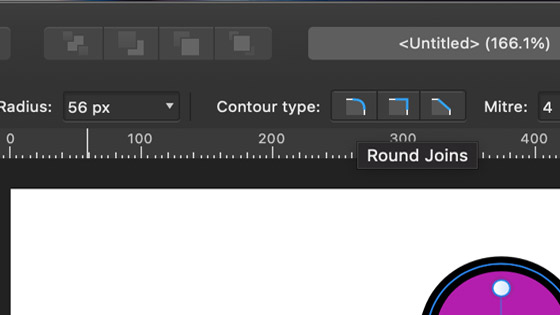
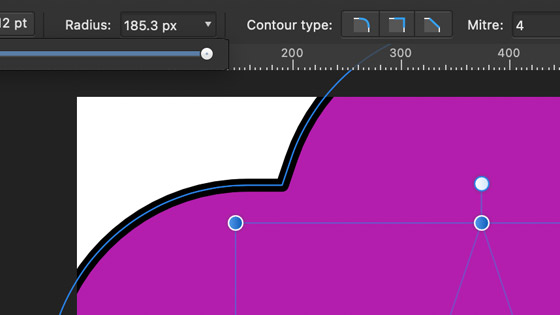
9. Contour types
Rounded joins, Mitre Joins and Bevel joins - the corner points of the curved object. There is a mitre setting as well for use as a threshold for the mitre join. The bevel join cuts off the corners as a straight line. The end result of these types depends on the underlying shape so they will work differently for a square to a circle (no effect) and to a star.
10. Contour fill
This has three settings: auto closed, forced open and forced close. The function with the contour tool depends on the shape. Say you have a basic closed path, the forced open will create a nice frame based on the shape as well as the current radius setting. If you are using an open path, the forced open will have no effect. The forced close works well with open paths.