Illustrator Path Eraser Tool Tutorial
graphicxtras > Adobe Illustrator tutorials > Illustrator tools tutorials
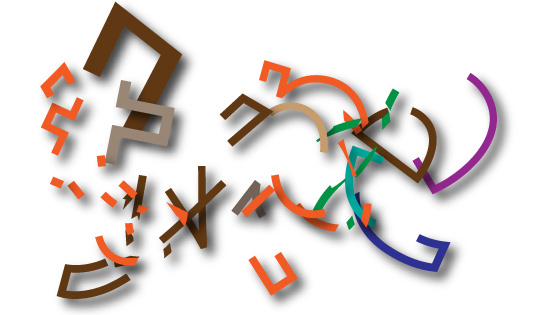
How to use the Illustrator path eraser tool to remove part of a path in Illustrator, how to use it to remove the parts of paths and create all kinds of amazing new path designs even from expanded type
** Youtube video tutorial on path eraser tool in Illustrator and remove parts of a paths **
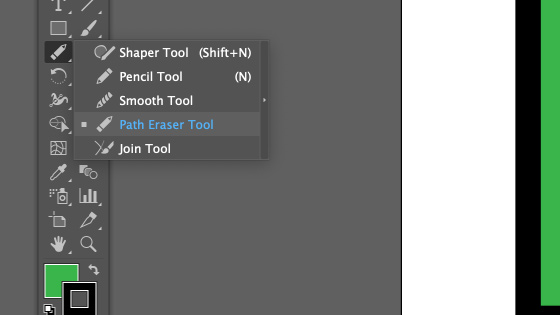
1. Where is the path eraser tool
The tool can be found in the toolbar of Illustrator. This tool has no options, you simply apply it to the selected paths and the path will be removed. The path eraser only removes the part of the path it passes over. It has been around for a while so you should be able to find it in many different versions of Illustrator
2. Basic set up for the path eraser tool in Illustrator
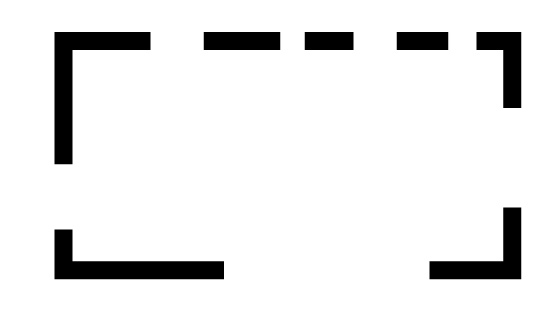
Select a path such as a rectangle and add a stroke to it say of 20pt and then select it and use the path eraser tool over part of the top part of the path and from the start point of the path eraser tool to the end point release of the mouse, the path will be removed and you will now have an open path.
You can repeat this breaking the part into multiple grouped paths and you will see the fill change to reflect the new paths created.
3. Re-color the paths generated by the path eraser tool in Illustrator
The paths are all now separate paths and they, if selected, can also be cut using the path eraser tool. Simply hover of the start point for your erase and the end point of your erase

Of course it does not need to be just applied to a square but all kinds of paths can be cut using this technique such as circles
4. Use path eraser tool with width profiles / width tool
You can also use the path eraser with width tool and width profiles. Either apply the width profiles or tool to one or more or all of the paths after using the eraser but you can also apply a width beforehand and then apply the path eraser tool beforehand

Or use different profiles

5. Path Eraser and appearance panel
Select a path with a complex set of fills and strokes etc and go to the appearance panel and you see the break down of the strokes etc. You can also use the path eraser tool and apply over parts of that and the path will be broken down into smaller fragments of paths with the same appearance

6. Illustrator Path eraser and brushes
You can also apply the path eraser to paths with a brush added. Select a path, apply an Illustrator brush and then apply the path eraser to cut the brush strokes into fragments. The end result can be far more intense brush strokes with the same brush setting

7. Path eraser tool and repeat feature
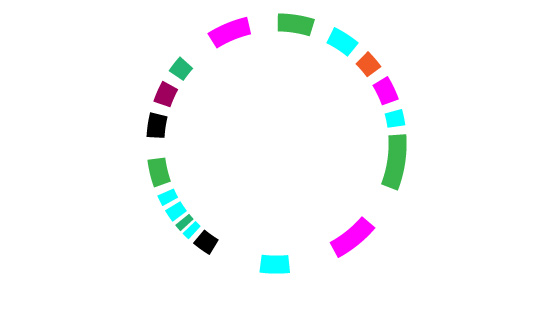
Select a path and then go to the object menu and repeat and select radial (the others are fine as well). Change radius and instances of the line design as required. With the selection tool, double click on one of the lines or designs and then go to the path eraser and apply to that single instance. All the other instances will change. As all the paths are separate they can be re-colored, shifted, etc within that repeat instance and all kinds of radial designs can be created from an initial single line

The radial design is still live and can be manipulated further such as increasing the instances as well as the radius and you can always double click back into the design. You can also add another repeat to that and so
8. Jagged line
You can create a quick jagged line by using the tool. Create a quick line by using the line segment tool via the toolbar and then apply the tool over parts of the line but only small cuts to the line (you can just use it to slice the line by cutting a very small part of the line and the zoom tool is pretty useful here)

Once you have done this, you can then go to each of the line parts and shift them as well as re-color them as well as scale or rotate etc

9. Expand the paths with the strokes
You can always turn the stroke designs into fills by using the object menu and expand command and you will then have a selection of closed fill and stroke paths to work with.
10. Warp path eraser tool
You can also use the tool with a warped line. Select a line or any design and then apply a warp to it via the object menu and envelope distort and warp. You can then edit the contents of that line with the path eraser tool and as you do that, the warp will also see parts of the line disappear as well.
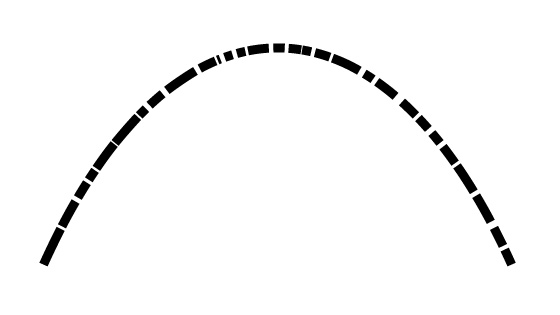
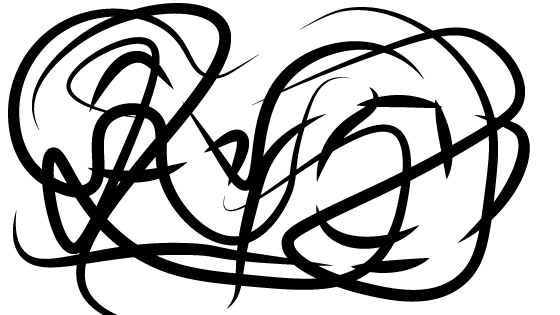
11. Curvature tool
You can create all kinds of very long curved doodle like curves with the curvature tool, you can then use the path eraser to create gaps in that. The key thing to remember is the select all command or to select all of the curves otherwise the path eraser will just not work. You can then break up the entire doodle into fragments which can then be re-colored and more
12. Path eraser tool on type
The path eraser does not work on type etc unless expanded as well as symbols etc. You can use in combo with the width tool as well as the brushes as well as the repeat feature in Illustrator as well as effects added to the paths and much more.
Select type, check spelling and then object menu and expand. Apply the path eraser tool along the path of each of the characters. Again, select all is super useful here as the tool only works on selected paths. Once you have done this you have your broken type
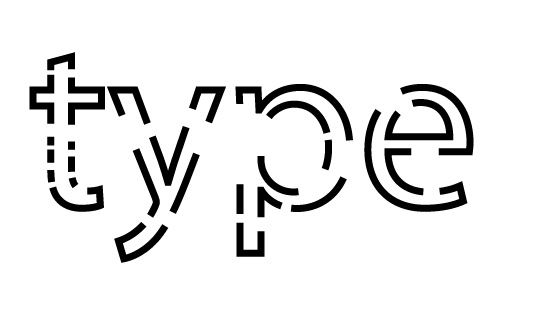
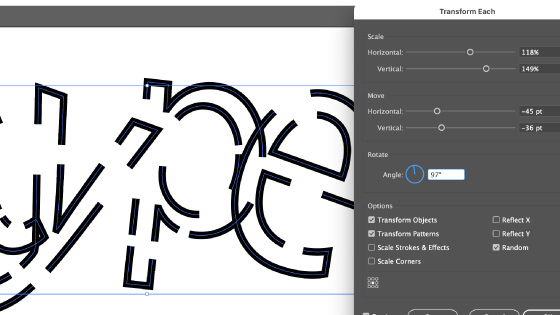
You can now select the individual parts. Or perhaps object menu and ungroup and then perhaps use the object menu and transform and transform each with random setting ON and scale and transform the design
You can also then select all the type and object menu and expand to turn them into filled paths and use the same object menu transform each mixing with re-colored designs and more. You can also double click the individual parts of the characters and enter isolation mode and then shift the individual fragmented parts of the type.
You can also release the entire type set from being compound by going to the object menu and compound and release and then you will be able to re-color the entire design or use the live paint bucket (in the toolbar) fill to fill the selected shapes of the type with different colors.

After expanding the live paint bucket color changes, you can also go to the object menu and ungroup (you may have to do this a few times) and then you will (finally) have separate character fragments that can be modified further using transforms such as transform each with random.