Photoshop Gradient Map Adjustments Tutorial
graphicxtras > Adobe Photoshop tutorials > Photoshop adjustment tutorials
How to use Photoshop gradient maps and color effects and text effects in adjustment tutorial. You can add gradient maps via the image menu but you can also add the powerful Photoshop gradient maps via the layer menu and adjustment layers which can be edited live. You can also combine the gradient maps in multiple ways to create amazing designs
** Youtube video tutorial on how to re-color images in 100s of ways by using the powerful gradient map adjustments in Photoshop **1. Where are the gradient map Adjustment in Photoshop
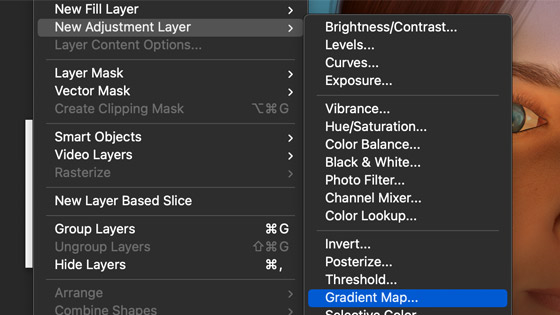
You can find them in two locations, image menu and also layer menu and adjustment layers in Photoshop
2. Adjustment Layers and Gradient Map Adjustments
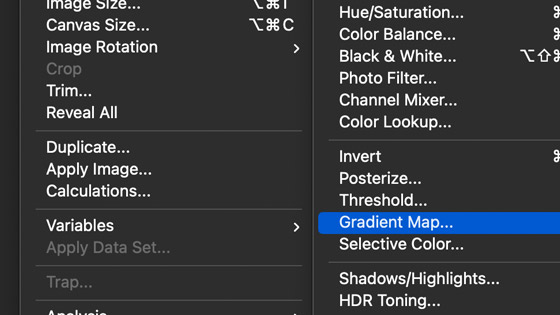
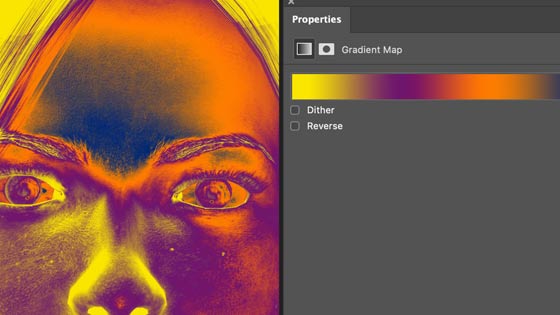
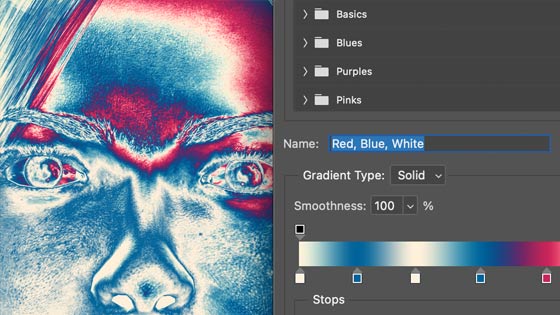
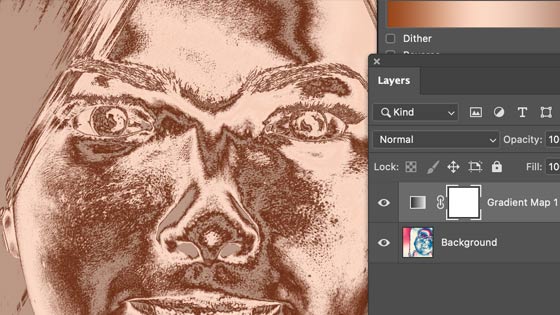
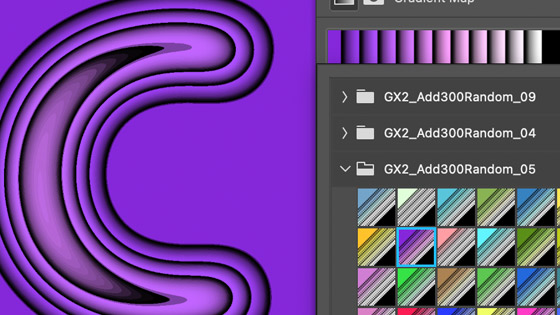
A guide to the Photoshop gradient map adjustment, the adjustment can be used to create amazing colorful designs using gradients as a source. The Photoshop gradient GRD presets can be used in the powerful Photoshop gradient map feature / filter found in adjustment layers (use it as a non-destructive effect and as a layer which can be moved at any point in the creative process or flattened to retain the adjustment) . The map can be applied via the image menu and adjustments (destructive). Set gradient map from selection in presets picker. Select dither (if required). Select reverse if you wish to have the reverse of the current gradient. Click OK
Reverse applied
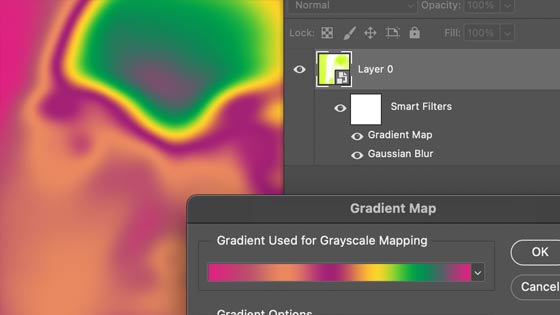
3. Gradient Maps - how they work
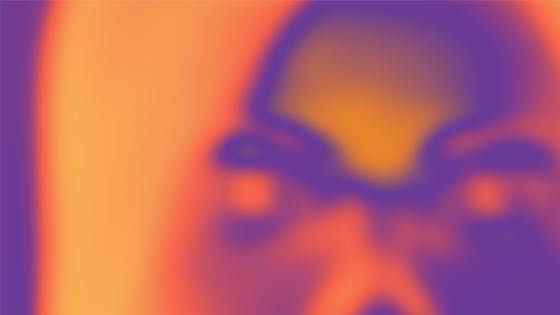
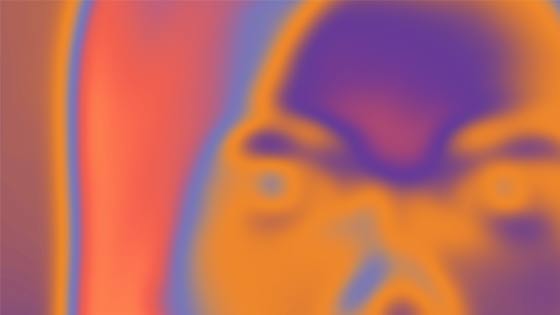
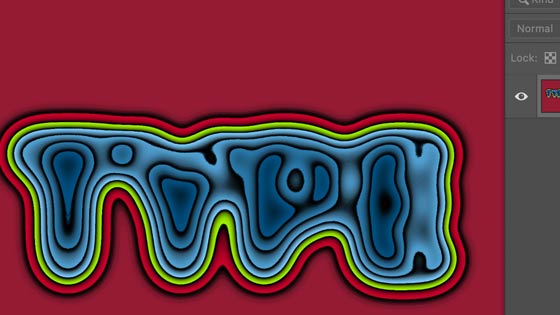
How do they work ? They work on a black and white gray scale gradient. Go to the map properties and the left side is the black side and maps to the black or darker parts of an image. The right side is the white side and maps to the lighter and white parts of an image. So change the gradient and the image will change accordingly. Please check out the tutorial at the top of the page. As you can see with the images on this page, the light sky blue is the black or darker parts of the image, the lighter parts of the image are mapped to the darker blue.
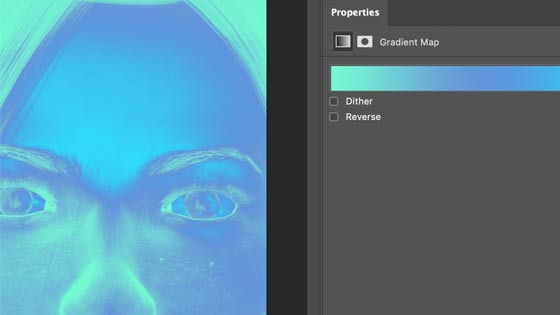
The lighter parts of the image are now the darker blues. The darker parts of the image (the hair) are the yellow which can be found on the left side of the gradient panel.
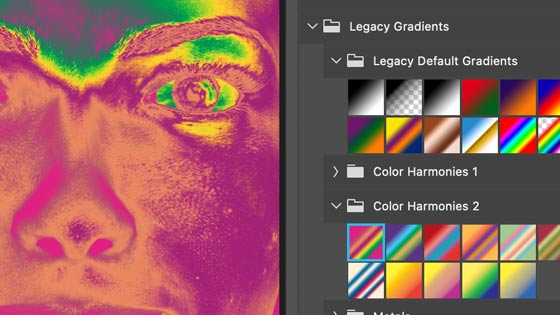
4. Gradient Presets for the adjustment 'gradient map' in Photoshop
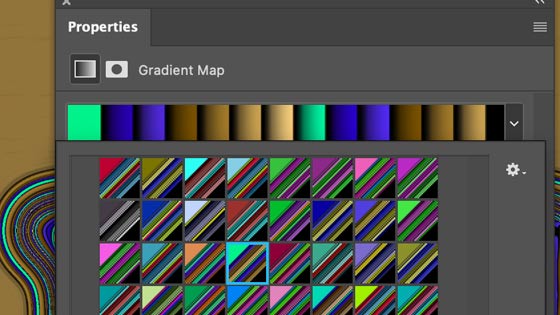
The gradient map adjustment uses the source presets and these can be any of the presets supplied with the Adobe ® Photoshop ® as well as presets created by yourself or perhaps ones you have purchased from third party sites and you can find many Photoshop gradients on this site
You can also quickly create your own gradients for use with the adjustment / gradient map (either in layer form as well as a straight adjustments). With the most recent release of Photoshop, the gradient map presets are now massive with 100s of entries available to be used. Expand out the gradient entries such as legacy default gradients and select and apply.
5. Tones and Photoshop Gradient Maps
The tool maps the tones of the image to the presets. The darkest parts of the image will be mapped to the far end of the stops; the lightest parts of the image will be mapped to the other end of the preset stops.
Of course, the gradient preset can have more than just two stops and you can use this to create truly surreal effects. The more and more stops you have though th end result can look pretty weird.
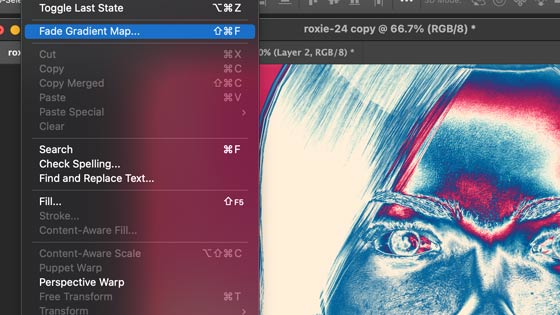
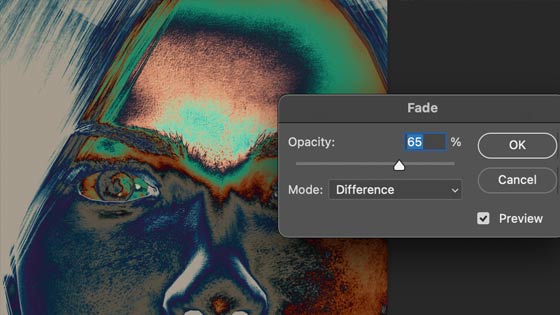
6. Fade Gradient maps via image menu
You can go to the image menu and adjustments and gradient map and apply it and then go to the edit menu and fade command to fade the gradient map adjustment. You can then blend in different blending modes as well as change the opacity of the effect
7. Multiple adjustments
Anyway, the presets / maps often results in some very interesting color effects that can be further enhanced by additional modifications / adjustments such as changing the end result to sepia via HDR toning etc. You can create far more interesting effects by using multiple layers and other effects and then combining those.
You don't have to use the same preset either. You can create some interesting and surreal effects just by adding the map twice using the same preset but you don't have to use the same one and you can also intermix it with other filters and adjustments as well as using the blending modes as mentioned.
8. Add in effects as well to the gradient map
You can also add effects to the image before you add any of the color effects via the adjustments. Effects such as blurs and shape blurs work very well with the adjustments but many others are just as effective
9. Adding many gradient stops
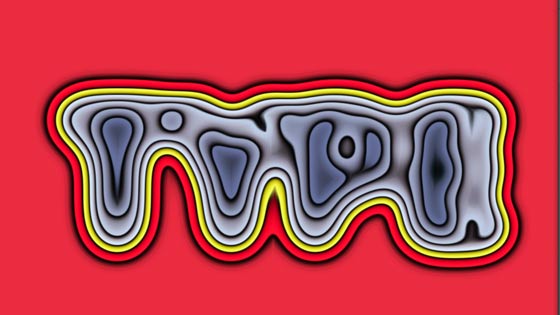
Different applied presets will result in a totally different image so any of the default presets can result in some very interesting colors. Or just use the same preset and use the reverse feature but all that does is swap the stops in the preset.
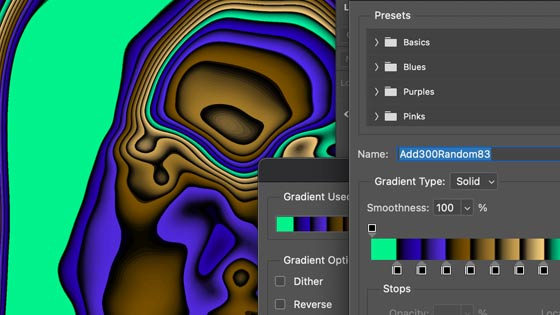
You can achieve even more extreme imagery. You can add loads more stops and many of the presets from the graphicxtras site include many more stops than just two (you can also just use a preset with one stop).
Go to the gradient map adjustment. Display panel and click on the gradient. Add more stops (say 10 or so, the best results seem to be with the gradient stops on the left). Click OK
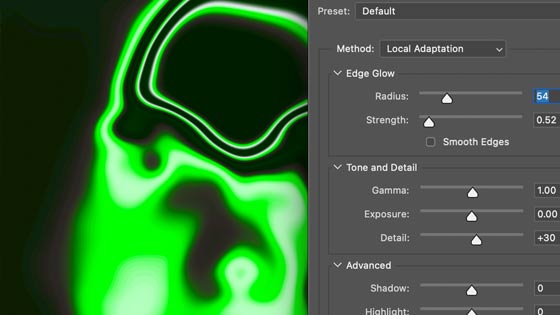
The results can be quite metallic like or perhaps posterization in many cases but that depends on the image and if the image is slightly blurred then the results will create unusual surreal glows. The image can then be further modified by other adjustments such as HDR toning
10. Effects can be added to the gradient map in Photoshop such as oil paint effect as well as camera raw
The images can also be further manipulated by tools such as the oil paint filter and camera raw filter as well as combining with two applications of the gradient map adjustments along with HDR toning. Go to the Photoshop Image menu and Adjustments and Gradient map and then HDR toning and then Filter menu and Oil paint filter and Camera raw filter
Apply yet another adjustment to get even more unusual effects applied to an image.
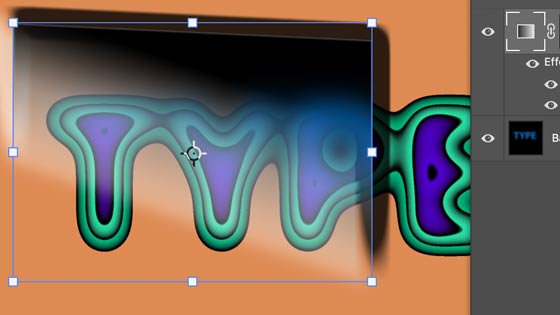
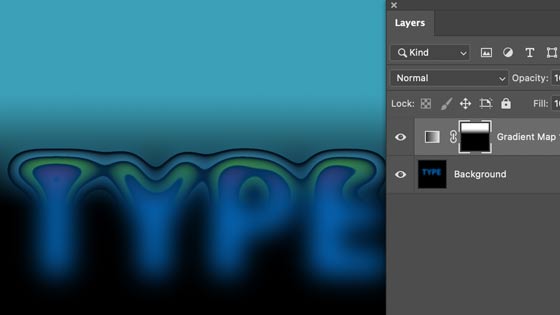
11. Photoshop adjustments and gradient maps can be also applied to great effect with type / letters
The map feature is useful for creating interesting text effects such as distress and inner glow and sharpening effects in Adobe ® Photoshop ®.
The start point (for me) is often applying some text and then blurring the text (a little or a lot) and then applying a map. The adjustment / gradient map does not use the transparency information, it is purely a color feature. It can be made up two or more of colors to create stunning color effects as well as distress effects.
Create some type and then go to the Filter menu and Gaussian blur and then Image menu and Adjustments and Gradient map ... Vary the number of stops from the basic two or three gradient stops)

With a little bit of blurring a very basic couple of stops preset you can create some interesting outlines or perhaps glows if you mix back the original source image. You can use gaussian blur but the shape blur filter can also be used to create some really interesting gradient map adjustments with type
You can add the map / adjustment with the same preset and different presets multiple times and interweave with effects as well as perhaps black and white adjustment and more.
All kinds of super text effects can be achieved using combinations of multiple map applications as well as combining them with filter effects such as the superb camera raw filter or perhaps using presets with a lot more stops and complexity than the basic two or three stops
Or blend them with additional effects such as oil paint filter as well as shape blur filter in Photoshop
12. They can also be used as amazing smart adjustments in Photoshop CC and changed in seconds
With the latest version of Photoshop, you can now use the adjustments with the smart objects and use the presets as a filter effect that can be disabled and changed or deleted at any point without any destructive effect on any type and the good thing is that the type can still be live beneath the smart filters and presets and can be changed from one text to some new text.
13. You can use the Adjustment layers with video timelines and masks
Photoshop layer menu and then New adjustment layer and Gradient map and Select gradient and Use blending modes etc. Change properties via the properties panel
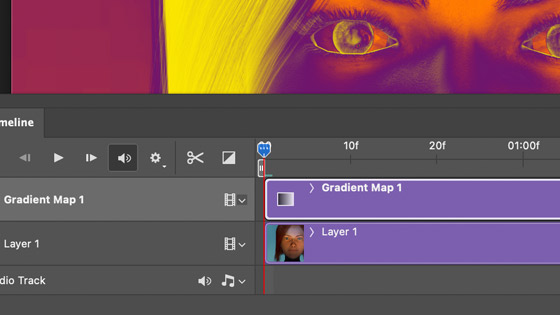
If you add the adjustment as a layer and as such, you can apply layer effects etc to the item. You can also use the video timeline and the layers containing the adjustments. Display the video timeline panel and create a timeline and then select that layer and select the style option - set the small stopwatch option on and you can then modify any attached layer effects to that layer over time (adding key frames). You can also duplicate that layer as well as well as combine multiple other adjustment layers below or above.
Also as a layer, you can use them with the normal blending mode but you can also use them with opacity (reduce) as well as difference / multiply etc blending modes which all result in some interesting color effects added to any image or text.
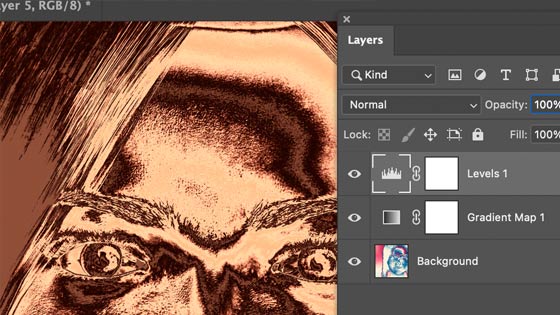
14. Gradient maps and Masks
You can also use gradient map adjustment layers with masks to apply the effect to one part of an image
Go to the layer panel and select the gradient adjustment layer. Select the mask thumbnail on the right of the map layer entry. Add or remove from the mask
Select the mask thumbnail and go to the gradient tool and add a gradient. It is a gray scale mask so you do not need to worry about the color, just the lightness and darkness of the mask. You can apply the gradient or brush stroke or pixel shapes etc to the mask thumbnail. If the thumbnail is black you will see more of the original, the closer to the white, the more you will see of the adjustment layer
15. You can also combine the gradient maps with layer effects in Photoshop
You can also add layer effects and plugin effects to the mask so the gradient adjustment layer can be modified in countless ways. You can also add other adjustments such as black and white adjustment
The gradient maps can also be used in other color modes such as 16bit color though sadly not 32bit mode (which is pretty odd but I guess all the effects etc are still being slowly moved for use in 32bit as well as 16bit mode)