Affinity Designer Convert Text To Curves Tutorial
graphicxtras > Affinity Designer tutorials > Affinity Designer How To tutorials
How to convert text to curves, standard paths in Affinity Designer. This can be done with artistic text as well as frame text. Text can be converted into curves and the nodes, individual characters etc can be manipulated. How to then divide the text. How to subtract from the converted text and more. Video tutorial on the subject below
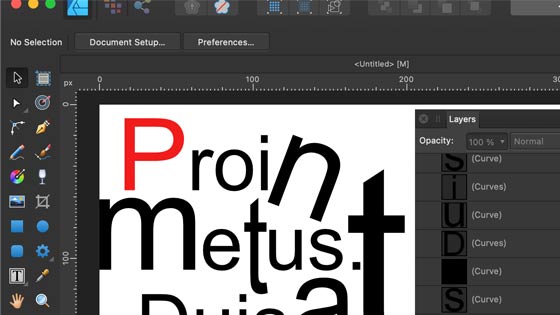
** Youtube video tutorial on converting text to curves / paths / outlines in Affinity Designer **1. Text To be converted to curves
Select the artistic text tool (or the frame text tool) in Affinity Designer toolbar. Click document art board at the location you want to add your text. Select the required font (such as one of the graphicxtras fonts). Select the size and color. Type something (one character or more)
2. Options to convert the text to curve
You can ....
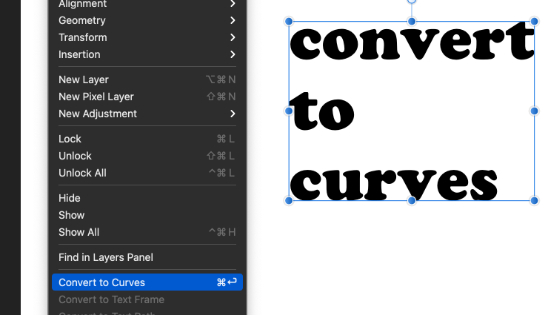
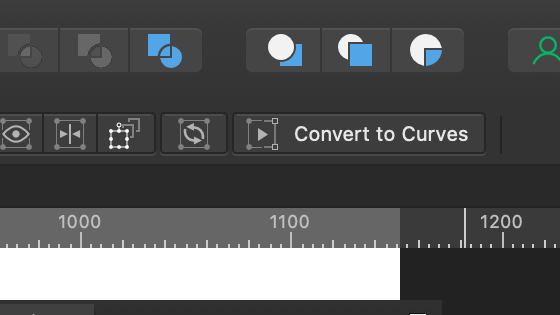
Right click the artistic text (as above) OR Go to the layer menu and use the convert to curves command there OR Use the convert to curves along the far right of the context toolbar. There are probably a few more tucked away in other parts of the application.
3. Text converted to curves - expand
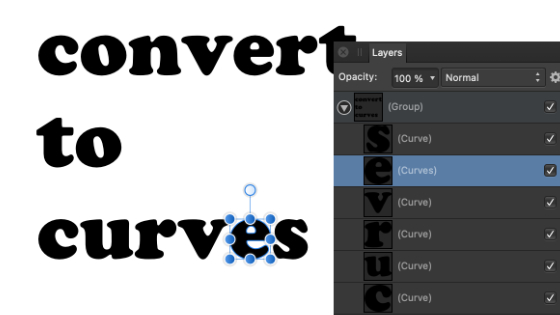
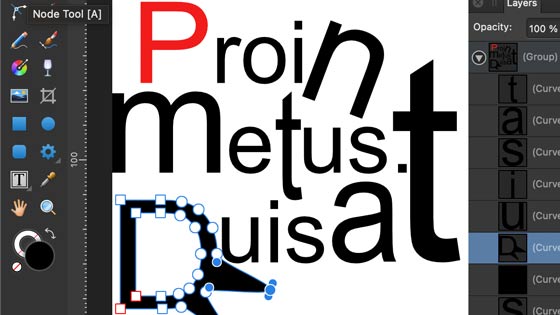
Select the 'Convert to curves' (all the characters will now become curves and the entire word etc will be part of a group). Once you have run the convert it is no longer text and can not be edited as such.
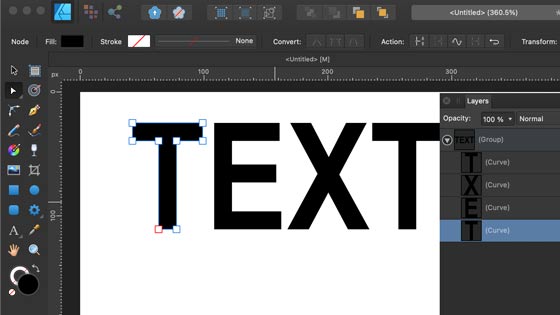
Goto the layers panel (found in the view and studio and layers) or double click the individual character in the document and select the character so if you converted 'TEXT' to curves you will see a group made up of 'T' 'E' 'X' 'T'. Select the node tool / move tool and select the character you want to work on via the layers panel
The same can be done with the frame text tool.
4. Moving the converted text in Affinity Designer.
If you wish to manipulate the nodes of the individual characters from your converted curve, use the move tool. With the Affinity Designer move tool you can then manipulate the size, angle, fill, stroke etc of the individual characters but you cannot modify the overall shape or the points / nodes of the paths.
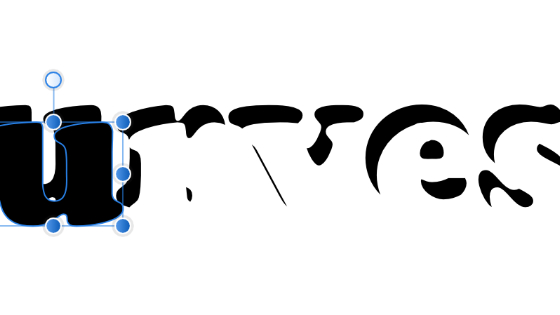
5. Manipulating the converted text using node tool
If you want to manipulate the individual characters and tweak the nodes / points of the curves then select the node tool. You can then drag the points in all kinds of directions to create weird and wonderful designs from your text.
The layers panel is super useful in changing the blending modes and opacity of the individual characters.
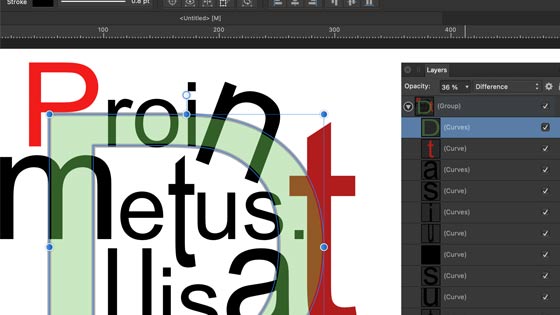
6. Combine converted text paths with other paths in Affinity Designer
You can convert text into a normal path / curves and then combine the curves with another path such as an ellipse or cog design etc
Select the artistic text tool and Select font / size etc and Click document / art board and create design via keyboard character. Right click and select convert to curves. Go to the ellipse tool. Create an ellipse. Select both designs. Use one of the combine / subtract etc options found via the top bar of Affinity Designer or layer menu geometry commands
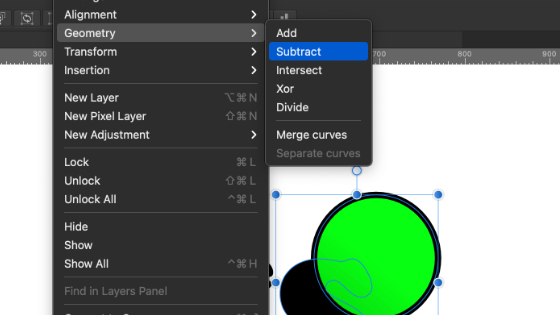
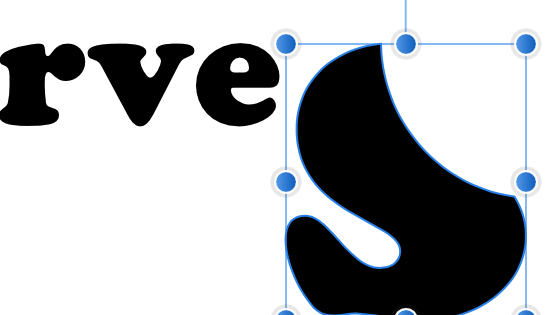
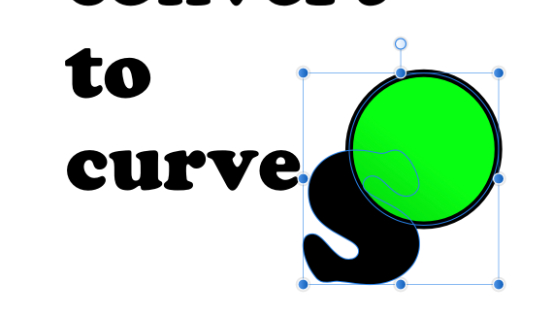
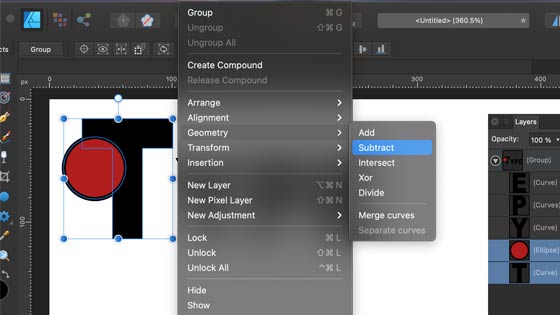
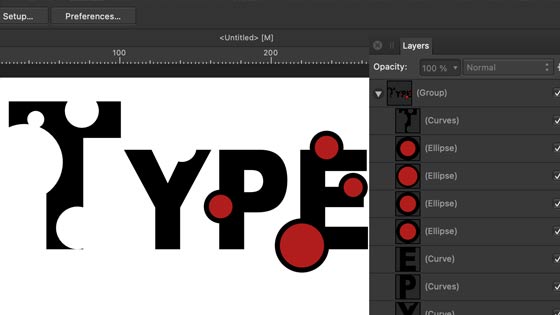
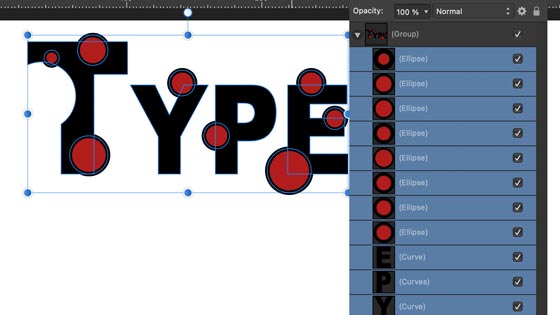
Once you have converted your text, you can now subtract etc other paths from it. Create a circle or square or another path and then place that on top of one of the letters and then select both the shape and the converted character (layers panel or use move tool) and then go to the layer menu and geometry and subtract to remove the circle or ellipse or shape from the text.
The end result of the subtract geometry command being part of the letter being removed
If you add multiple shapes on top of your design it is tempting to thing you can simply use the geometry command and remove those paths from the underlying text, the result will be yes, the shapes are removed but all but one of the text entries will also be removed. If you want to remove spots or lines or parts of multiple paths then you have to do it individually so select (move tool) the shapes on top of the letter 'T' as well as the letter and then apply the layer menu geometry command and then go to the 'E' (or whatever character) and select the shapes above that along with the letter and again use the layer menu and geometry etc.
It should be noted that the additional designs should be above the letters otherwise the letters will chop away from the shapes. Not the quickest approach.
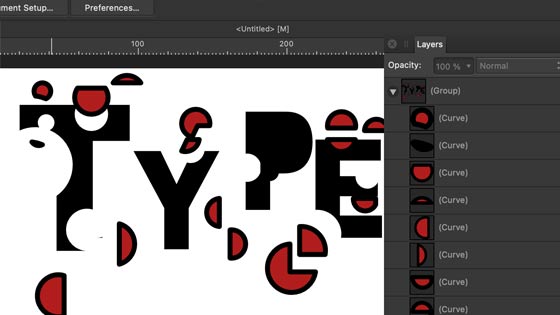
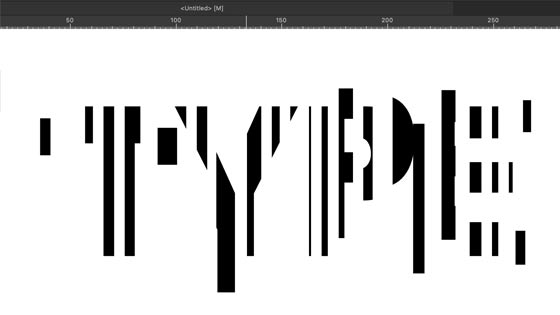
7. How to Divide the Curved text in Affinity Designer
One of the more interesting options in the geometry has to be the divide as that splits the paths into individual components.
Create your text and convert to curves command / button and then create some shapes on top of the current text.
The divide has no issues with all the characters and shapes selected, it will divide everything. So what happen ? Go to layer menu and geometry and divide and you will get paths where the paths intersect so instead of 8 shapes and 4 characters, you will potentially end up with 20 or 30 individual paths and those paths can then be manipulated as new curves. To select the individual curves, double click the paths or use the layers panel to select the individual parts and then you can break your text apart even more.
It should be noted that they all have to be part of the same group of converted text and curves to work with the divide.
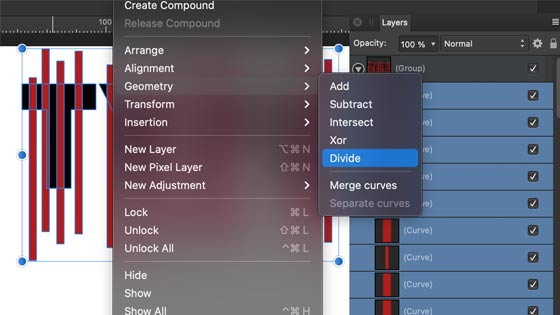
8. Line slicing effect added to text converted curves
Say you want to create a line cutting design from your converted text to curves using lines, all the lines and the converted text to curves designs need to be part of the same group before you run the geometry command.
You can then use the move tool (double click the individual curves or use the layers panel) and move the line fragments of your converted curve text and lines
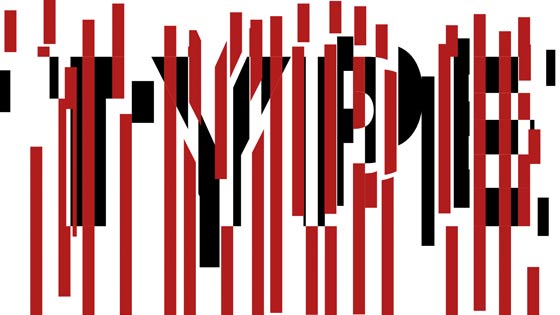
You can always remove the lines if they are a different color from the converted text to curves, select one of the lines (the red etc) and then go to the select menu and select same and fill color and then delete all the lines in one go.
9. Emboss convert to curves of text
You can convert some text to curves via the methods mentioned and then duplicate the design, apply a slight shift and then use the layers panel to select both of the same characters in the text and then right click and use the geometry command and subtract command. A quick text emboss. Sadly you cannot do it by the group but it has to be done on each character in turn and it is not live
10. Corner tool and convert to curves
Once you have your text converted to curves, you can apply the corner tool to round the text. Some of the characters are pretty round already and will not be changed by the corner tool but it will work for K and T etc. Expand the text but you have to go to the layers panel and select the individual characters and then use the corner tool on each and you can only round to maximum allowed for the character
