Affinity Photo Snapshot Tutorial
graphicxtras > Affinity Photo tutorials > Affinity Photo How To tutorials
How to capture the current work in an image via a snapshot in Affinity Photo and the snapshot can be seen in the history panel. You can use the snapshot also as a layer to restore etc
1. Snapshot Basics
.Affinity Photo snapshot feature captures the current image in Affinity Photo. You can create multiple snapshots in Affinity Photo.
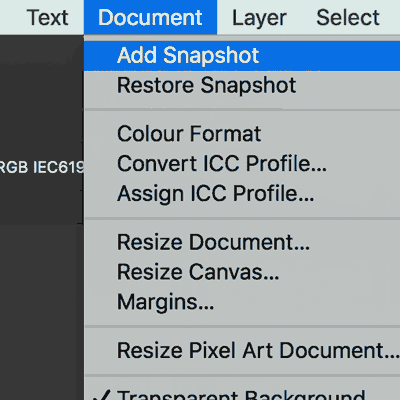
Document menu and then add snapshot; to restore by using restore snapshot. The key menu is document and 'add' and 'restore'
Many apps have a similar snapshot / capture feature, it is always useful to return to an earlier point (a super undo feature). The Affinity Photo app does have a neat and super fast history panel but if you have a history panel full of commands all indicating add pixel or gaussian blur or transform it is actually quite hard to find exactly the correct point to return to, the snapshot feature makes it a whole lot easier.
2. How to save the current state of the image in Affinity Photo via "snapshots" - document menu
So you have added a number of layers and effects as well as adjustments and type and at that point you wish to save a current state / history state.
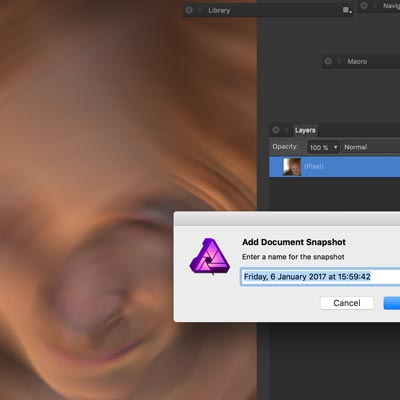
Goto the document menu and select the add snapshot command and then enter a name for the snapshot or just leave as the default and then click OK
When you save the document, that added state is added to the document as well so if you close down the app etc and return to the document at a later time, it is still there
3. How to restore the snapshot in Affinity Photo via the document menu
How to restore, well that is the next menu command in the document menu. If you have used the add command multiple times or just once, you will see an entry in the restore menu with the time and date stamp or whatever text you added to the add. It is as simple as selecting one of those and all the various layers etc will be restored as before.
Go to the document menu and restore and select snapshot
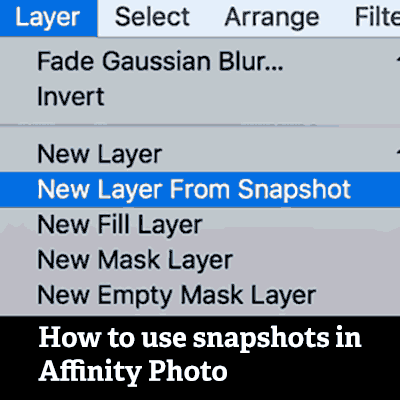
4. How to create a layer from a snapshot via the layer menu
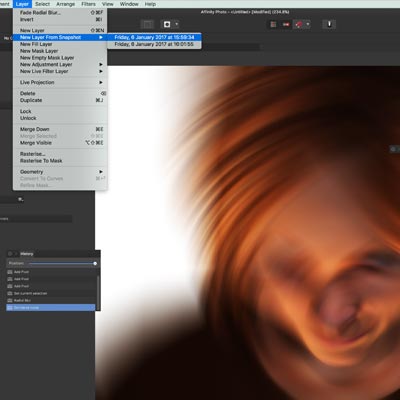
This is a very useful feature. If you have any history states stored then you can go to the layer menu and select the new layer from snapshot command and you will see a pixel layer appear that shows exactly what was displayed on the screen.
It does not restore the actual layers (that is the restore command) but it does generate a pixel screen dump and that layer can then be manipulated in exactly the same way as any other pixel layer which can have opacity added as well as using blending modes or adding effects to the screen layer as well as effects added to the snapshot layer so a radial blur snapshot can then have a new radial blur filter added to the layer.
To get a layer, go to the layer menu and select the command new layer from snapshot and then select the snapshot. You will now see a new layer appear with the image as it was at the time of the snapshot in Affinity Photo
5. How to access the snapshots in Affinity Photo via the snapshots panel such as restore and delete and add
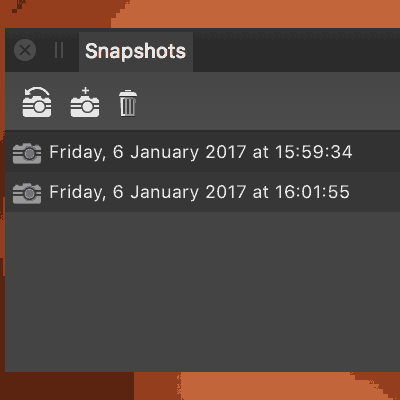
There is also a snapshot panel and that can be accessed via the studio menu View menu) and the snapshot includes : Restore snapshot, Add snapshot, Delete snapshot, The snapshots generated, New document from snapshot. Weirdly, the snapshot panel does not include the create a layer from the snapshot.
6. Blending snapshot layers
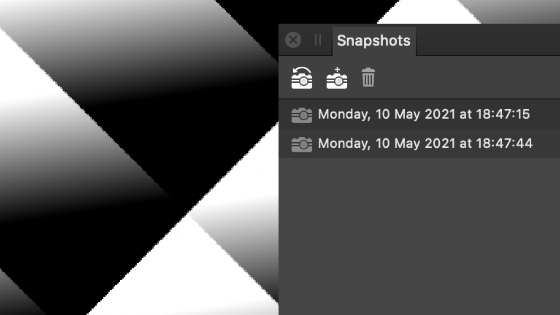
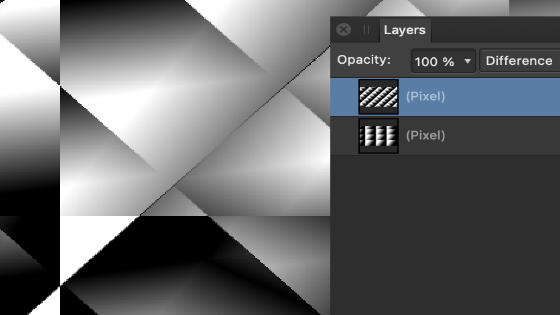
Quickly create a couple of snapshots from the current image, in this case a couple of views of the pattern panel with a live gradient. The images are now stored in the snapshots panel and are listed with their date of creation. You can delete them etc from the panel. You can set the history back to the original state but the snapshots are still there, they are just a snapshot and can be used as a layer via the layer menu and new layer from snapshot. Select the first snapshot saved and then repeat the layer menu and new layer from command and you will now have two layers, the layers can be blended etc and effects applied etc
You can use this approach with all kinds of snapshots combinations to create many unique artworks from your designs at any stage of your work.
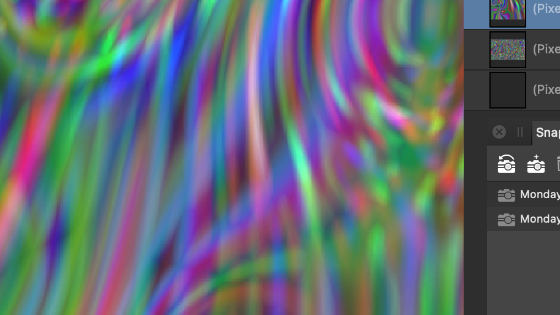
You can use any number of filters such as the powerful deform filter and create a very unusual distorted imagery and then add a snapshot and then apply the deform filter again along with other effects and then capture that and you can then remove all the work and the entries are still in the panel and then can be used to generate two gradient etc layers (as above) and those layers can then be blended via the layers panel such as setting it to a blending mode of lighten. Multiple layers can be combined in this way and you can also then capture the above design and repeat the process with other effects.