Illustrator Arc Tool Tutorial
graphicxtras > Adobe Illustrator tutorials > Illustrator tools tutorials
How to use the arc tool in Illustrator, how change the arc settings, how to add multiple arcs, how to use with arc strokes, repeat features, brush strokes, width profiles, how to use the arc tool shape with the appearance panel and more, also please check out our arc video tutorial as well giving many examples
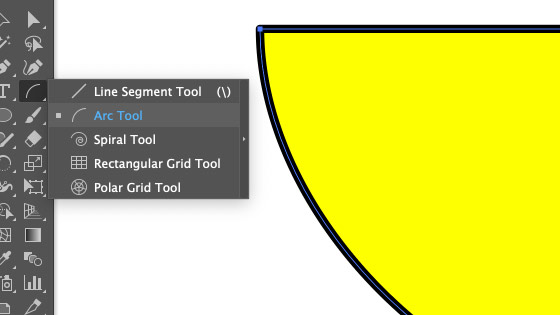
** Youtube video tutorial on how to use the arc tool in Illustrator to create all kinds of amazing vector artwork **1. Where is the arc tool in Illustrator
Just beneath the live line segment in Illustrator tools box. Click to use the tool to create a basic arc
2. Options for the Arc Tool in Illustrator
Press return or double click the arc tool icon.
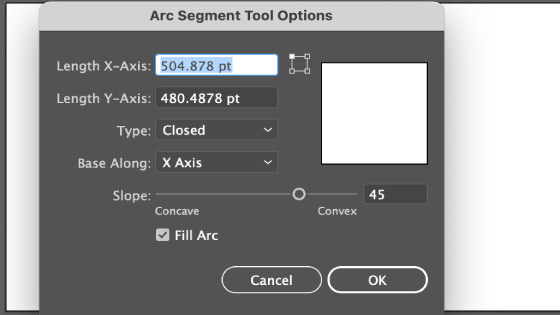
The arc tool has a nice preview (a small preview) and you can try out different arcs using the settings in the preview, personally I generally just create the arc on the art board and don't use the fixed length settings but they are useful for creating interesting arcs shapes in combo with the slope.
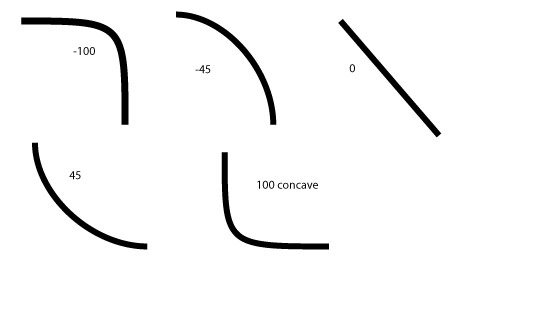
The base x axis y axis is much as the little origin control to the right of the x-axis length. The type closed generates a closed path (though not a filled path) and the open generates your basic arc open shape that is not closed. The fill arc just adds the current fill color. The slop is great for creating the slope in either direction, as a dip or bump. 45 degrees is the best setting for a basic arc.
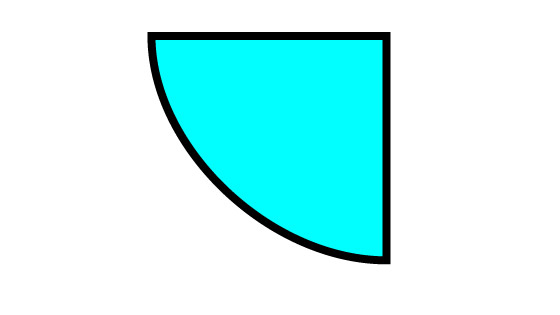
3. Closed arc shape
You can add the shape as a filled closed object, set the type to closed and apply the arc tool to the art board, Go to the fill and set the fill color.
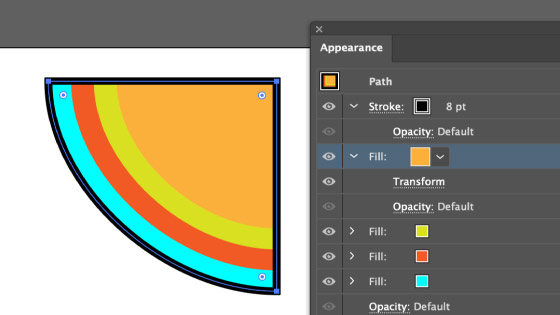
4. Add extra fills and strokes via appearance to the arc
Go to the window menu and appearance panel. Go to the panel with the arc shape selected and right side menu to add new fill as well as additional strokes. You can also keep that selected and then go to the effect menu and distort and transform and transform and set the scale to 90 / 90 as well as set the origin and create a new slight smaller arc inside the current arc. You can then repeat this with different colors such as 80, 70, 60 etc. This can all be modified via the appearance panel.
5. Arc shape and width profile
You can add all kinds of arc with the arc shape but you can extend them further by using the width profiles as the top of the application as well as using the width tool found in the tools box.

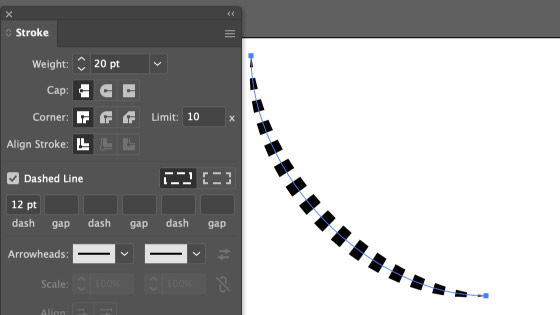
6. Dash arc shapes
Select the arc shape and go to the stroke settings (stroke panel etc found via the window menu) or via the properties panel. You can set the dashed line to ON and then set the dash and gaps for the arc shape.
7. Arc shapes and repeat
You can also use the arc tool to create shapes that can then be repeated using the object menu and repeat and radial. You can then modify the radius of the arcs along with the instances. You can change the arc design by double clicking one of the instances.

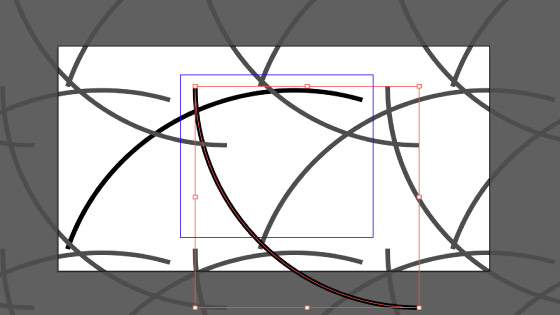
8. Arc Tool and Patterns
You can use the arc tool when you are in pattern mode in Illustrator. Create an arc design using the tool and then go to the object menu and pattern and make. You can then manipulate the arc design in numerous ways and create all kinds of pattern tiles saved in the swatches panels that can be used with selected paths
9. Curvature tool and arc
The arc created by the arc tool is a standard path and you can edit it in countless ways such as using the curvature tool to manipulate the points of the arc, you can drag and re-position the points to create unique designs.
10. Warp the arc
The arc design can be selected and warped using a number of different tools such as the effects in the effect menu such as zigzag as well as using tools such as the wrinkle tool in the toolbar as well as the powerful crystallize tool to add a lot of extra points to the line, which in turn can be manipulated by the direct selection tool.