Illustrator Curvature tool tutorial
graphicxtras > Adobe Illustrator tutorials > Illustrator tools tutorials
How to use the curvature tool in Adobe Illustrator for amazing curved vector designs. The curvature tool is very similar to the pen tool but at the same time it does bring an ease of use of creating curves
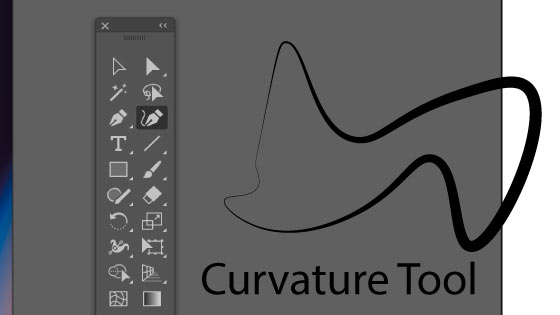
1. Where is the curvature tool in Illustrator
The curvature tool in Illustrator is found in the toolbar near the top of the toolbar.
2. Basic apply of curvature tool
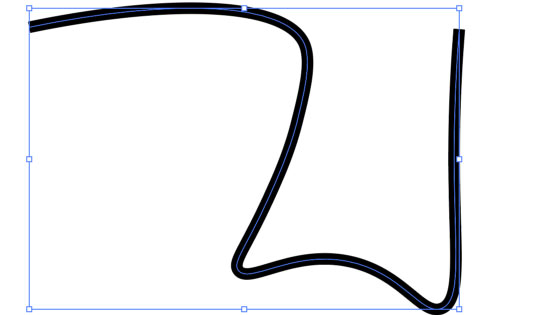
Select the curvature tool in the toolbar, there are no options available for this via the tool's icon. Set the color to nil for the fill (you can have a color fill as well but unless you create a closed path, the fill may be of less use. Set the stroke to black and 7pt say for the width. Click on the art board and then click again and after that you will see a preview blue line showing the direction of the curve which can be modified before you click to add the third point to the curve. To escape from adding more points to the curve, press the escape key and it will stop the blue preview path.
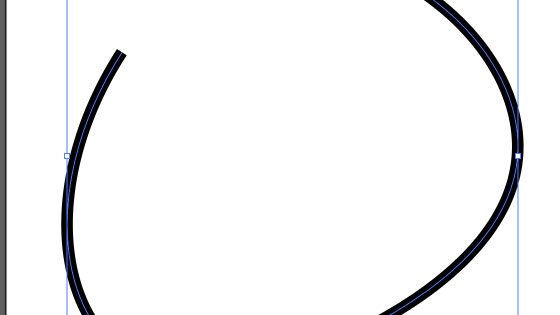
You will see the line has a number of points along the path. You can select any of those points and shift them, you can also shift them along the path as well.
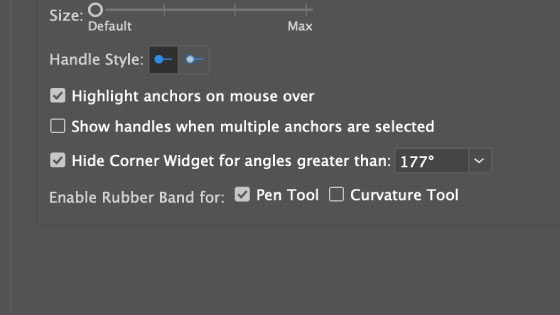
3. Rubber Band preview for the curvature tool
You will notice the blue preview keeps re-appearing, you can remove this by going to the preferences for Illustrator and selection category and the bottom part of the panel and 'rubber band' for the tool, turn it off (I must admit, it is useful but does get in the way as well)
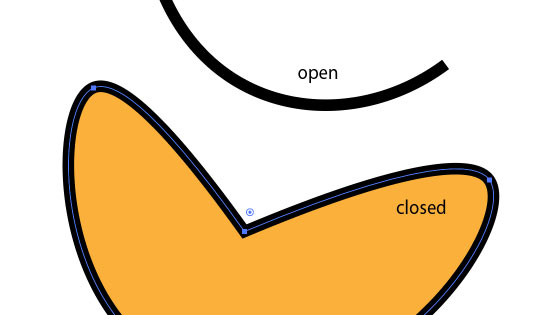
4. Open or closed path for the curvature tool
You can if you wish, close the path by clicking the first point and that case the fill is more useful.
5. Points on curvature curve
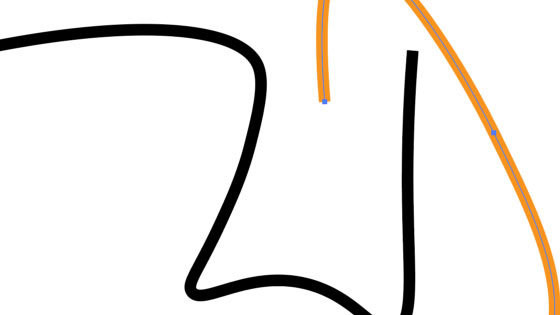
You can double click a point and turn it into a corner sharp point, you can double click it again to turn it into a smooth curve again. You can click anywhere else on the curve (not on an existing point) and a new point to the curve will be added and it will slightly change the shape of the curve. You can also click a point and then press the delete key to delete it.
6. Add a new curve with the curvature tool
Make certain you have deselected the curve before starting a new one because the tool will just try and connect it to the existing one
7. Curvature tool with existing paths
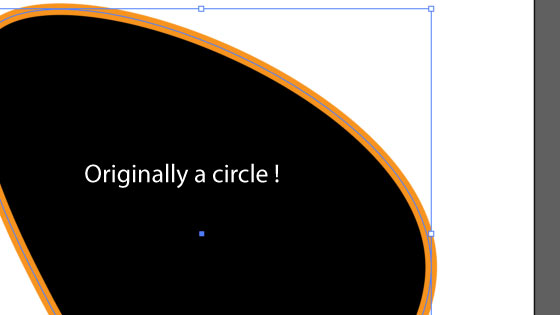
You can also use the curvature tool on existing paths such as star design or ellipse created using the ellipse tool or arc designs and more. You can manipulate the points as well add additional points and shift the curve using the curvature tool.
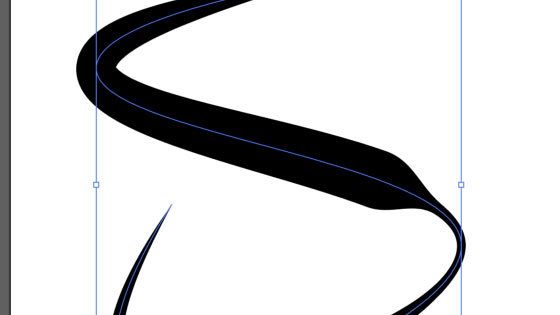
8. Add width profiles and modify the width of the stroke
You can create the curve using the curvature tool, the stroke can be further manipulated by the width tool or by adding width profiles and the line can be changed in countless ways
9. Adding brush strokes to the curves
You can also select brushes via the brushes panel and add these to the curve created by the curvature and you can still continue to add additional points by using that tool.

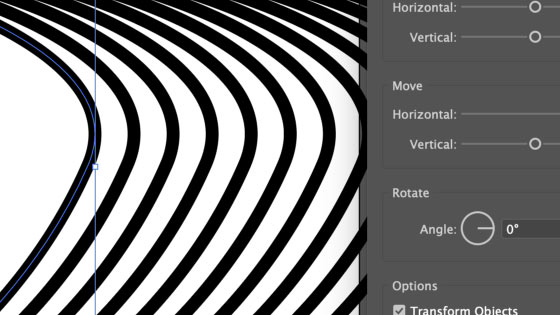
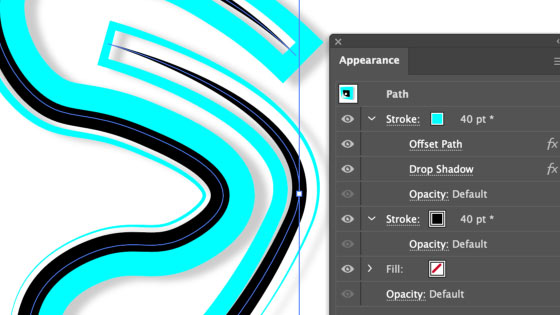
10. Appearance panel and adding additional strokes and Effects
You can add effects via the effect menu which can all be edited via the appearance panel found in the window menu. Go to the effect menu and distort and transform and then transform and with the path selected, set the copies and the move value as required to create multiple copies of the same curvature design stroke
Goto the appearance panel with the stroke and then right side menu and new stroke. Set the color for the path. Goto the effect menu and select path and offset path. Set to a value in the offset that displays both the original as well as the duplicate. You will now see the offset in the appearance panel and it can be double clicked and edited at any time. You can also continue to add and remove and move points using the curvature tool with this path.
11. Repeat and curvature
Select the tool and create a path using the tool in Illustrator, set the color, width profile etc. Go to the object menu and repeat and radial and set the radius and instances. Double click one of the instances and you can continue to edit the path. You can then exit the repeat isolation mode via the top left arrows.
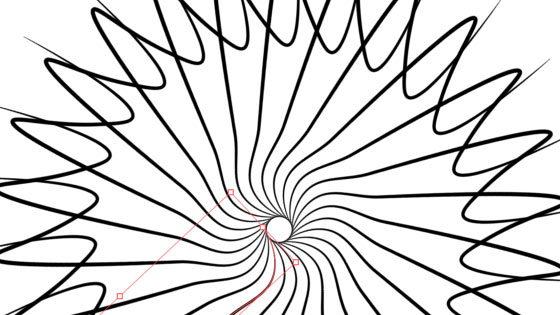
The design can be expanded via the object menu and expand command.
12. Doodle using curvature.
Select the tool and set the stroke color etc and click the art board and continue to draw, make a tangle of points by adding points back and forth across the art board. You can then use the live paint bucket to fill the cells of the image
13. Curvature effects
You can warp the design using live effects found via the effect menu. You can also warp the design using warping tools such as the wrinkle tool and crystallize tool