Photoshop cutout Filter tutorial
graphicxtras > Adobe Photoshop tutorials > Photoshop filters tutorials
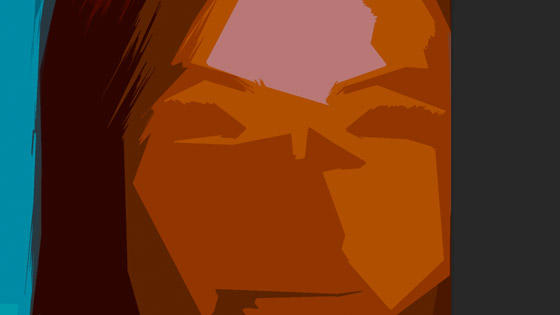
Cutout filter in Adobe Photoshop for abstract artworks as well as reducing color and much more. It is a simple filter to use but it is an effective tool that reduces the color or flattens or abstracts an image in many artistic ways.

1. Where is the cutout filter in Photoshop
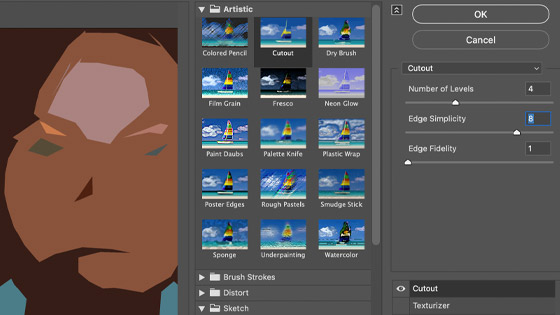
The cutout filter in Photoshop is a powerful filter found in the filter gallery of Photoshop. You can find the cutout filter in the filter menu and filter gallery and the artistic section 'cutout'. You can add the cutout filter once as well as multiple times in the same filter gallery though there is no blending between the settings. The filter has been around a long time, it was part of the Aldus filters in the very early days.
2. Basic use of the cutout filter
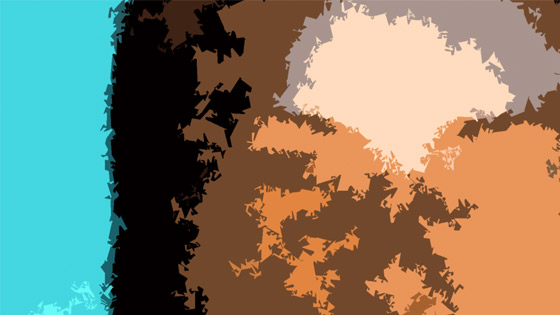
Cutout filter is a totally wow filter that can be used for all kinds of amazing artwork. Filter menu in Photoshop and filter gallery and artistic section and cutout filter and set the levels / edge simplicity etc and click OK. It has a preview which is super useful, one you can zoom into and see the cutout effect overall or in fine detail.
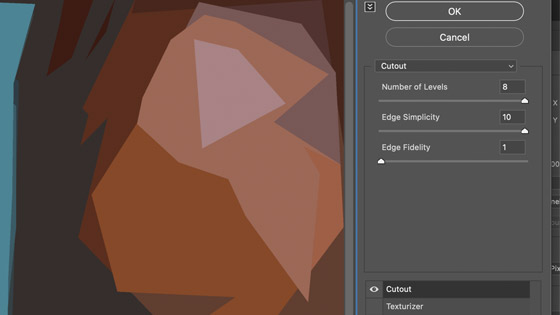
Unfortunately the settings cannot be extended, quite often I always feel the number of levels of 8 maximum is too low a limit. You can increase the edge fidelity but keeping it low can be used to create all kinds of lovely abstract designs
Set the edge fidelity high and the result can be a more realistic image but with a limited range of colors (I always find the end result a little dull which needs a little more work with adjustments)
3. Setup / settings for the cutout
The cutout filter is for RGB 8bit images. The cutout filter has only a few settings but they are very effective. The cutout filter is a powerful effect that works best combined with other images such as the gaussian blur filter. You can use it create an interesting drawn looks as well as some truly abstract designs.
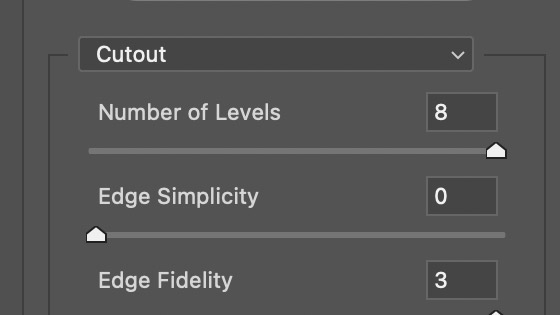
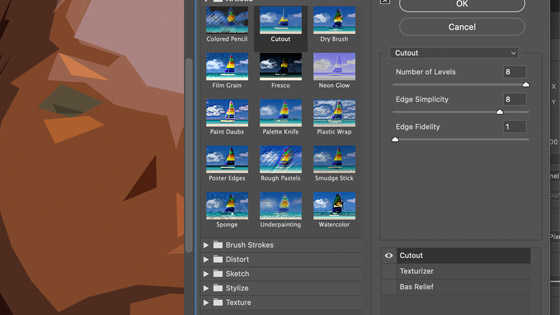
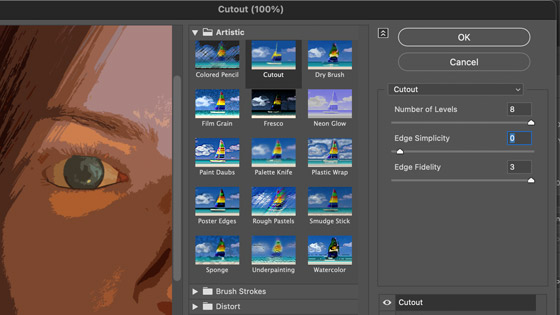
Number of levels - the lower the setting, the more abstract the image with hardly any features appearing. Set the number of levels to 2 and hardly anything appears, the image is reduced to very few visible highlights
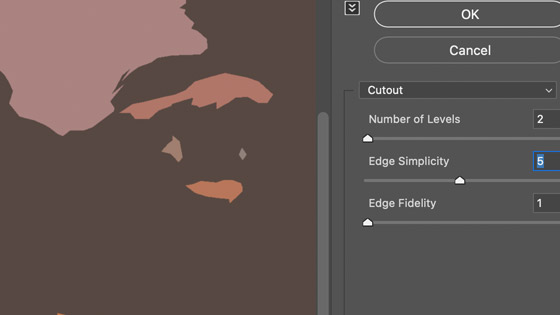
Edge simplicity - the higher the setting, the more the image will be lost and replaced with solid colors
Edge fidelity - probably the least effective of the settings with very subtle changes with either maximum or minimum but it does come in useful if the image is noisy
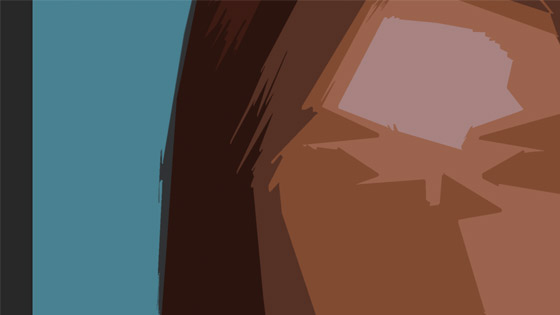
If you want more of your image then the best settings for the cutout filter in Photoshop are levels 8 and edge simplicity 0. If you want a more cubist like image then set the number of levels to 8 and edge simplicity 10. If you want a fairly flat scene then set the levels to 2 and edge simplicity to 10.
4. Presets / actions
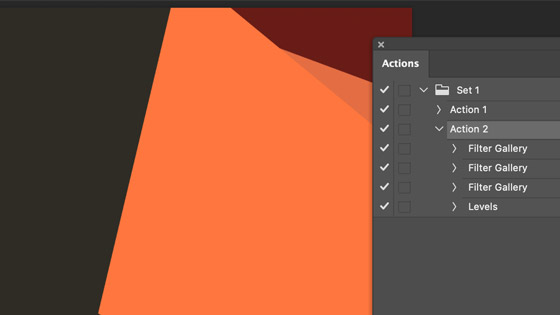
Sadly, there are no presets features available with the filter set, none of the filter gallery effects have any presets. A workaround for this is to use the actions panel and you can set up an action or a number of actions for the cutout filter and then you can simply click those and run that action and the action can be made up of one cutout but it can also be made up of multiple entries. Use the recording feature on the panel to record the cutout filter and then playback via the same panel.
5. Combine with other filters
As with many filters in the filter gallery, the cutout filter works best in combination with other filters such as the gaussian blur or spin blur filter or oil paint or twirl filter. The one below used the cutout along with oil paint. The effects can be stored into an action

I really don't like to see them described as one click tricks or one trick ponies etc, they can be used in countless ways to create many unique artworks.
gaussian blur 10 and cutout filter levels 3 and edge simplicity 3 and then go to the cutout filter again and run it with these settings, cutout filter levels 8 and edge simplicity 7. Or use the cutout filter with auto tone and then follow it with an find edges filter.
Actually, the edge fidelity really kicks in on the second pass. With the first application of the cutout filter, the edge fidelity had hardly any effect but with two passes you can see the change with the edge fidelity. Repeat cutout filter etc to create a still recognizable design (in most cases) but still now very flattened.
It should be noted that the cutout results will vary depending on the source image. I am using a 1000 x 1000 image but the effect may vary with a noisy image and 4000 x 4000.
Combine it with a noise effect such as add grain and then apply the cutout filter and you end up with a more fractal design
6. Cutout filter and reapply
You can use the filter once or multiple times, you can create all kinds of weird and wonderful designs by applying the effect multiple times and you can always undo if you go too far. You can apply it via the reapply filter at the top of the filter menu
7. Cutout filter and fade
As with all the filters in Photoshop, you can use the cutout filter and then go to the edit menu and fade the result.
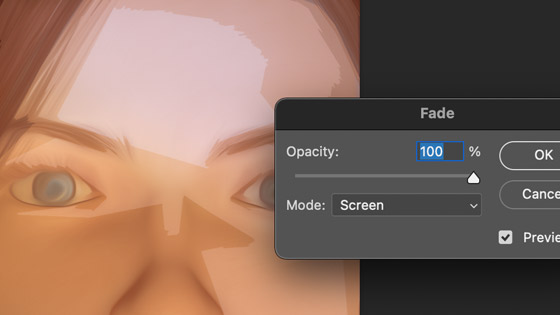
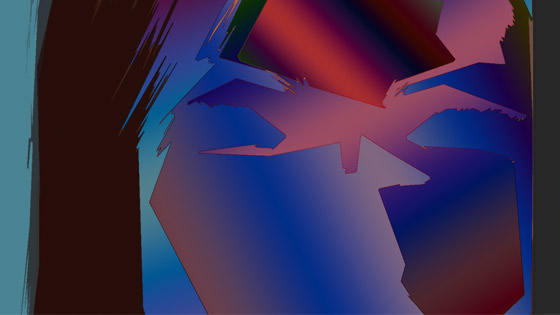
You can also use the fade to change the opacity and the blending mode of the effect and that can be used to create interesting cutout effects such as using the abstract cutout filter effect and then using the edit menu and fade with the divide blending mode for a very surreal looking artwork
Or you can use the edit and fade with screen and other blending modes. The result can be a very surreal looking cutout effect. It does mean that you see the original image but with at least some of the more abstract design added into the mix
8. Cutout filter and fills
The great thing about the cutout effect is that the result is a large expanse of a single color and that is great for a selection using the magic wand tool. You can either select the areas of the cutout filter result and then copy and paste them onto different layers (now that would be a very useful feature for the filter, the ability to place the solid colors on different layers) as well as just using the selection of the solid color areas and filling them with different colors such as gradients or perhaps random fill patterns using a selection
Apply cutout filter and go to a solid area of color and use the magic wand and select and fill with a gradient or pattern fill etc and repeat selection etc
9. Cutout filter and colors
The cutout filter in Photoshop is great for creating abstract art but sometimes the result of averaging out an image can be a fairly unsaturated and dull design without a little tweaking and I always find the camera raw filter or some of the adjustments super useful to finish on. I would suggest going to the image menu and using the adjustments and vibrance and boosting the colors. You can also do the same with the powerful layer menu and new adjustment layer and vibrance.
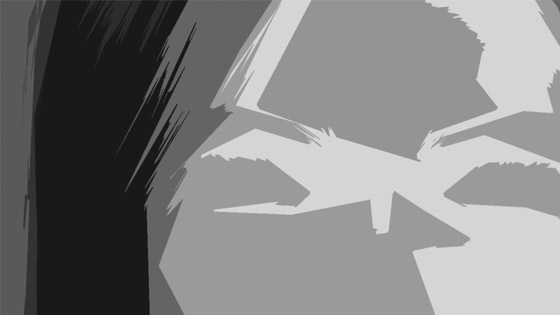
Or turn the image into a black and white artwork
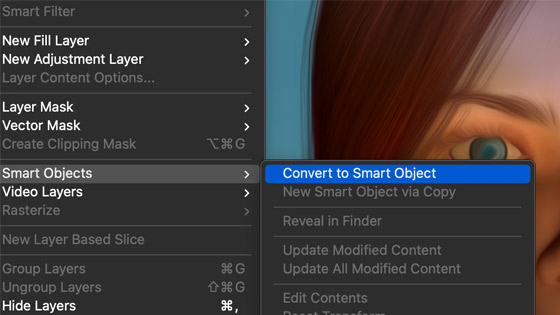
10. Cutout filter and smart filters
You can also use the cutout filter effect with the powerful smart filters. Convert the image into a smart object via the layer menu and smart objects and then apply the filter to that and the great thing about the smart objects is that they can be edited at any time in the future and the cutout effect changed
11. Blending modes and layers
You can duplicate the image and then with the new layer selected, the cutout filter can be applied to that and then the two layers can be combined in many different ways and you can always five or six cutout effects and combine them all into one via the layers panel and flatten the image later via the layer menu
