illustrator calligraphic brush tutorial
graphicxtras > Adobe Illustrator tutorials > Illustrator brushes tutorials
** Youtube video tutorial on calligraphic brushes in Illustrator to create amazing brush stroke designs **1. Calligraphic brushes Set-up
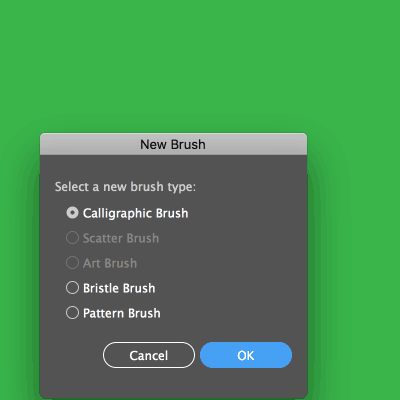
1. Create calligraphic brushes in Illustrator
How to create amazing calligraphic brush strokes in Adobe Illustrator, simply go to the Window menu and then brushes and then with the brushes panel displayed go to the right side menu and select the new brush command and select the calligraphic brush open and then set the name as well as the various settings and then click OK and the brush stroke will then be added to the Illustrator presets.
2. Options for Adobe Illustrator Calligraphic Brushes such as size, roundness etc
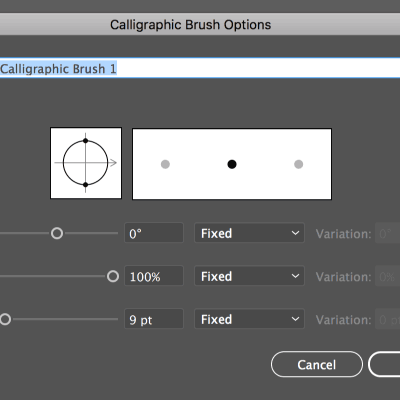
Size and roundness and angle, you can set a value for those. There is a preview showing the current roundness etc.
3. Variation of the calligraphic brushes
You can keep the options as fixed but if you change the variation options to pressure / random etc then you will also have access to change the size based on those. The variation is slightly odd in that you cannot have an unlimited variation, the variation size is limited to the size of the brush etc so if you have a brush of 10pt then the variation is limited to that as well. The angle has no use if you have 100% roundness, set the roundness less then 100% then the angle of the brush will change and you can see the calligraphic effect far more clearly
You will also notice from above that the randomness of the calligraphic brush is per brush stroke and not as you apply the brush so if you set the value to 10pt and the variation to 8pt then each brush stroke will be up to 18pt but there will be no variation in the actual stroke (such as with a width profile)
4. Accessing the calligraphic brush libraries and using them in Adobe Illustrator

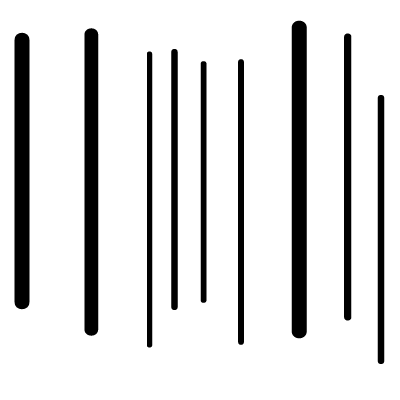
A couple of calligraphic brushes libraries come with Illustrator for starters. You can find them artistic section of the libraries but sadly they offer nothing more than a selection of presets based on different roundness / diameter etc but you can quickly use these with any selected stroke and change a round artwork into a slanted or straight line artwork in seconds. You can also quickly create your own variations by changing the current ones or by going to the new brush command in the panel and then defining them there with different roundness etc settings
5. How to use Illustrator Calligraphic brushes with an art pad
They come into their own if you are using them with an art pad and the pressure setting. Using them with a mouse is fine but with an art pad you can create all kinds of stunning line work with the paintbrush tool.
6. You can also use the calligraphic brushes with paths in Adobe Illustrator
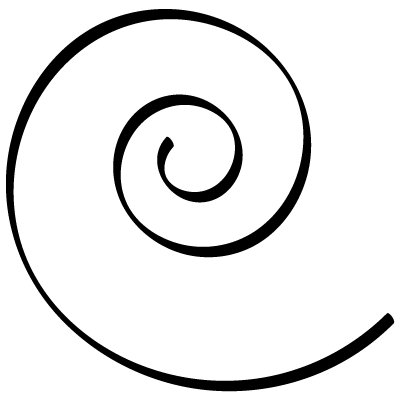
You can use them as is and never change them but you can always select a path (either open or closed) such using with an arc tool path and spiral tool paths then add a stroke and then go to the object menu and use the expand appearance command to generate a normal filled closed path instead. The result will probably have too many points and you may like to use the smooth tool to remove or reduce the points or perhaps the path simplify command found in the object menu. Another option to remove and cleanup the path is to use the Astute Graphics' excellent VectorScribe plugin which includes a smart remove tool. You can also then add the preset to the end result.
Once you have the designs into normal paths you can also convert them into library presets or symbols
For example, create spiral path in Adobe Illustrator and select a spiral path and go to the brushes panel. Double click calligraphic brush and et angle to 40 and random and variation to 113 and set roundness to 40% and random and variation to 20% and size 10pt and random and variation 5pt. Click OK and click apply to strokes
7. How to use the calligraphic brushes with color in Adobe Illustrator
You can use the Illustrator calligraphic brushes in black but you can always add the strokes in any color. You can set the color via the stroke panel / panel. You can create a multiple colored item by alt key to duplicate the item and then re-color them and having them slight offset.
8. How to use the calligraphic brushes with the ColliderScribe plugin (Astute Graphics)
You can create some amazing backgrounds and path fills in seconds by using the Astute Graphics' ColliderScribe plugin as you can select any path (say a large rectangle) and a stroke filled with the preset (slanted or rounded) and then apply the space fill plugin. You can make all kinds of randomized fills using different curved strokes as well as straight strokes or zigzag filled ones as well as single or multiple colorful filled strokes. You can then expand the path.
9. How to use them with the appearance panel and effects and combine the calligraphic brushes with 3D effects etc

You can re-color the calligraphic Illustrator brushes via the fill and stroke panel but if you want to add a more color then you can use them with the appearance and you can add multiple fills and multiple strokes as well as effects such as blurs and zigzags and distortions etc). All can then be expanded via the object menu expand appearance command. You can add the effect to the fill which is not so effective as adding the effect to the stroke when it comes to the calligraphic brushes.
You can also add into the mix effects such as transformations via the effects menu. The transform command is great for a single path but you can also add a number of copies so instead of one stroke, you can see 100s of the strokes all rotated or scaled in different ways though the actual calligraphic setting is the same for all of them (even if randomness has been set with the preset). A workaround would be just to duplicate the items and perform the transformation for all manually.
10. Using calligraphic brushes with type in Adobe Illustrator to create amazing type effects
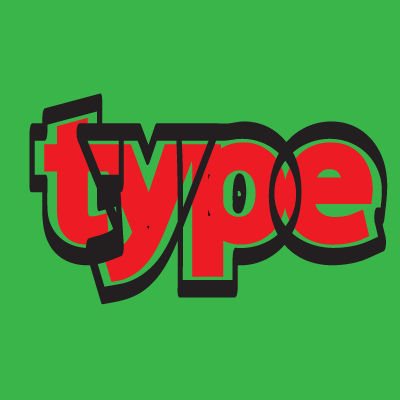
You can't add them straight to type but you can add them to type via the appearance panel. To do this, select some type and go to the appearance panel. Add a new stroke via the right side menu and then add the calligraphic brush presets so you can create a whole range of interesting slanted strokes / rounded strokes with the type.
You can also add multiple strokes and combine them with different effects such as offsets to create interesting contour effects; or perhaps use them with transformations / live effects to create all kinds of echo strokes. If you select the stroke entry in the appearance and there is randomness included in the preset then the type stroke will change over and over every time you click the preset. If you have multiple strokes added to the item (and perhaps the offset) then all the strokes will have different randomness so one slant will be one way and the other in a different direction etc.
11. How to use the calligraphic brush strokes with the blob tool in Adobe Illustrator
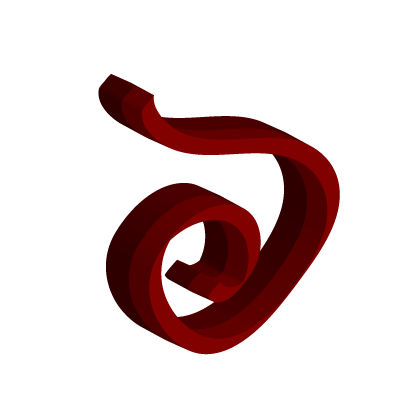
The blob brush tool is a weird tool. Set the preset via the brushes panel and you can then use the blob with those settings though if you double click the blob tool, the settings are not reflected in the blob options (odd) - even though the tool clearly uses the preset. So what is the difference ? The blob uses the item as a fill instead of a stroke so you don't have to expand the item. The blob tool also has a pathfinder unite feature so if you pass over any of the previously generated line then it is added and united to that. You can then use the direct selection tool to modify the corners but to be honest, it never seems to work well as there are just so many points generated. After using the blob brush, I always find I really need to cleanup the result and remove a lot of points using smart remove tool or smooth tool. You can also then add the calligraphic brush preset to that as well and so on. Double click a calligraphic brush in the brushes panel and set the roundness to 7% and angle 40 and size 20pt and all fixed and click OK. Select the blob tool in the Illustrator toolbar. Set color of fill to red and goto the effect menu in Adobe Illustrator and 3D and extrude. Create extrude with depth 50pt etc. Apply blob strokes and calligraphic strokes
12. Repeat feature
You can use the brush stroke with the powerful new feature 'repeat radial'. Apply the stroke and then go to the object menu and repeat and radial (as well as grid and mirror) and then you can modify the number of instances of the design as well as the radius. You can also double click the stroke and modify the design within the repeat object.