Photoshop Brushes Define Tutorial
graphicxtras > Adobe Photoshop tutorials > Photoshop brushes tutorials
How to define a Photoshop brush / make / create Photoshop brushes for use, a quick tutorial on how to add new strokes. Photoshop brushes are a powerful preset resource.

1. Basic Define brush
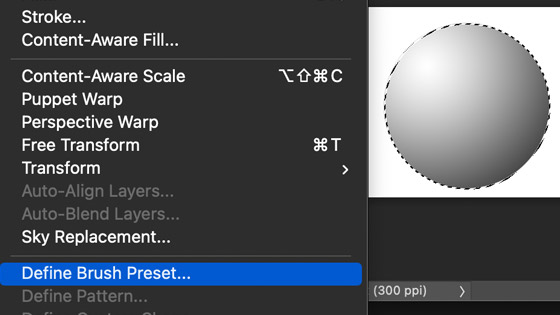
Select brush image in Photoshop and edit menu and Define brush and then give the brush preset a name. The Brush is added to the current brushes panel in Photoshop. Use the brush with the Photoshop brush tools in toolbar
Give it a name, makes it easier to search for - something that I rarely remember and ignore my own advice and Photoshop does have a great search feature to find those brushes but it does need to have a clear and easily searchable name.

2. Brushes from custom shapes
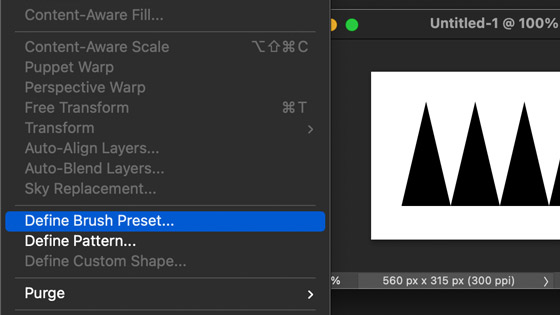
Select the custom shapes tool and Set the color to black. Apply custom shapes (such as type as a custom shape) and select and edit menu and define brush in Photoshop
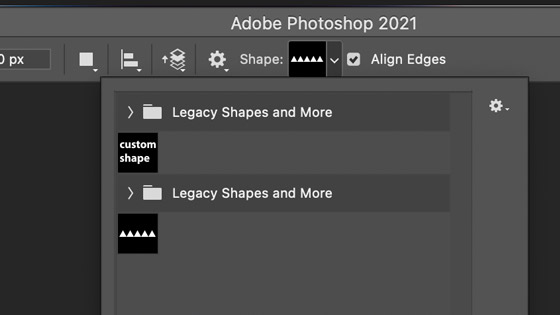
Custom shapes can be used over and over to create unique new brushes that can be defined in Photoshop and they can be applied in any color or size to create a near infinite range of brushes that can then be defined via the edit menu.

3. You can use scans from old books
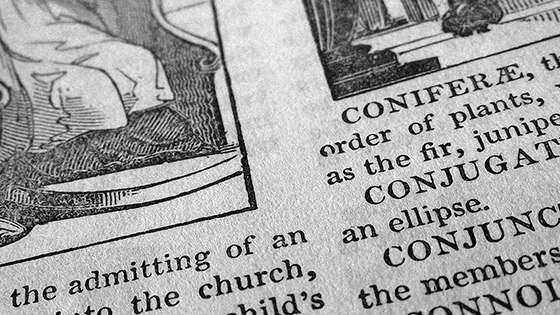
Open an image such as a public domain page scan and edit menu and define brush and give the brush stroke a name
Of course, you can always start from a scan or a scan of a sketch etc, that is another great start point for any number of strokes (I have used public domain images in the past, mainly stuff from the 18th century to make really certain that they are public domain).
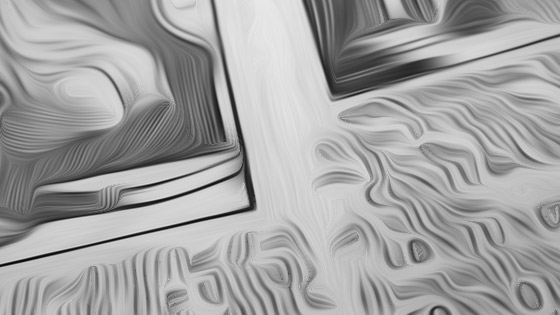
Another key thing to remember with artworks - they are gray scale. You can either start working with a gray scale or you can use the powerful black and white adjustment tool (image menu) to turn any color image into the perfect image to capture as a brush.
Of course, you could just keep the original image as a color image or use an adjustment layer to change the color of the stroke to gray scale. You can also apply effects to the designs and then define them as a new brush stroke
4. Once you have your freshly minted brush stroke, you can also save it as a PSD document
Another option, and one I often use is to use a PSD document and create them on layers and then you can create many variants of the same brush which can then all be preserved in the PSD for future use and manipulation.
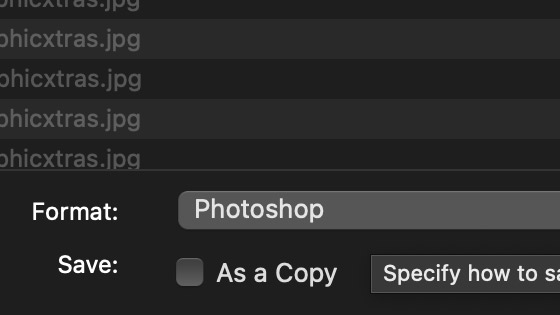
Saving them in PSD format also means you can use the live effects and live layer effects and save those with the brushes for future changes. Remember to save the file otherwise you will have to re-create the brush at a later point.
Also if the work is saved as a PSD file you can always open the PSD file in other applications and re-work the brushes with other tools and also define the brushes in that application as well (such as Affinity Photo)
5. Save to the creative cloud libraries
With recent releases of PS, you can now save the artwork created in the creative cloud libraries panel. This is useful as the libraries panel can be used as a massive store of any of the developed or part developed brushes. You can also be sure that the items are saved securely on the Adobe server.
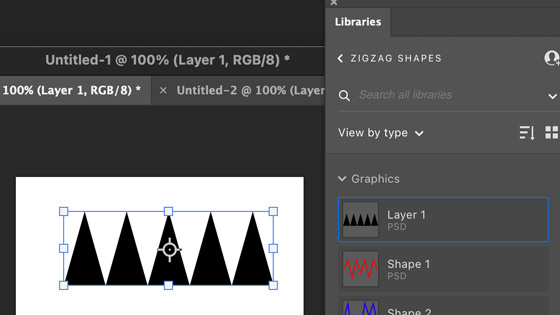
You can then re-use them at any point in the future and continue to work on the items or perhaps add additional elements or remove parts of the stroke etc.
6. You can also use brush presets to add scattering, shape dynamics, texture, color dynamics etc
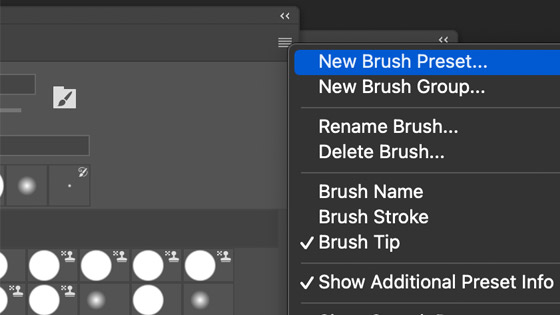
With the define preset command you have not saved a complete tool, only really a dab. You can now go to the brush panel (found in the window menu) and set various shape dynamics, scattering, texture etc. Note: this is only accessible if you are selecting a tool found in the toolbox. Set different spacing, set various scattering settings and then go to the right side menu of the panel and select the new brush preset command.
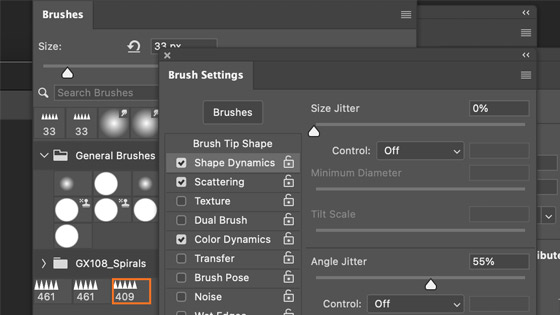
The preset now has all the settings (marked by a check box) and can be recalled via the preset panel. I, personally, have always found it odd that there is no update preset command so any changes to the preset - such as adding texture as well as adding dual brushes can be updated. The only option seems to be to add a new preset and then delete (if you wish) the old one
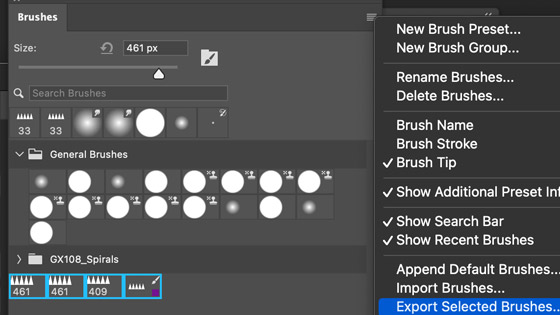
7. Exported selected ABR brushes
You can go to the brushes panel and select some brushes and then go to the right side menu and export selected brushes and save it as an ABR format. The ABR can be accessed in Photoshop as well as Affinity Photo as well as Clip Studio Paint and many other applications
8. How to make a great Photoshop brush
Well, that is a totally different thing.
You need to know what you are creating them for. If you want a star burst scatter effect or explosions or splatters, it is no use creating a tool made out of pandas. It might be a great panda preset but it is going to be no use for star effects. Good ideas and good source material and you should be able to make wonderful new painting tools. Personally, the best tool for creating and making the tools is Illustrator as you can create a new infinite number of excellent vector artworks which can be then used with any size of preset.
My favorite tool to create brush presets has to be gradients as well as contour effects
Illustrator also comes with some truly excellent tools to make them such as the VectorScribe plugin set from Astute as well as MirrorMe as well as the excellent Art Blue plugin set from Amazon Canvas.
9. Define Photoshop brushes from gradients
Gradients are an excellent source for brushes and the defining of those presets. The best gradients are ones with transparency in them especially at the two ends of the gradients. To do that, select the gradient tool and then click the gradient editor at the top left of the application and then edit the current gradient. Select the end stops and change the opacity to zero for those. It doesn't matter if the gradient is colorful, the brush will be saved as a gray scale image. I always find the best gradients to add are radial designs so select that type and then apply the effect. You can then build up a complex set of images across the document and you can then go to the edit menu and define brush command